1 Wooden or Plastic Hanger (measure and record base width)
1 Closed End Zipper **2” longer (or more) than hanger’s width (match color with fabric)
Fabric: 14.5” x Hanger’s width + 2” (front piece) and 5.5” x Hanger’s width + 2” (back piece)
Iron-on Fusible interfacing for each piece of fabric, for example: Hanger Width - 18“, Zipper - 20” or more, Fabric (fused) - 14.5“ x 20” and - 5.5“ x 20”
Regular sewing foot
Embroidery foot
Zipper Foot
Regular sewing thread and bobbin to match fabric
4 - 5 Embroidery Thread colors
Embroidery Hoop (minimum size 3.5" x 5" - 90mm x 125mm)
1 piece Medium weight Tear-away Stabilizer
1 piece Lined 8.5” x 11” paper (regular loose-leaf works well)
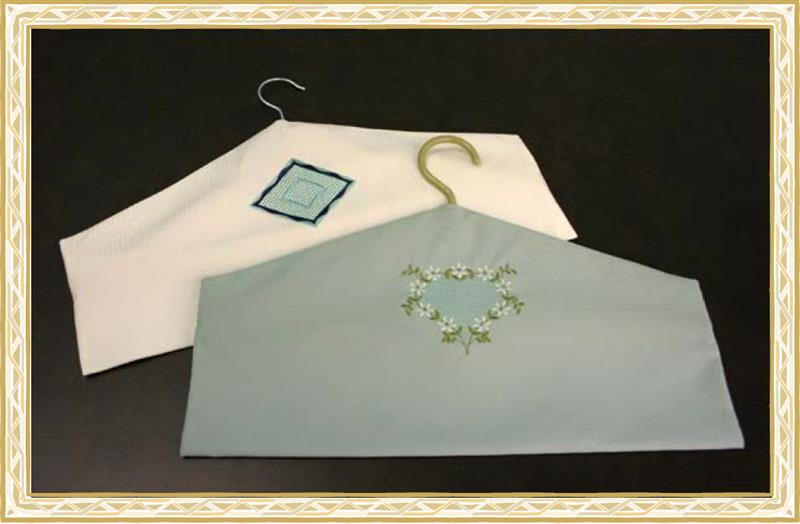
Hide valuables and freshen your closet with this fun and easy project. You will want to make one for every closet in your house! This project is great for a fast and unique gift. The designs for this set have been supplied in different styles and options. You can personalize yours with a monogram too! Our supply requirements make 1 Hanger Cover with dimensions dependent on the hanger that you choose.
Step 1:
Embroidery
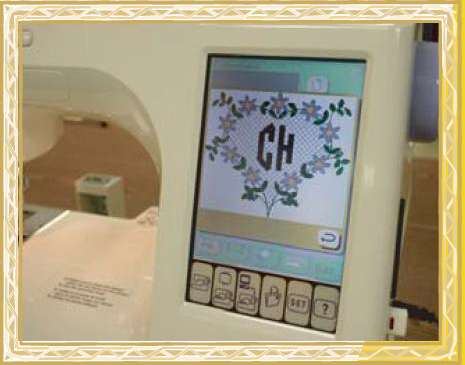
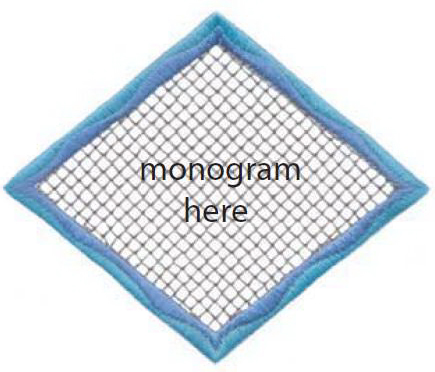
There are 2 different styles of embroidery designs to choose from, Floral Heart (Bee008A’s) and Diamond Shape (Bee008B’s). Each of the styles have been supplied with a shape in the center to finish the design (Bee008A1 & B1). These are intended for use if you Do Not want to monogram the hanger cover. Each of the styles has also been supplied with a space in the center (Bee008A2 & B2). These designs are intended for use if you want to monogram the hanger cover. In order to monogram you will need to add lettering in your machine’s or software’s edit mode. It is best to add the monogram to the design before you start sewing to ensure that everything is centered properly. All editing systems are different, therefore, we recommend that you read your manual for help.
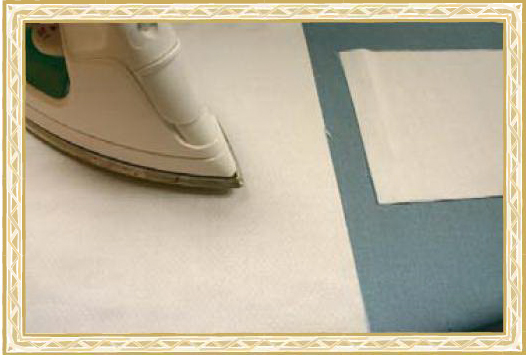
Step 2:
Iron fusible interfacing to wrong side of both pieces of fabric following manufacturers directions.
(Click Image to Enlarge)
Step 3:
Choose a design and prepare machine to sew embroidery. Choose embroidery colors to compliment your fabric. If you are adding a monogram, prepare the design in your editing mode prior to starting the design.
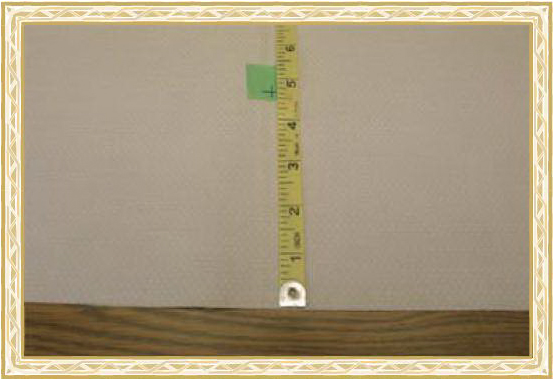
Step 4:
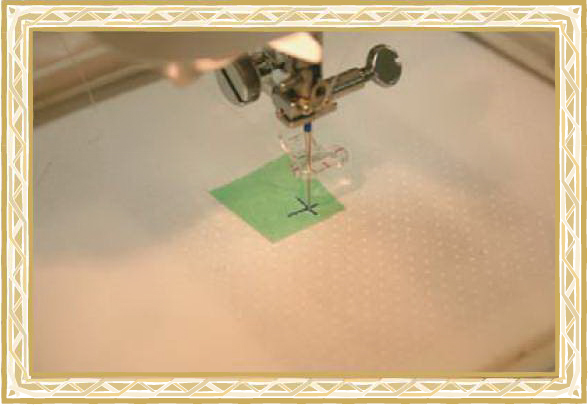
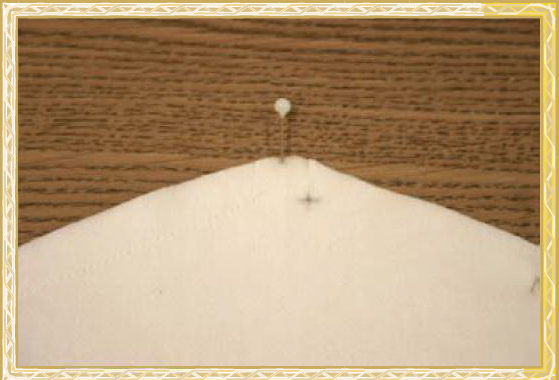
On largest piece of fabric only, (front piece) measure and mark a crosshair on a small piece of tape 4.75” DOWN and CENTERED on longest side. If you have serged your fabric, your mark should be measured from the opposite to the serged edge.
(Click Image to Enlarge)
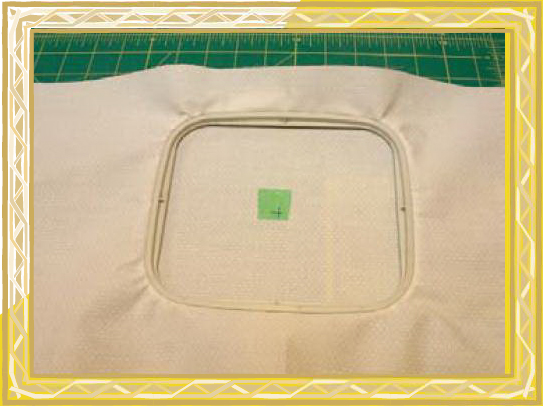
Step 5:
Hoop fabric with mark as close to center as possible.
(Click Image to Enlarge)
Step 6:
Attach hoop to machine and use your jog keys to align your needle exactly through marked crosshair. Slide a piece of medium weight tear-away stabilizer under the hoop. Remove the tape and sew your design following the corresponding sewing sequence (see below).
(Click Image to Enlarge)
Step 7:
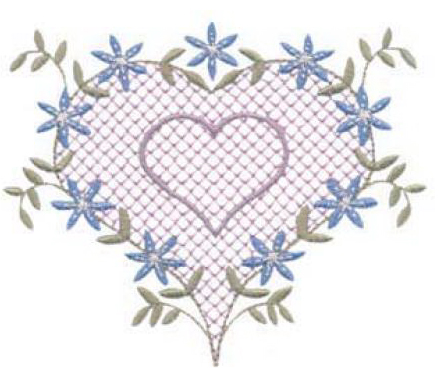
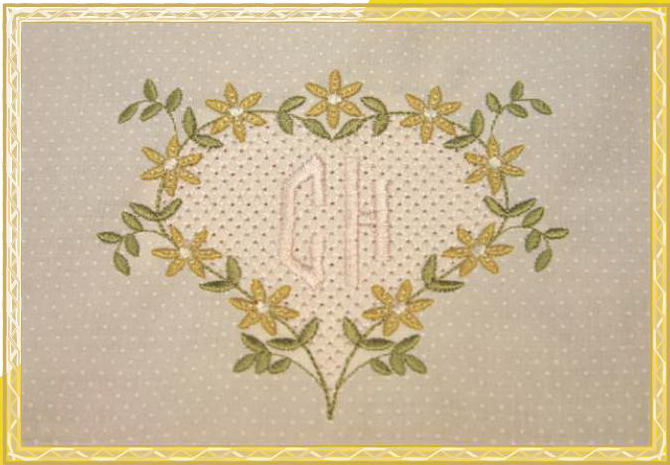
Floral Heart Shaped Designs
Bee008A1 - backgound fill - leaves - flowers - flower centers **Trim thread jumps through center of design - center heart shape
Step 8:
Bee008A2 - background fill - leaves - flowers - flower centers **Trim thread jumps through center of design - monogram (if added)
Step 9:
(Click Image to Enlarge)
Bee008A3 This design has been included for added embellishment to your hanger cover, or how about a matching sachet! - one color heart shape
Step 10:
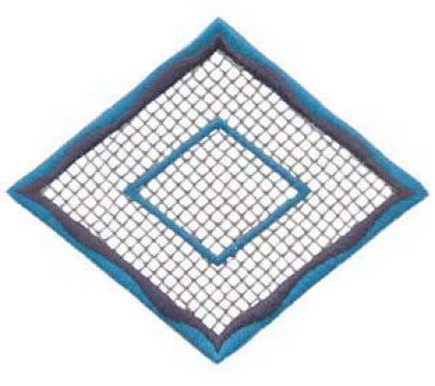
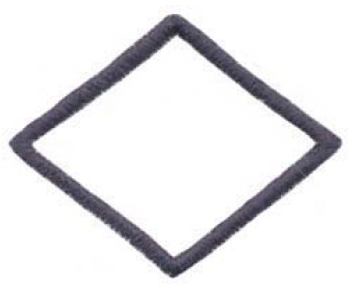
Diamond Shaped Designs
Bee008B1 - backgound fill - outer swirl border - inner swirl border - center diamond shape
Bee008B3 This design has been included for added embellishment to your hanger cover, or how about a matching sachet! - one color diamond shape
Step 13:
When embroidery design is complete, remove the fabric from the hoop and trim all threads from front and back. Gently remove all stabilizer from back side perimeter of the design. Lightly press to remove hoop marks and to “smooth out” the embroidery.
(Click Image to Enlarge)
Step 14:
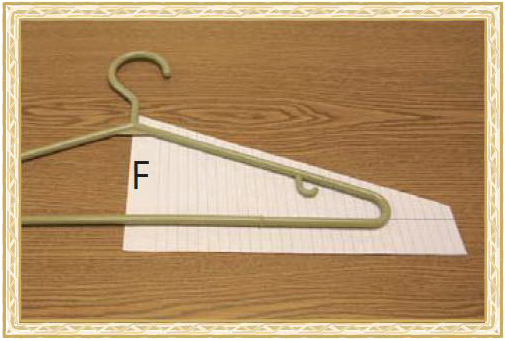
Making Your 1/2 Pattern
In order to make your cover fit the hanger that you have chosen, you will need to trace the shape of the hanger for your 1/2 pattern.
Step 15:
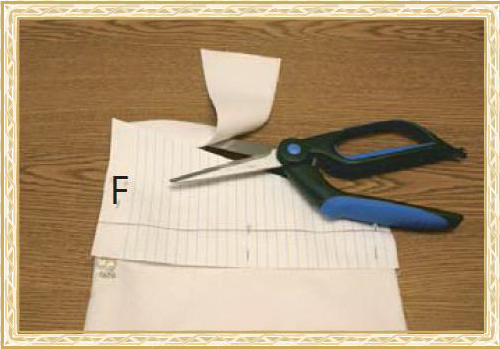
Place hanger on lined paper. Line up bottom of hanger with a long edge of paper or margin line and trace one side of the hanger shape. Draw past your hanger approx. 1”.
Step 16:
Cut out along shape and down each side following the lines on the paper. Mark the longest side edge (where the center of the hanger was) with an F.
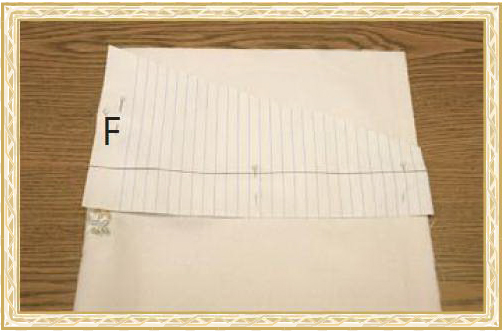
Step 17:
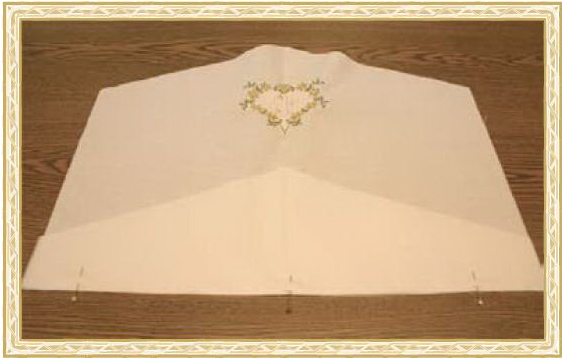
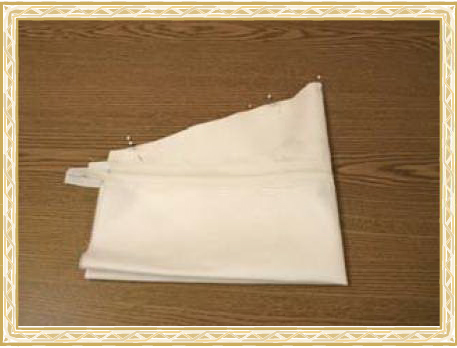
Fold the embroidered fabric, right sides together, joining short ends. Place pattern on fabric with the marked F on the fold of the fabric and the tip of the pattern even with the top edge of the fabric.
Step 18:
Pin pattern to fabric and cut along shape. Repeat for second (back) piece of fabric.
Step 19:
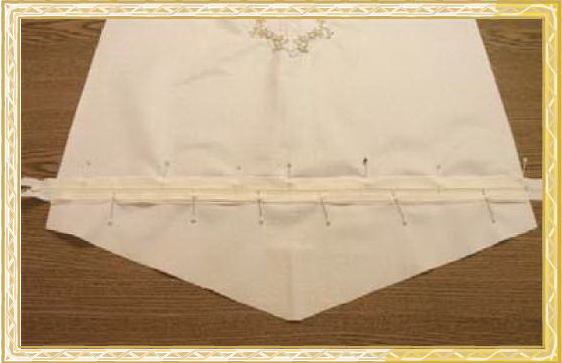
Inserting Center Zipper
Lay embroidered fabric bottom edge and back fabric long edge (both serged edges if you did this step) right sides together. Pin.
(Click Image to Enlarge)
Step 20:
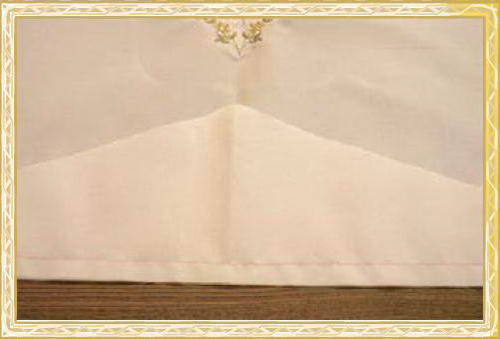
With thread and bobbin to match the fabric and machine in regular sewing mode, baste (longest stitch length) 5/8” (SA) to temporarily join these edges.
Step 21:
Press the seam open from the wrong side.
(Click Image to Enlarge)
Step 22:
Pin zipper with teeth exactly through center of basted seam. If your zipper is longer than your fabric width, lay both ends of the zipper over the edges of the fabric.
(Click Image to Enlarge)
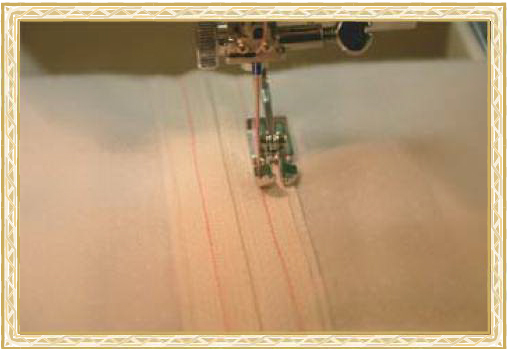
Step 23:
Return to regular stitch length. With zipper foot attached, sew 1/4” from zipper teeth on each side of zipper tape. Be sure to sew directionally (start each seam on the same edge).
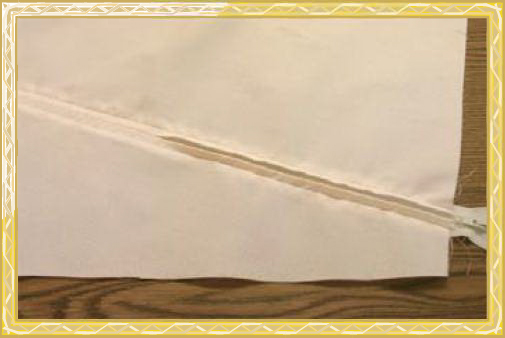
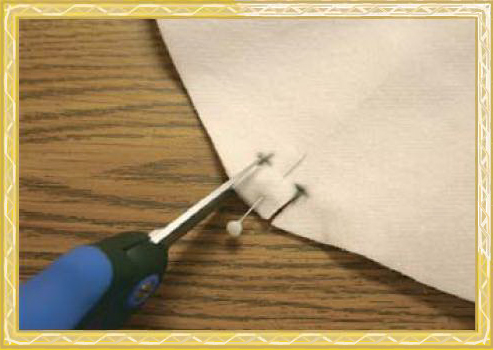
Step 24:
Carefully open the basted seam on the top side with a seam ripper. Clean off bits of thread through the zipper opening with a piece of tape.
Step 25:
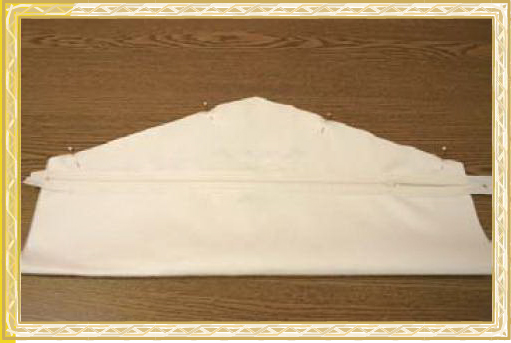
Finishing
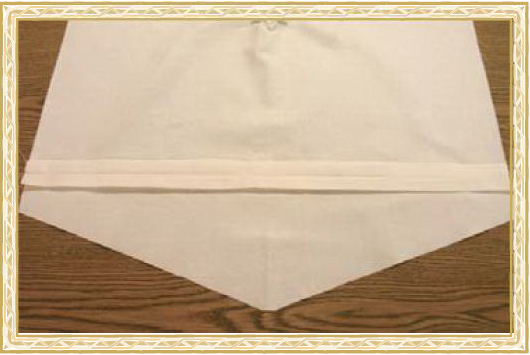
Open zipper slightly. Fold entire piece, right sides together, joining shaped edges. Pin.
Step 26:
Fold in half, joining short edges to find center at shaped edge peak. Pin at exact center.
Step 27:
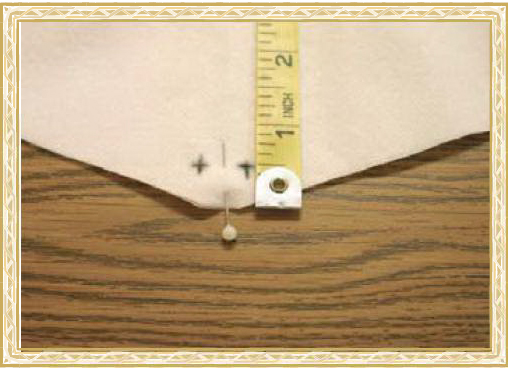
Lightly mark 1/4 on each side of pin.
Step 28:
Lightly mark 1/2” down from peak on each side of pin. You will now have a crosshair on each side of the pin.
Step 29:
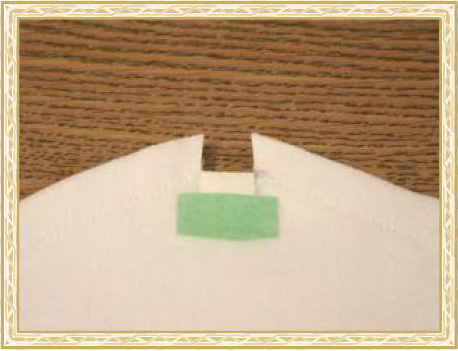
Cut from top edge of fabric to the crosshair on both sides of the pin. It is important that you DO NOT cut past the crosshair.
Step 30:
Pin Zipper ends at both sides to ensure that there is no movement while sewing last seams.
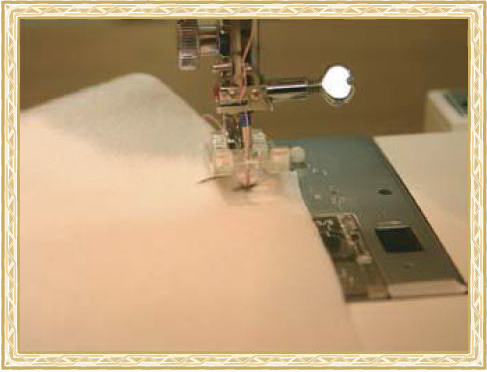
Step 31:
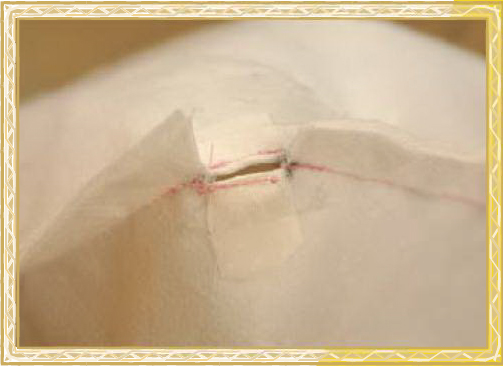
With regular sewing foot attached, start with needle down exactly on a crosshair. Sew 3 stitches forward and backtack 3 stitches, do not sew over crosshair. Continue with a 1/2” (SA) on one side down to fold. Be careful when sewing over the zipper.
Step 32:
To ensure that your cover keeps it’s uniform shape, it is best to sew directionally. Turn fabric over, mark at bottom of cut. Repeat step #6 to finish the opposite seam.
(Click Image to Enlarge)
Step 33:
With hanger cover still inside out, fold both peak tabs over, wrong sides together. Temporarily secure both.
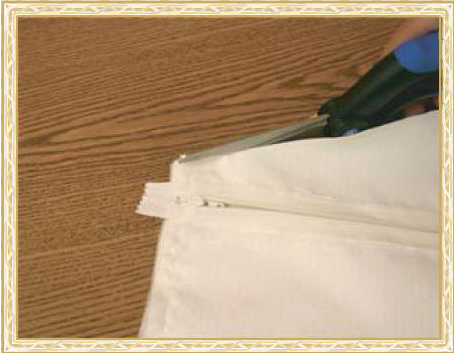
Step 34:
Open zipper fully. Prepare to sew tabs from wrong side. Work with the fabric in the tab area until it is flat under the foot. Sew 1/8” seam along each tab, backtack each tab back to start position once.
Step 35:
Trim the seam allowance to 1/4” being careful when cutting zipper ends.
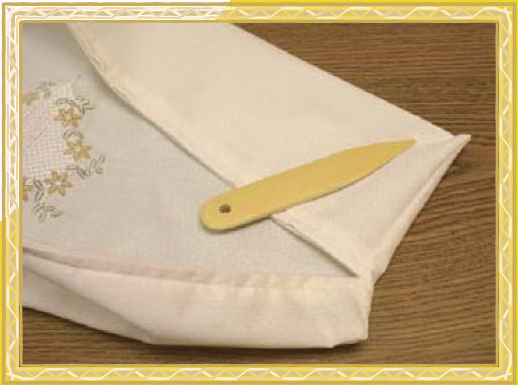
Step 36:
Turn to right side. Use a point turner to poke out corners. Press. Insert hanger.
(Click Image to Enlarge)
Step 37:
Finished!
Extras and Ideas
- embroider a small piece of matching fabric with coordinating small embroidery design Bee008A3 or B3 and make a sachet to tuck inside or attach it to hanger hook with a ribbon - when travelling, use with a garment bag to store all of your accessories for an outfit. (lingerie, jewelry, scarves, etc.) - use the embroidery designs to embellish matching closet organizer accessories, bedroom linens, etc.
The name Stitchitize was coined and registered in 1988 when the Conquergoods sold their first contract embroidery business. “Stitchitize” was coined as the art of digitizing stitches for machine embroidery. The company actually started developing embroidery designs in 1983 and soon saw the need for Stock Embroidery Designs. By 1988 the company had several thousand Stock Designs to sell, however the majority of their development was still geared towards the commercial embroidery market. It wasn’t until 2001 when Trevor, the Conquergoods eldest son, now managing Stitchitize, saw the opportunity to start developing designs for the emerging domestic embroidery market. In 2002 the Conquergoods opened a Sewing Centre selling domestic machines and embroidery models. The staff members that were hired for the Sewing Centre were all accomplished sewers and they worked very closely with the Stitchitize staff developing new designs. It soon became apparent that project based designs would be well received by the consumers.
In late 2003 it was George Conquergood, the patriarch of the family that suggested the poem and storybook “Twas The Night Before Christmas” as a good place to start development. The manager of the Sewing Centre at that time, Brenda, was an accomplished artist and she was given the task to prepare the graphics for the storybook. Her drawings were then given to the digitizing department under direction of Beverley and her sister Linda the actual digitizer to execute. Another Sewing Centre staff member Darlene had the task of sewing the original prototypes, which eventually became an even bigger project. A quilt was also developed and Darlene and graphic artist Colin began the task of photographing and documenting every step of the construction process. Finally the collaborative efforts of eight staff members brought the project to completion and the production of the CD. To have the last word, George decided that as part of the product launch in 2004, Stitchitize would give every dealer a personalized copy of the storybook as a Christmas gift. The Conquergoods commercial production manager Darcy was brought in to discuss the logistics. Some of the pages in the book had over 24 colours and up to 42 color changes. Darcy was given the task to pleasingly reduce this to a maximum of 15 colours per page, as that was the maximum number of colours that their largest commercial machine could handle. He did this and started production of the over 200 books required. Darlene got to assemble all 200+ copies on a domestic sewing machine. The books were completed and sent out to all the dealers for Christmas 2004.
The following year George suggested the development of the Mother Goose 1 & 2 Collection, which was so well received that a second collection, Mother Goose 3 & 4 was produced. The graphics and nursery rhymes came from the original book “Mother Goose and her Goslings” which had belonged to George’s mother when she was a child, and read to George as a child. That book is now over 100 years old.
Other collaborative works included the FSL – 3D Flowers & Butterflies Collection, Italian Lace Collections, Mardi Gras Masks and the 13 Stitchitize Bees, which were fully tested by consumers in the Creative House Sewing Centre classrooms.