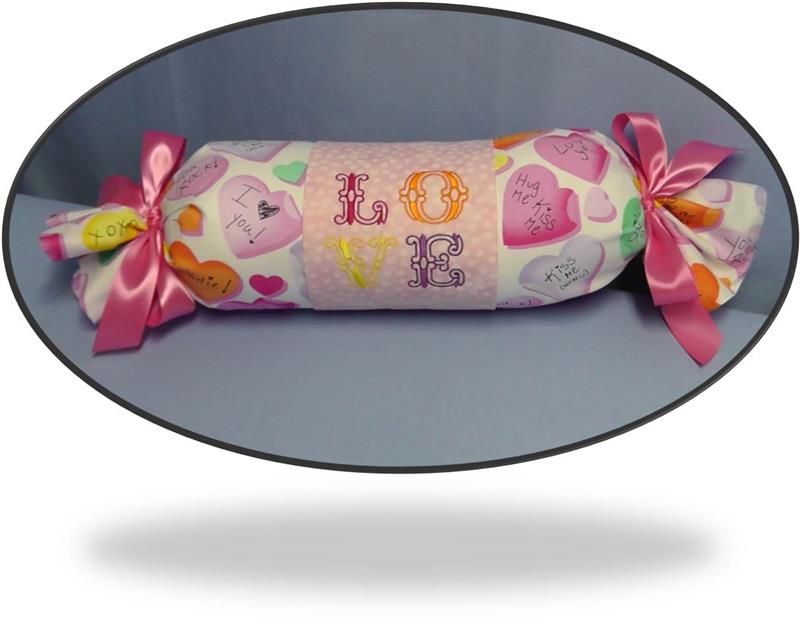
This project is very easy to create and will be really cute sitting on a bed. The bolster pillow is measured and fabric cut and constructed to construct the pillow case. The pillow sleeve is backed with tricot interfacing, embroidered, and constructed to slide over the pillow. Each end of the pillow is tied with a ribbon bow and finishes off this “Candy Pillow”.
Step 1:
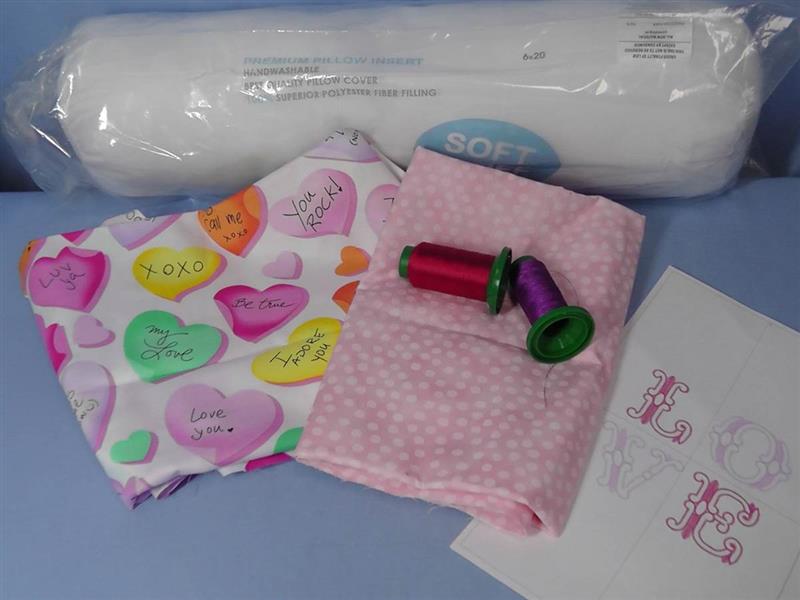
Gather the supplies, print the embroidery template, and read through the instructions before beginning. Pillow sizes will differ, so these instructions will show how to measure the pillow and cut the fabrics for the pillow you purchase. The pillow for the project is 6” x 20”.
(Click Image to Enlarge)
Step 2:
First, determine how wide the embroidery is and how wide to cut the sleeve fabric. For the project 1” was added to each side of the design measurement, that amount doubled, and 1” added for seam allowances. For the project, the sleeve will be cut 13” wide (6” + 6” +1”).
(Click Image to Enlarge)
Step 3:
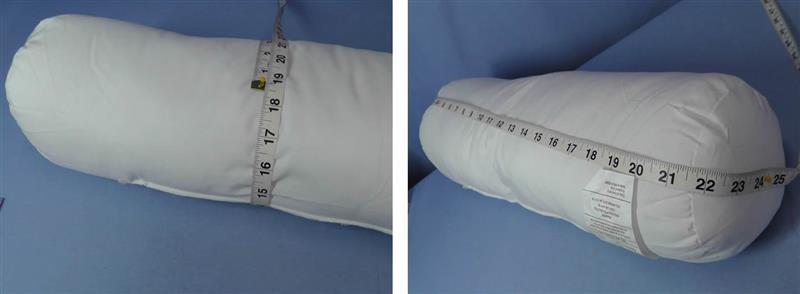
Measure the circumference of the pillow and also the length from the center of the end, down the length of the pillow, to the center of the other end. For the project pillow the measurements are 18.5” x 24”.
(Click Image to Enlarge)
Step 4:
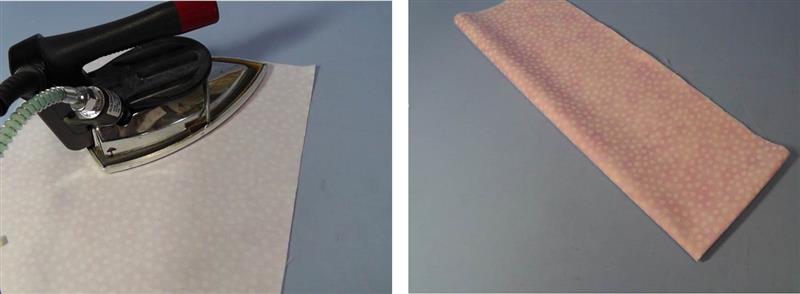
Cut the fabric for the sleeve to be embroidered. For the project, the fabric was cut 13” wide (measurements in step 2) x 20” long which is the circumference of the pillow (18.5”) plus 1” for seam allowances and ½” for ease. Cut a piece of tricot knit interfacing the same size. Follow the interfacing directions for application to the back of the sleeve fabric. Quarter fold the fabric to find the center point. Lightly crease the fabric to mark the center of the fabric.
(Click Image to Enlarge)
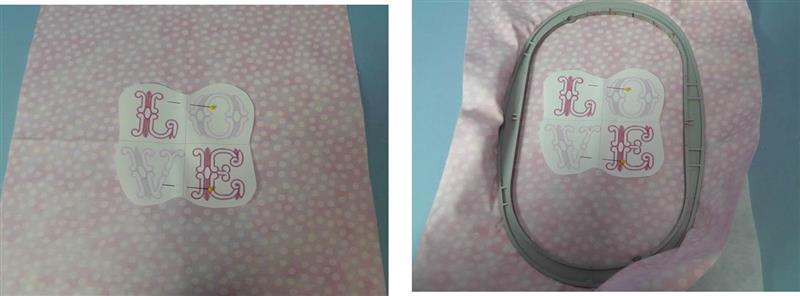
Step 5:
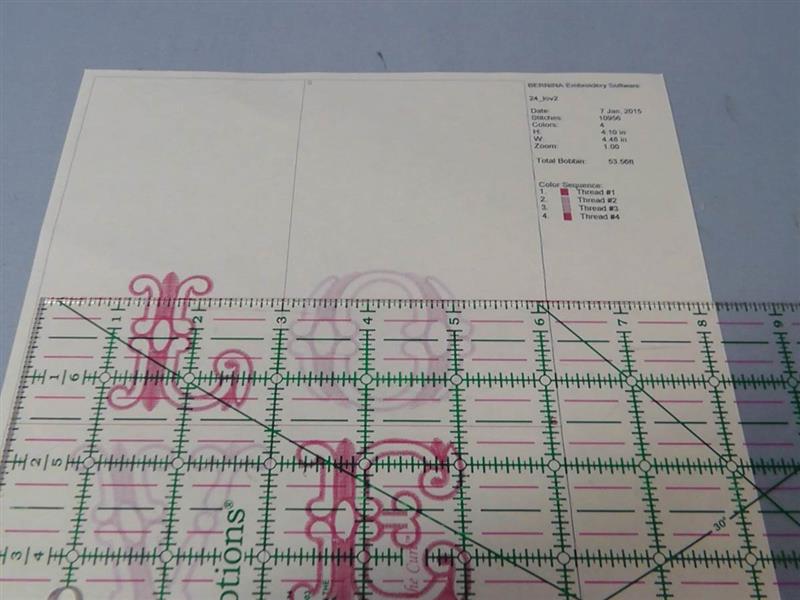
Cut out the paper template and use the crosshairs on the paper to align with the light creases on the fabric to center the template on the fabric. Hoop the fabric with one piece of tearaway stabilizer.
(Click Image to Enlarge)
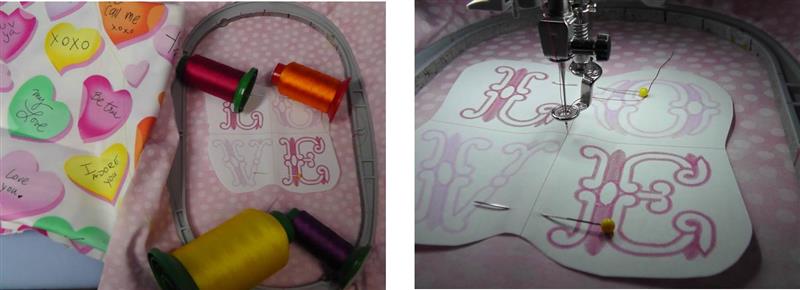
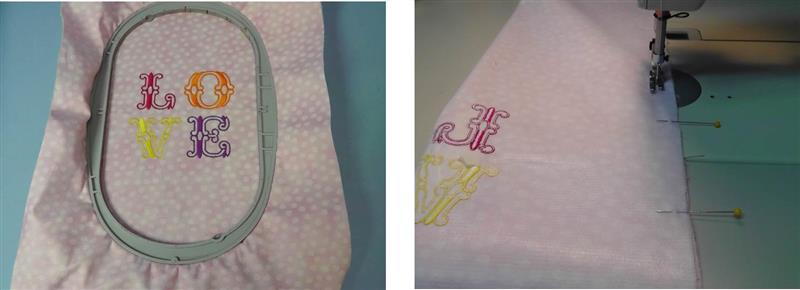
Step 6:
Have fun choosing the embroidery thread colors to coordinate with the colors in the heart fabric. Load the “Love” embroidery design on the machine. Center and align the template under the needle. Stitch the design using the thread colors chosen.
(Click Image to Enlarge)
Step 7:
While the design is stitching, prepare the pillow fabric; be mindful of fabric with one-way prints so the print wraps around the pillow properly when the sewing is finished. For the project, the fabric was cut so a deep hem would be on each end of the pillow, plus ¼” to turn under. The pillow measured 24” from center to center along the length, and the circumference was 18.5”. The fabric for the project was cut 20” along the length of the fabric by 44” across the width of the fabric. Press the fabric well and starch it to make it crisp. On each width (hem) end, turn the edges under ¼” and press.
(Click Image to Enlarge)
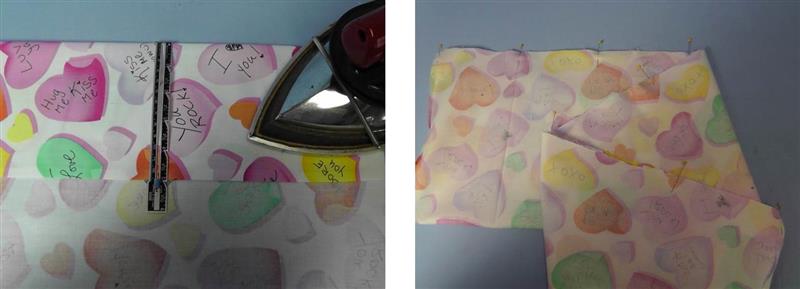
Step 8:
Measure and press under 5” on each end for the hems. Open up the fabric. Fold the fabric, right sides together, matching long cut edges and pin.
(Click Image to Enlarge)
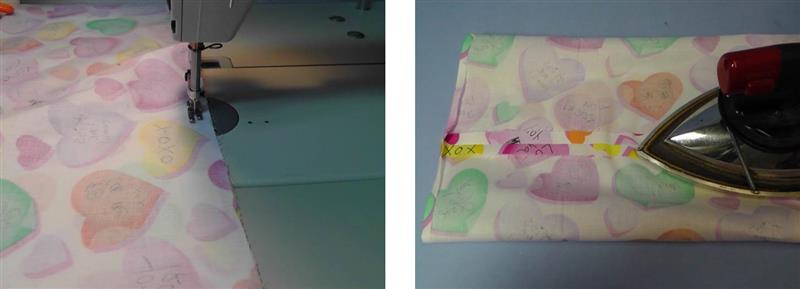
Step 9:
Sew the seam using a ½” seam allowance. Press the seam open.
(Click Image to Enlarge)
Step 10:
Turn the fabric right side out. Re-fold hems back in place and stitch each in place. Work from the inside of the pillowcase to make sewing easier - or use the free-arm of your sewing machine. Insert the pillow into the pillowcase.
(Click Image to Enlarge)
Step 11:
When the embroidery is finished, remove the fabric from the hoop and remove the excess stabilizer. Press the fabric well. Placing right sides together, fold the fabric in half lengthwise, pin, and sew a ½” seam.
(Click Image to Enlarge)
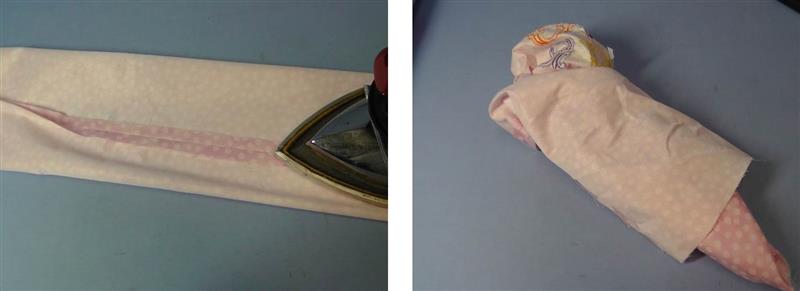
Step 12:
Press the seam open and turn the fabric right side out.
(Click Image to Enlarge)
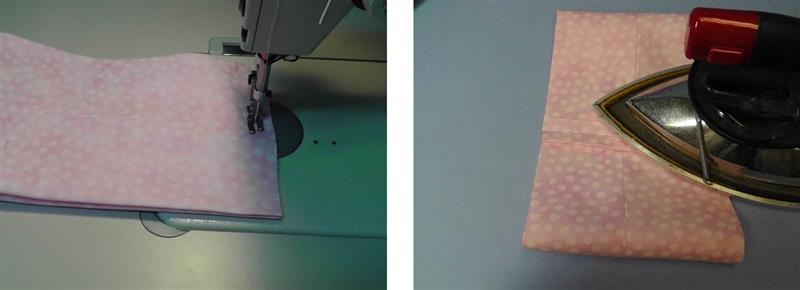
Step 13:
Press the fabric well, centering the embroidery between the creased edges. Bringing right sides together, match the short cut edges and pin.
(Click Image to Enlarge)
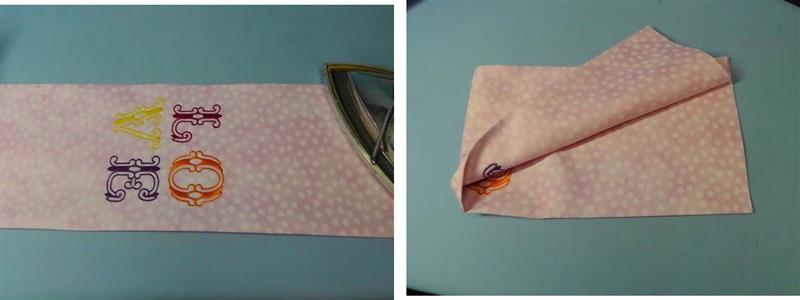
Step 14:
Sew a ½” seam and press the seam open.
(Click Image to Enlarge)
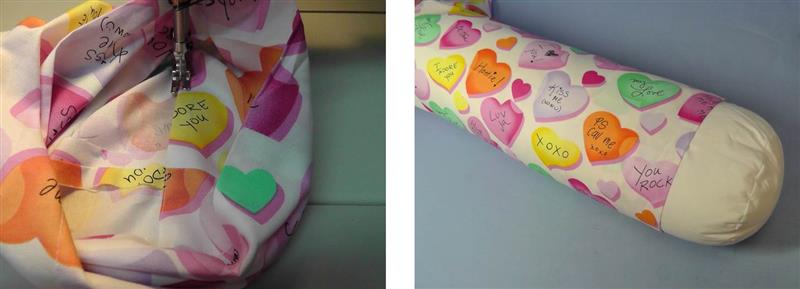
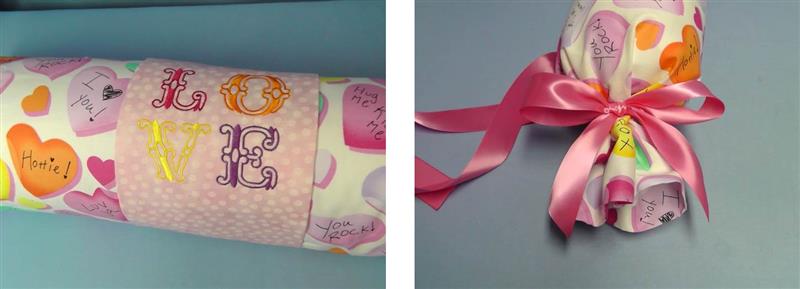
Step 15:
Slip and center the embroidered sleeve over the pillowcase. Gather up the ends of the pillowcase fabric at the hem stitching line. Use the ribbons to tie pretty bows at the hem stitching line at each end of the pillow case. Fluff the fabric at the end to make it look like a candy wrapper.
(Click Image to Enlarge)
Step 16:
This “Candy Pillow” will be a welcome gift and a reminder of your love for a special someone.
Ramona Baird has been in the embroidery industry for over 23 years. She and her husband owned a commercial and retail embroidery store in Arizona for many years. She is an experienced digitizer having been mentored by award-winners Pat Williams and Lindee Goodall. Ramona is a contributor to “Creative Machine Embroidery” magazine having 5 covers to her credit. Ramona has worked for Wilcom America and served many years as Education Director for the American Sewing Guild. With a degree in fashion design, she is able to design and execute patterns which Pat Williams says are “out of the box” in creativity and application. Ramona likes to challenge the boundaries of embroidery and bring new and exciting designs, ideas, and projects to EmbroideryDesigns.com. She wants embroiderers of all levels to increase their skills and enjoyment in using their embroidery machine for gift-making and personal pleasure.