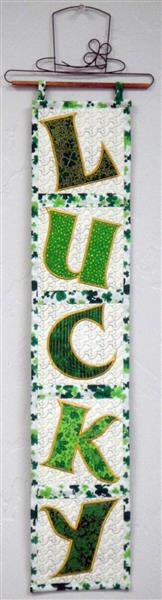
Decorate for St. Patrick’s Day with this Lucky Wall Hanging. Appliqued letters can be cut with the Stitch & Trim method or download the .SVG, .FCM, and PDF for your Scan N Cut or other cutter.
This little wall hanging is easy to make up with whatever method you choose to make the applique letters. The instructions are written showing the letters cut with the Brother Scan N Cut, but all of the necessary stitches are included for you to use the Stitch N Trim method. You can download the PDF, .SVG and .FCM files to use in your method of cutting. These files have already been enlarged by 2% to ensure a good fit in the outlines of the letters.
Step 1:
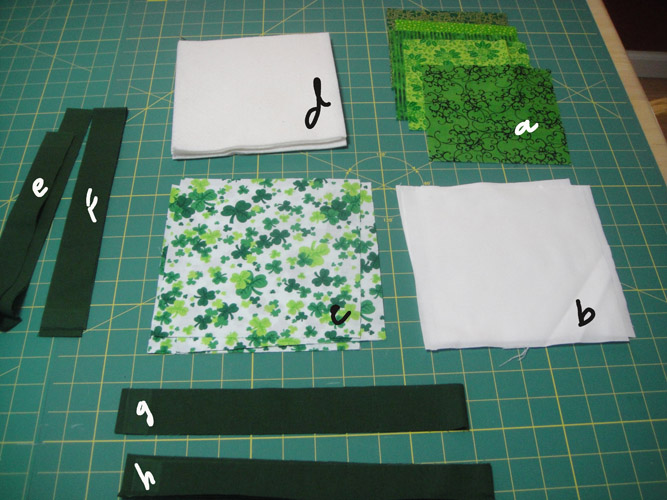
Cut the following pieces.
a. 5 5” squares of assorted green fabrics b. 5 7” squares of white c. 5 7” squares of a shamrock print d. 5 7” squares of Battilizer e. 1 1.25” strip of dark green f. 3 1.5” strips of shamrock print (these are pictured as dark green, but were changed to shamrock print in the final sample. 1 is used as sashing and two were used to bind the wall hanging.
(Click Image to Enlarge)
Step 2:
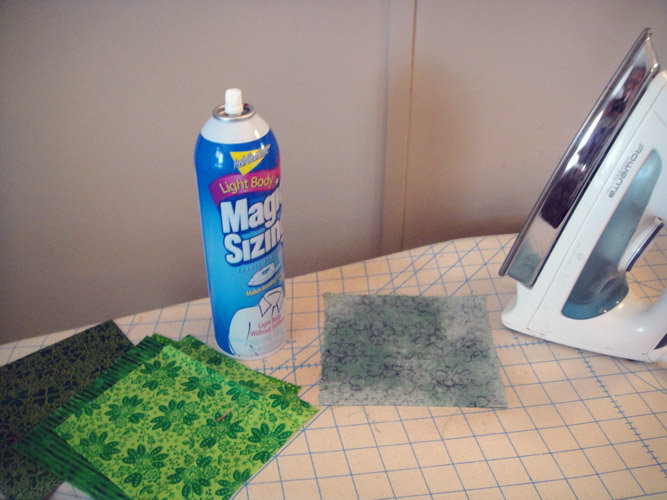
Press your applique fabrics 3 or 4 times with Best Press or Magic Sizing.
(Click Image to Enlarge)
Step 3:
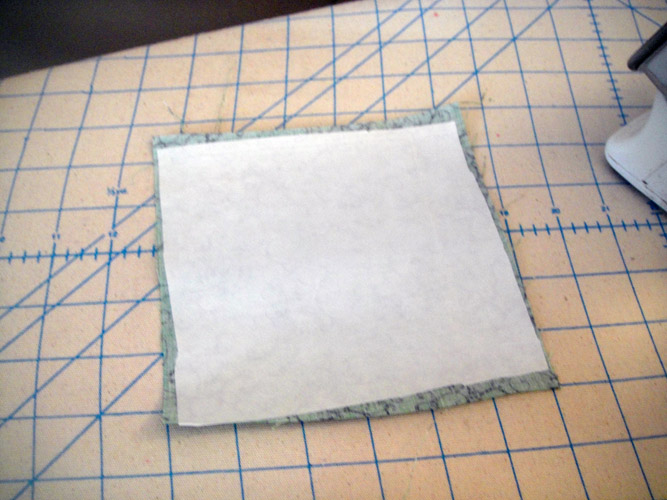
Following the manufacturer’s instructions apply Heat N Bond Lite to the wrong side of the green 5” squares.
(Click Image to Enlarge)
Step 4:
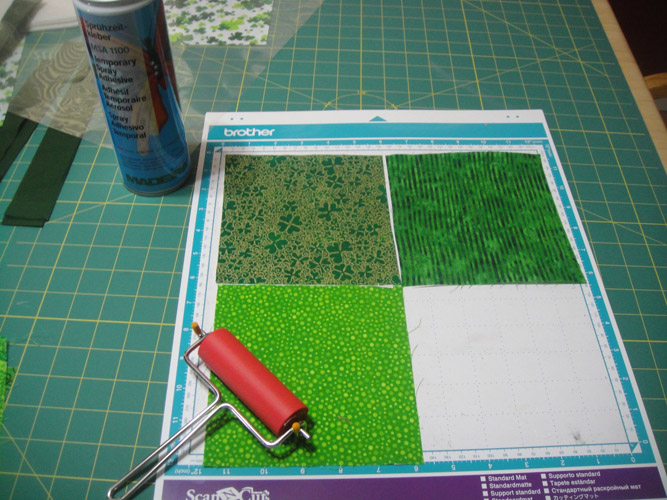
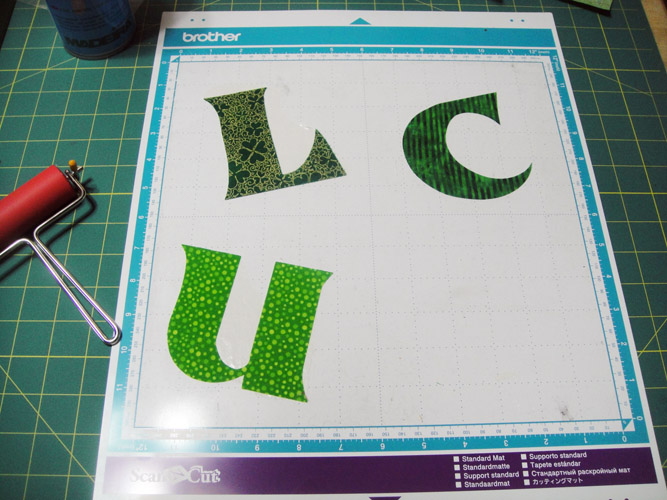
For Scan N Cut users: There are two .fcm files with this project. The first file is to Cut the LUC the second files is to cut the KY. Place your fabrics on the standard mat, right side up for the L. U and C. Roll with a brayer to ensure they are adhered to your mat.
(Click Image to Enlarge)
Step 5:
For Scan N Cut users: Scan the fabrics into the machine and place the letters from the .FCM files over the appropriate fabrics following the manufacturer’s instructions. Settings may vary on each machine but a cut speed of 4; cut pressure of 4; and a blade depth of 4.5 was used in this sample.
(Click Image to Enlarge)
Step 6:
Cut the K and Y from the second .FCM file.
Step 7:
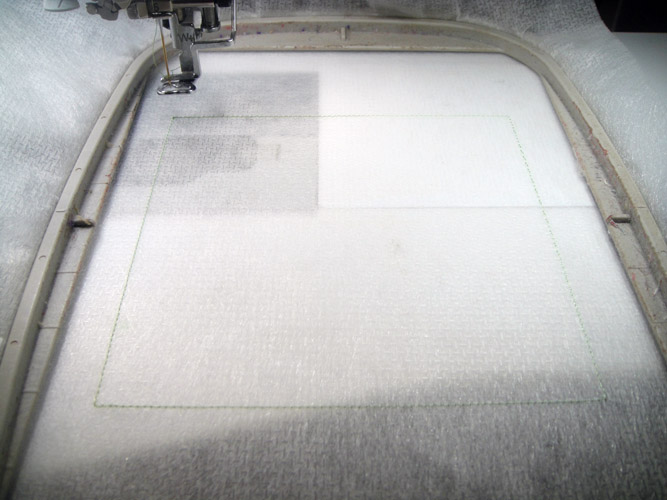
Load the variegated green thread in the top of the machine. Load the LUCK01 file into the embroidery machine. Stitch the first CS (color stop) which is an outline for the block. Remove the hoop from the machine – do not unhoop.
(Click Image to Enlarge)
Step 8:
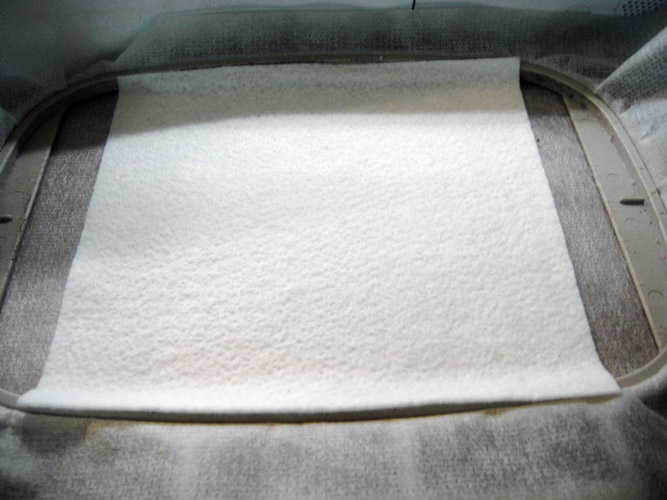
Spray a 7” square of Battilizer with adhesive spray and place over the outlines making sure that the Battilizer exceeds the outlines by ¼” on all sides.
(Click Image to Enlarge)
Step 9:
Spray a 7” square of white fabric and place over the Battilizer.
(Click Image to Enlarge)
Step 10:
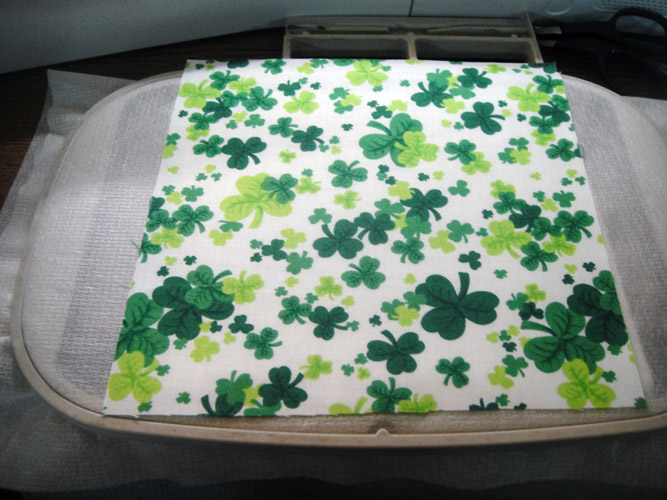
Turn the hoop over; spray a 7” square of the shamrock print and place over the outlines.
(Click Image to Enlarge)
Step 11:
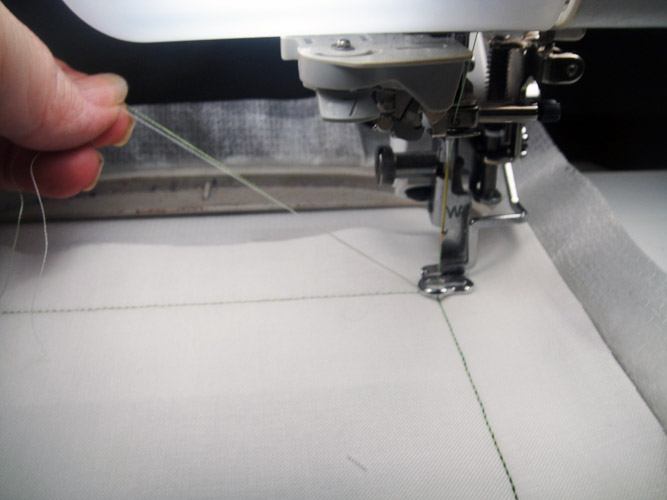
Return the hoop to the machine. Run the 2nd color stop to tack down all the fabrics. Then to start the quilting of the block bring the bobbin thread to the top of the work by feeding the top thread through the presser foot; while holding on to the tail of the thread push your needle up button twice. That will bring the bobbin thread to the top of the work. Hold on to the top and bobbin thread and stitch a few stitches; stop the machine and trim the threads; continue stitching. You will want to do this each time a new section of stitching starts to keep the back of your quilted block neat.
(Click Image to Enlarge)
Step 12:
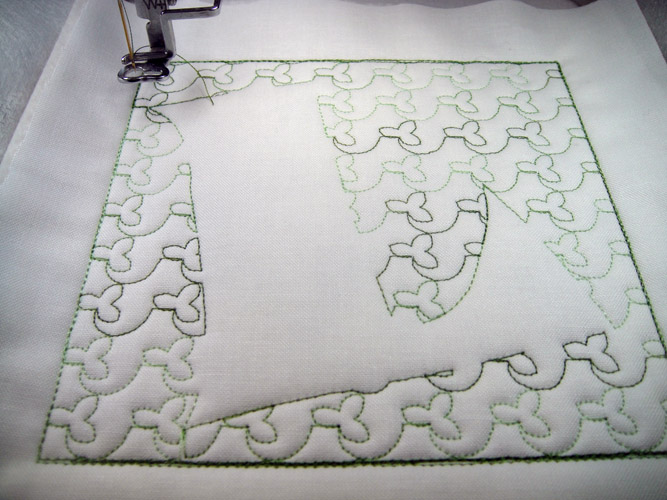
After color stop #3 sews your project will look like this.
(Click Image to Enlarge)
Step 13:
Color stop #4 is an outline of the letter. Once that has stitched if you have precut the applique with the Scan N Cut or by hand spray adhesive on the back of the letter and align it with the outline. If you are using the stitch & trim method spray and place the 5” square of green print and place it over the outlines.
(Click Image to Enlarge)
Step 14:
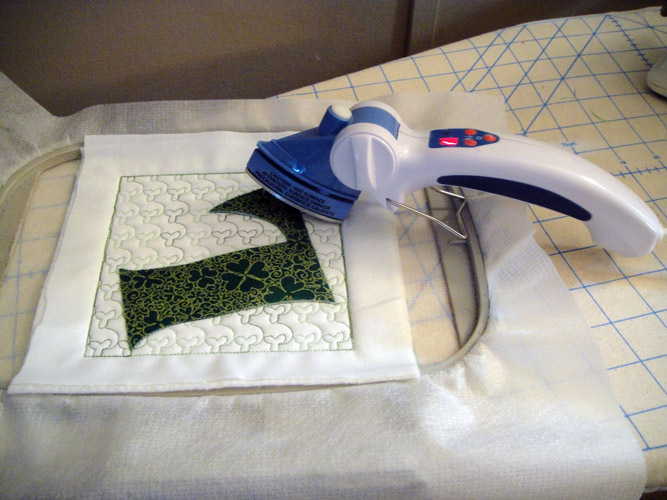
If using a precut applique press the applique at this point to permanently secure the letter to the background.
(Click Image to Enlarge)
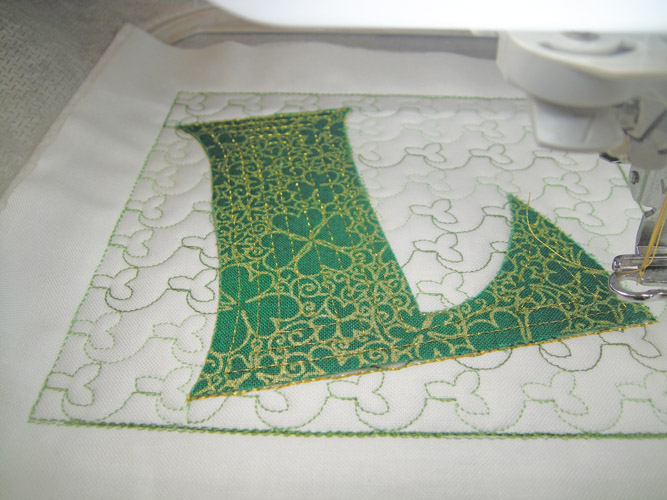
Step 15:
Color stop # 5 is the tack down for the letter. If you have used a precut letter this stitching will just brush the edges of the applique. If you are using the stitch and trim method this will tack down your fabric; trim the fabric right up to the tack down lines after this stitches.
(Click Image to Enlarge)
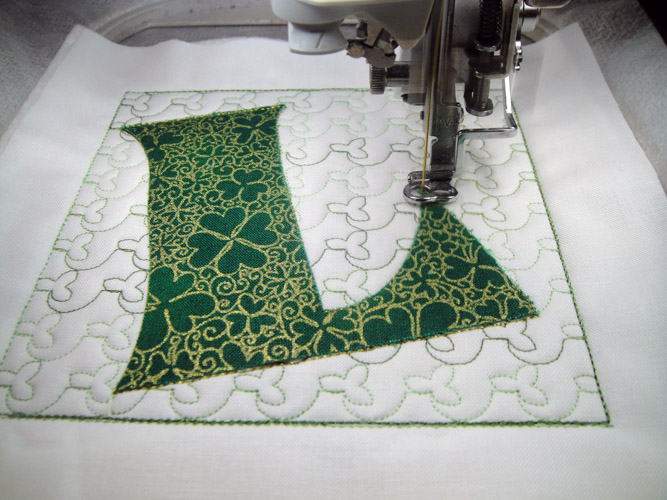
Step 16:
Change to metallic gold thread on top of the machine only. Begin the echo quilting inside the letter. To properly make the echo quilting stops are provided though out the letter in separate sections. Color stops were put into the designs so that you could bring the bobbin thread to the top as necessary; just keep the metallic thread in the machine through the various color stops.
(Click Image to Enlarge)
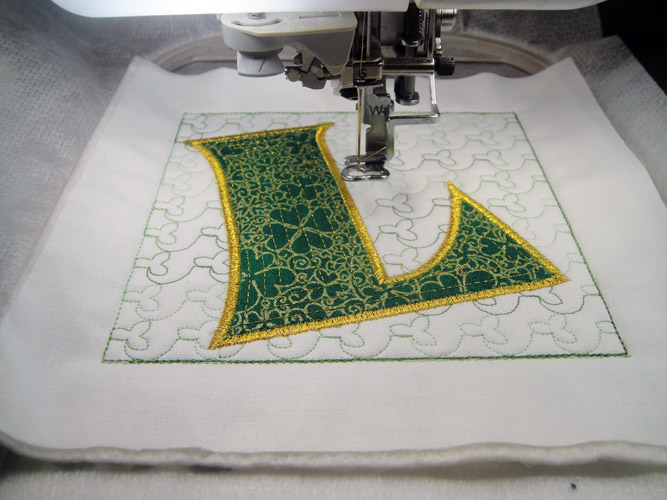
Step 17:
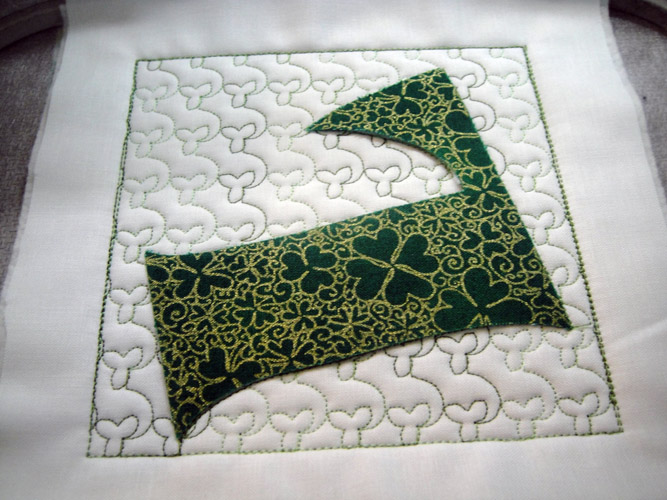
The final color stop in each block will border the letter.
(Click Image to Enlarge)
Step 18:
By bringing the bobbin thread to the top you made the back of your block neat by eliminating the tie-in tails. However, the tie-off stitches will still have left tails, trim those off.
(Click Image to Enlarge)
Step 19:
Lay the ¼” mark of a see through ruler along the outline stitching of the block. Trim all sides of the block to ¼”.
(Click Image to Enlarge)
Step 20:
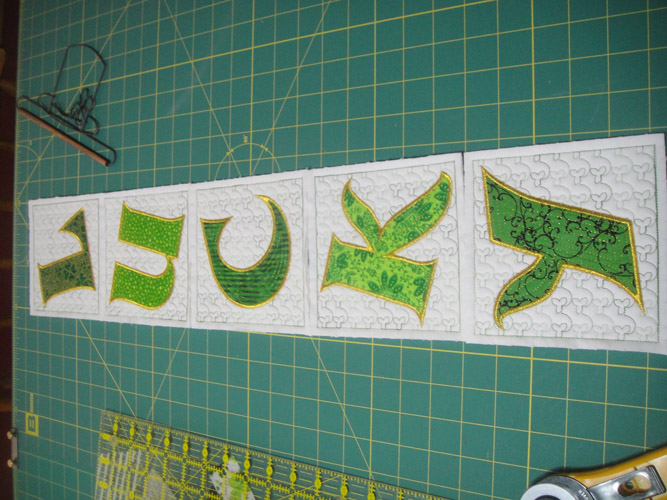
Create the blocks for the other four letters using the same techniques. Lay the blocks out in the correct order.
(Click Image to Enlarge)
Step 21:
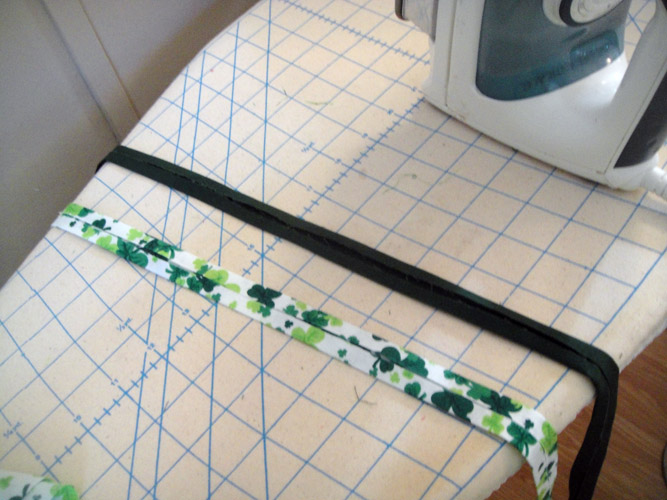
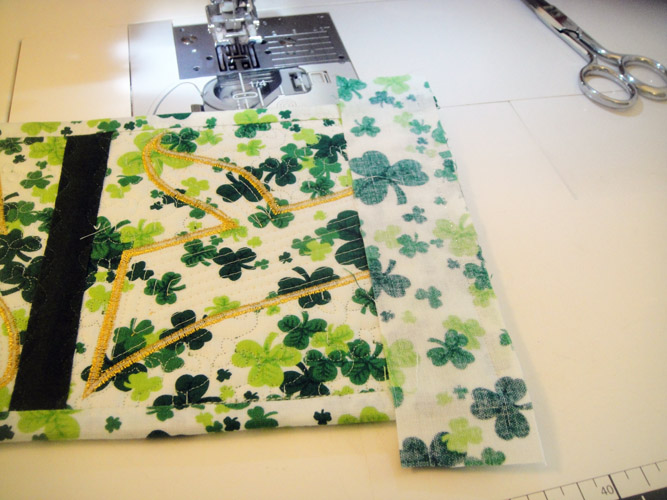
Fold the long edges of a sashing strip for the front and the back of the wall hanging and press. The strip for the back of the wall hanging is 1.25” the strip for the front of the wall hanging is 1.5”.
(Click Image to Enlarge)
Step 22:
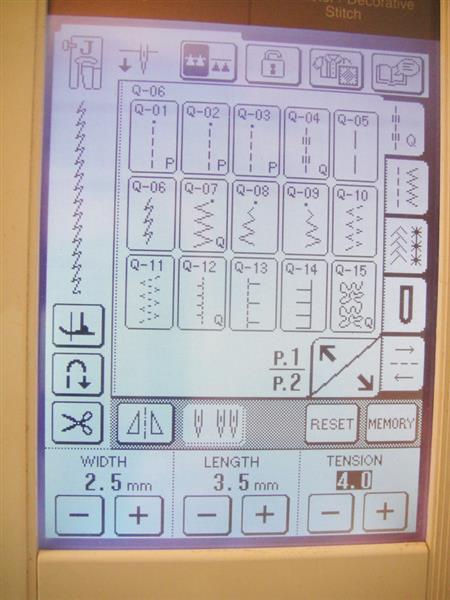
(Click Image to Enlarge)
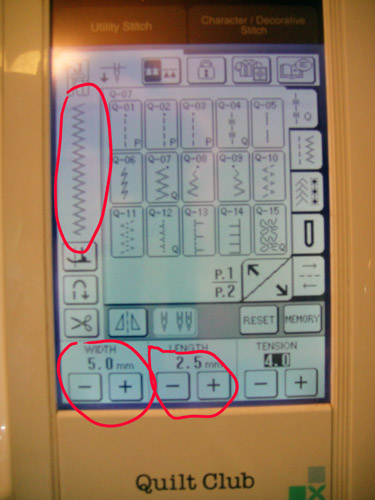
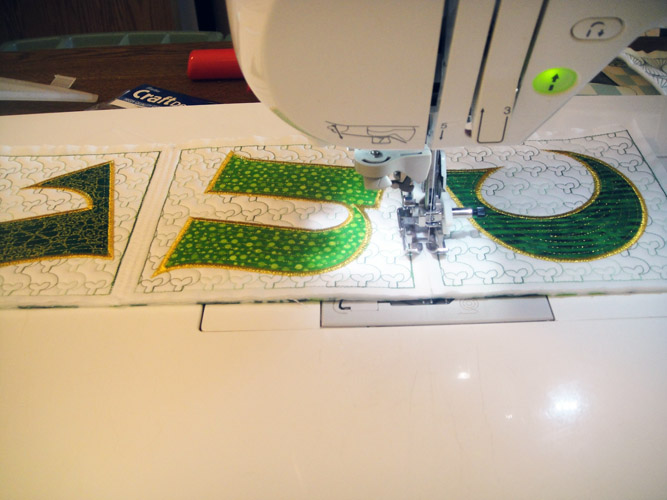
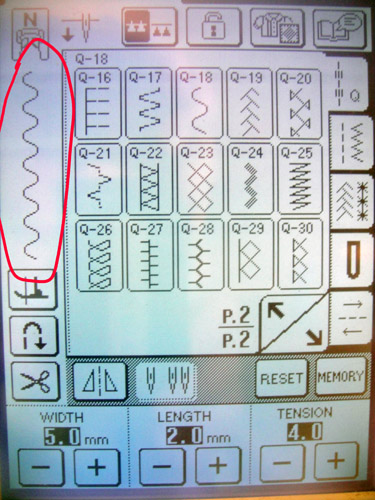
Select a wide zigzag stitch on your regular sewing machine. Load matching regular sewing thread in the top and bobbin of the machine.
Step 23:
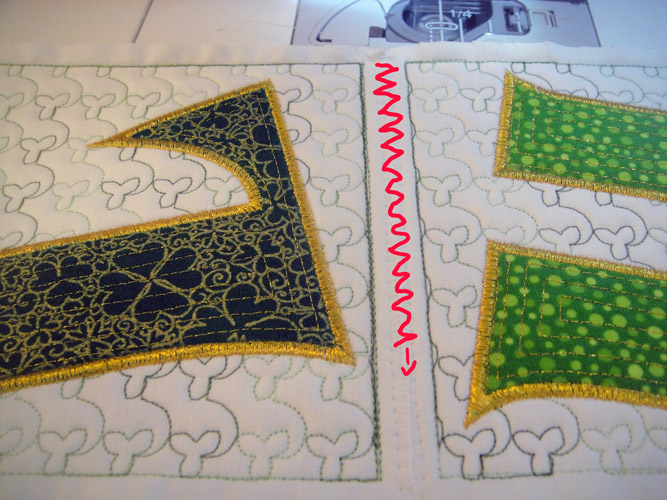
Butt the edges of the L and U blocks together, do not overlap, and stitch them together with a zigzag stitch.
(Click Image to Enlarge)
Step 24:
Add the C, K and Y to the vertical wall handing as in Step 23.
(Click Image to Enlarge)
Step 25:
(Click Image to Enlarge)
Your wall hanging will now look like this.
Step 26:
(Click Image to Enlarge)
Load YLI invisible thread in the top and bobbin of your machine. I do recommend YLI thread as other invisible threads can be problematic. Select a Serpentine stitch, or other stitch that is not straight so that it will blend into the quilting when the sashing strips are attached.
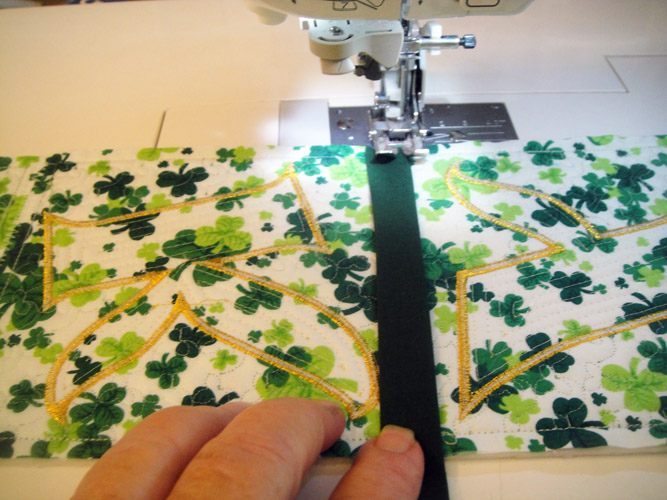
Step 27:
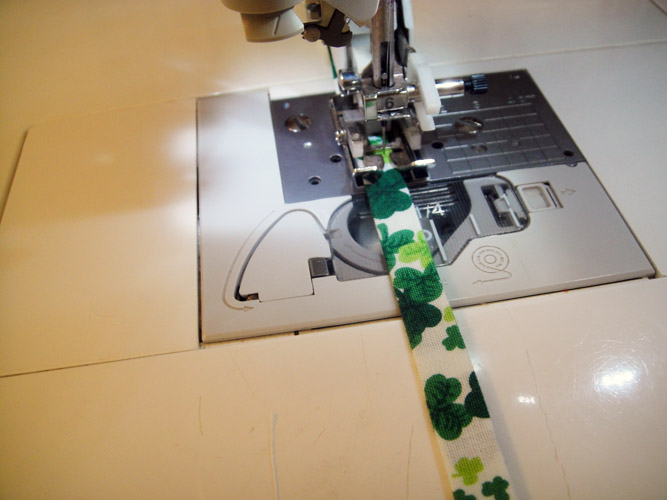
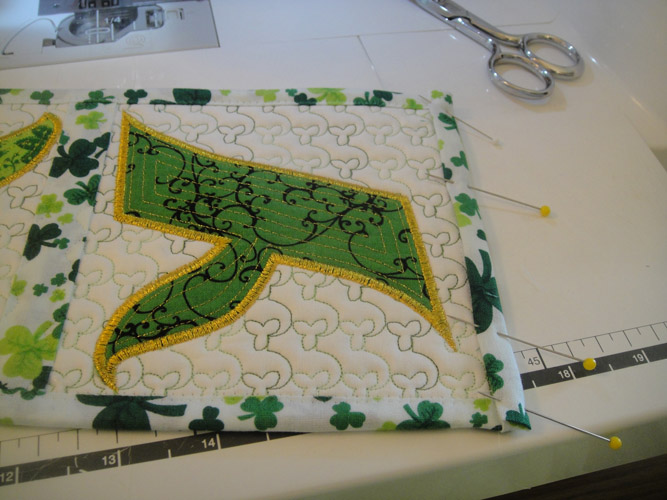
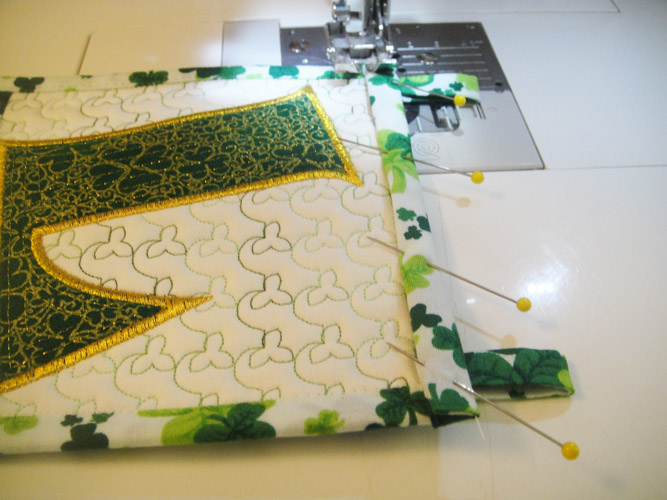
On the back of the wall hanging center a sashing strip over the zigzag stitches between the blocks. Stitch down both sides of the sashing with the Serpentine stitch.
(Click Image to Enlarge)
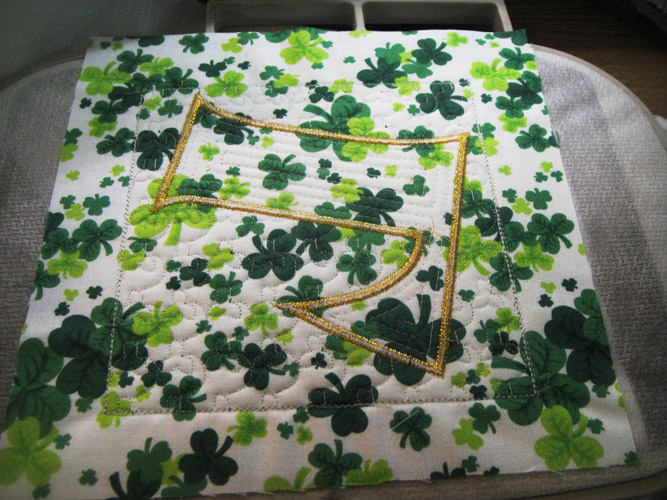
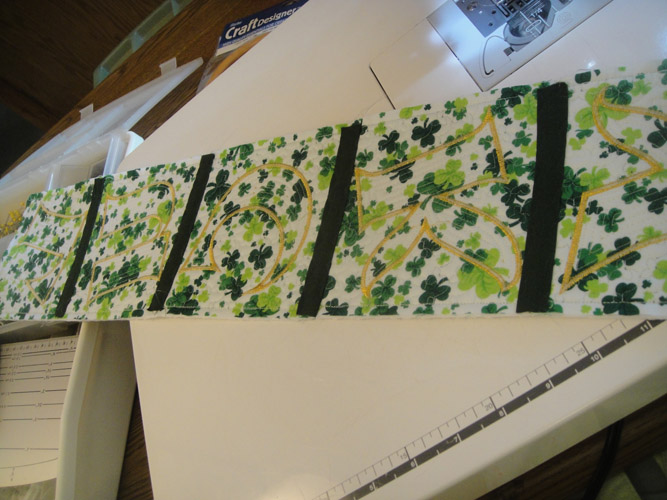
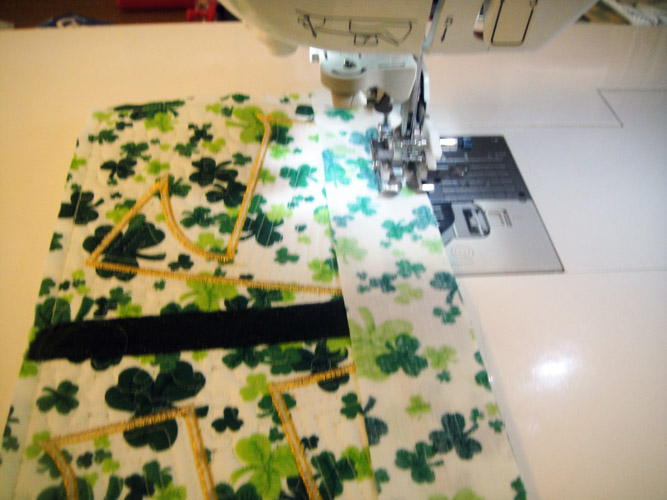
Step 28:
The back of the wall hanging will now look like this picture. Attach the wider sashing strips to the front of the wall hanging in the same manner.
(Click Image to Enlarge)
Step 29:
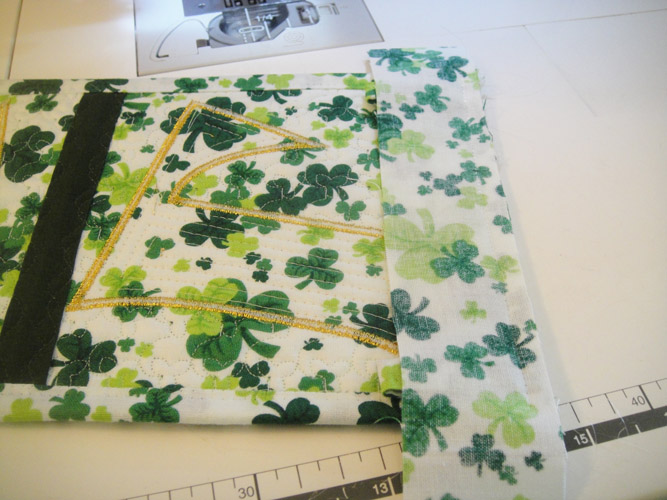
To make the little loops at the top of the quilt take 6” of left over sashing strip and fold in half again; stitch down the edge; cut in half to make to 3” pieces.
(Click Image to Enlarge)
Step 30:
Apply straight binding to both sides of the wall hanging by stitching a 1/5” down the long sides of the back of the wall hanging with a ¼” seam allowance.
(Click Image to Enlarge)
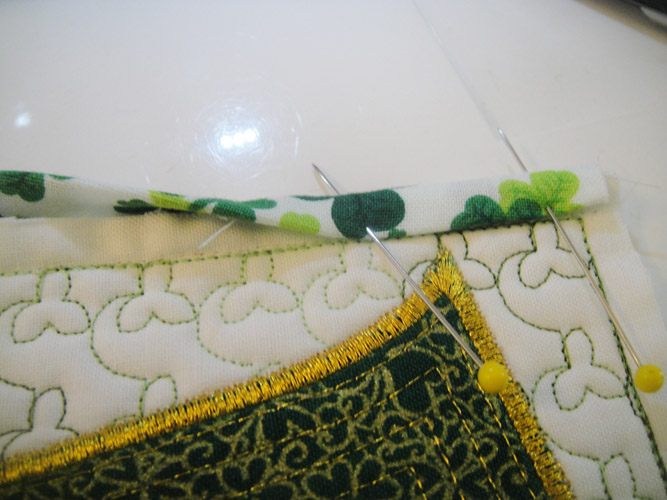
Step 31:
Fold over the binding on the sides twice and pin in place.
(Click Image to Enlarge)
Step 32:
Stitch the front of the binding into place. A slanted zigzag was used in the sample. Use a matching or contrasting thread of your choice.
(Click Image to Enlarge)
Step 33:
Lay a strip of binding across the bottom of the wall hanging having ½” extra binding extending from both ends and stitch to the wall hanging.
(Click Image to Enlarge)
Step 34:
Fold the ½” extensions in and then fold the binding over the bottom of the wall hanging and stitch in place.
(Click Image to Enlarge)
Step 35:
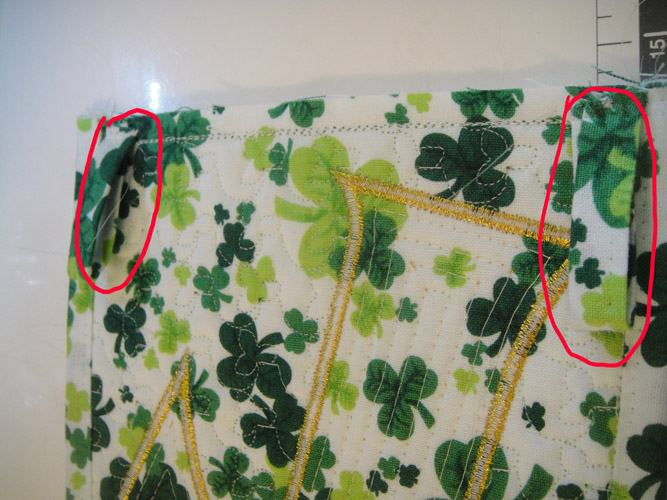
Take the two 3” loops, fold in half, and position at the top of the wall hanging aligning the outside edge of the loop just inside the side binding. Pin in place.
(Click Image to Enlarge)
Step 36:
Lay the binding strip for the top of the wall hanging over the two loops and stitch to the back of the wall hanging.
(Click Image to Enlarge)
Step 37:
Fold in the ends of the top binding and fold the binding over the front of the wall hanging and pin in place. Making sure your loops are up and clear of where you will be stitching, stitch down the top binding.
(Click Image to Enlarge)
Step 38:
(Click Image to Enlarge)
Slide the loops over the rod on this adorable Ackfeld Wire Manufacturing St. Patrick’s Day quilt hanger. Congratulations your project is complete!
Award winning Digitizer, Embroidery Educator, Author and a Consultant to the Industry, Pat Williams has 30 years of experience in the embroidery industry. Pat has won multiple awards for her digitizing expertise including the 2007 Impressions Awards Grand Championship, Best of Show as well as the 1st and 2nd Place Awards. Pat’s love of digitizing has afforded her the opportunity to write numerous articles for Impressions magazine in the United States and Images Magazine in Europe. In 2001 Pat was named “Embroidery Educator of the Year.” For many years Pat taught digitizing seminars at the ISS Shows in Long Beach, CA and for Compucon software. She now resides in Tucson, AZ.