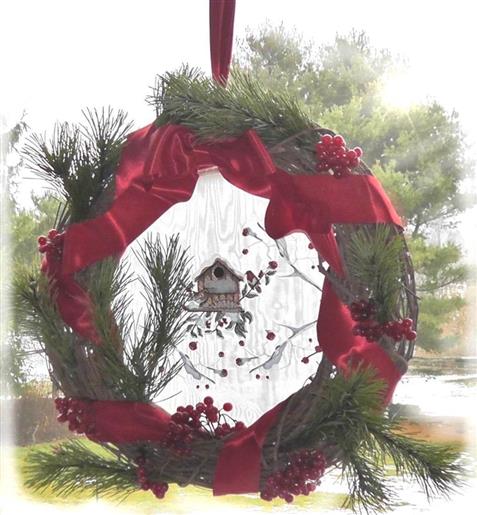
This project uses some unique supplies for a project. The designs are setup in software, or optionally it can be done at the machine by re-hooping the fabric and rotating and mirroring the “Winter Berries” design to frame the “”Winter Birdhouse” design.
You will notice on the materials list there is no stabilizer. That is because two layers of nylon sparkle organza are hooped as one and there is enough strength in the organza to provide support for the stitching. Using the nylon organza allows the embroidery to be translucent enough for the background behind the window where the wreath is hung to show through the middle of the wreath adding to the overall wreath design.
Note: the time denoted for project completion does not include drying time for the glue.
Step 1:
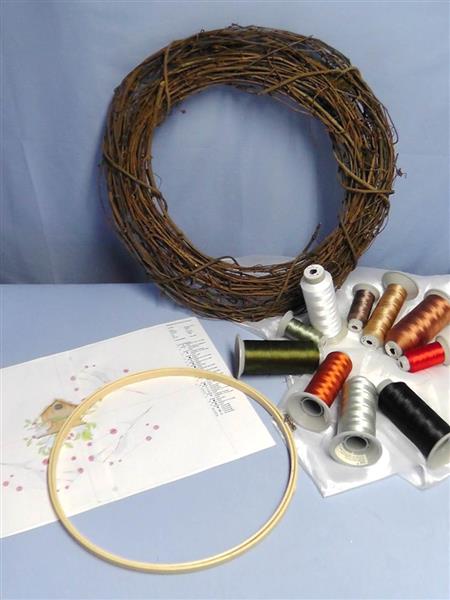
Gather the supplies and read through all the instructions before beginning. Red satin blanket binding was used for the project, but red double sided satin ribbon may also be used. The blanket binding provides a heavier ribbon-look for the project.
(Click Image to Enlarge)
Step 2:
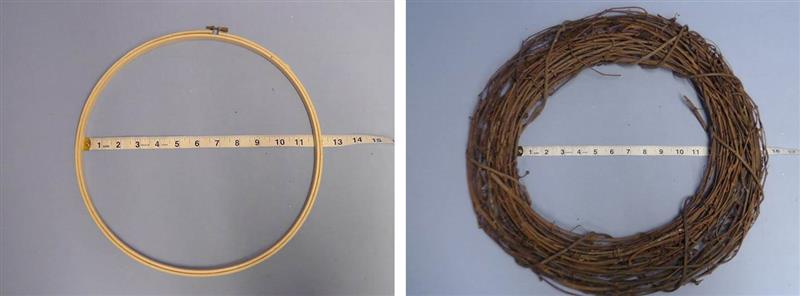
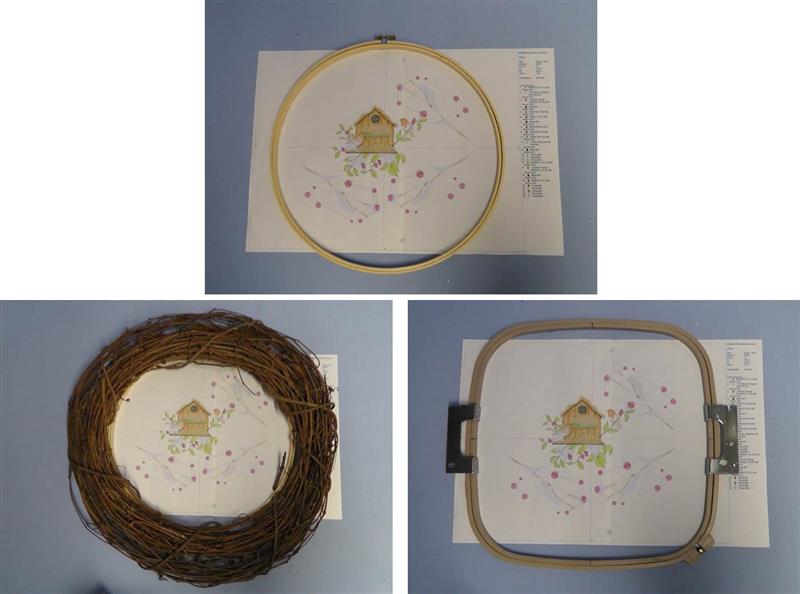
Measure the diameter of the wooden hoop and also measure the diameter of the inner opening on the grapevine wreath. The wooden hoop needs to be hidden by the opening in the grapevine wreath when the project is finished.
(Click Image to Enlarge)
Step 3:
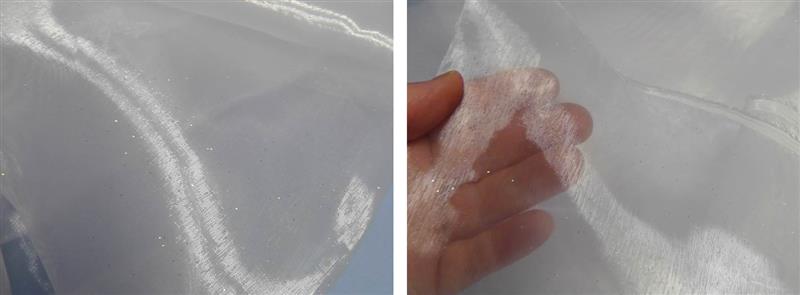
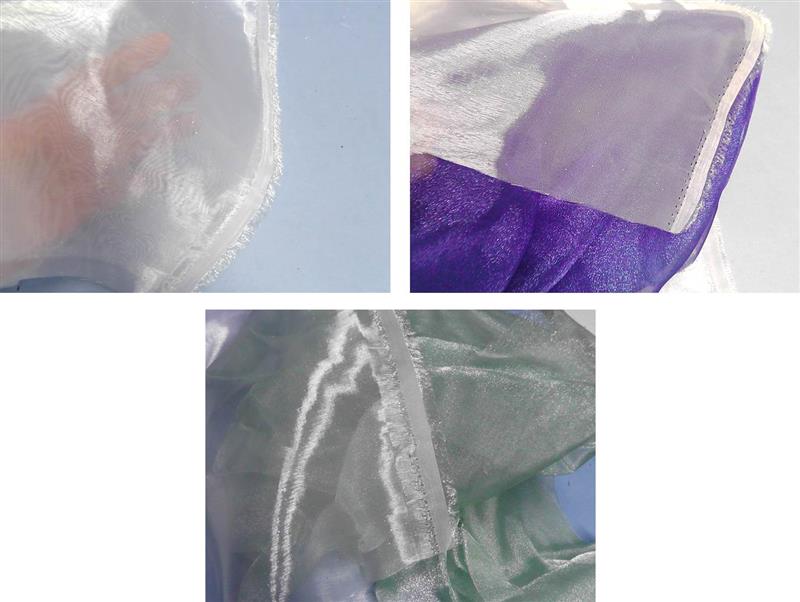
Choose the fabric. For the project white nylon sparkle organza was used. The fabric is very lightweight, translucent, and yet very strong.
(Click Image to Enlarge)
Step 4:
For this project two layers of white sparkle organza was used, but when shopping for the fabric, experiment by placing a colored organza behind the white and perhaps you will choose to use a layer of white and a layer of color for the base fabric of the embroidery. Placing a colored organza behind a layer of white will give a different look to the fabric.
(Click Image to Enlarge)
Step 5:
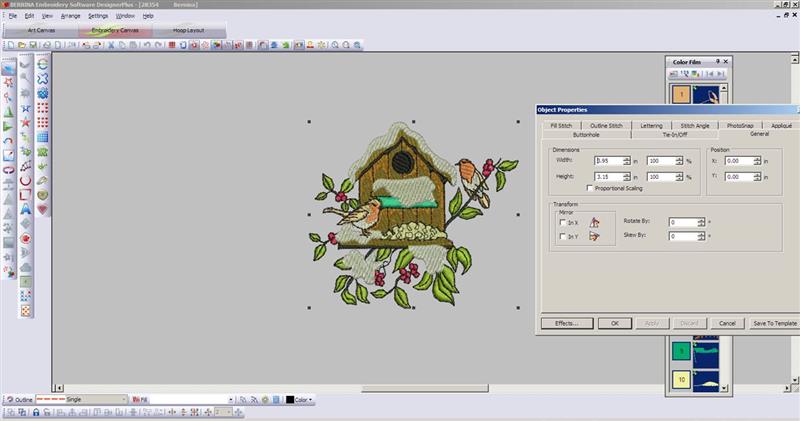
Prepare the embroidery design. Open the software. Insert design “Winter Bird House”. Check the size in the properties window. (Note: this design, as prepared, fits into a 9.5” x 9.5” hoop. If you do not have a hoop that large, stitch the house first then the branches the number of times needed to complete the designs as if it were done in software.)
(Click Image to Enlarge)
Step 6:
For this project, the size was increased proportionally to 5” x 3.99”.Save this working file as “winter wreath”.
(Click Image to Enlarge)
Step 7:
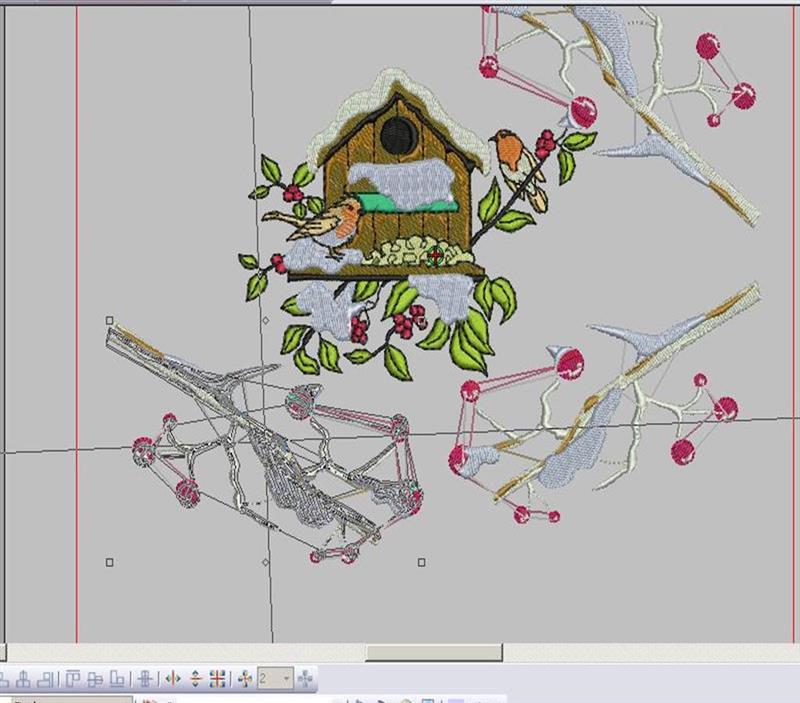
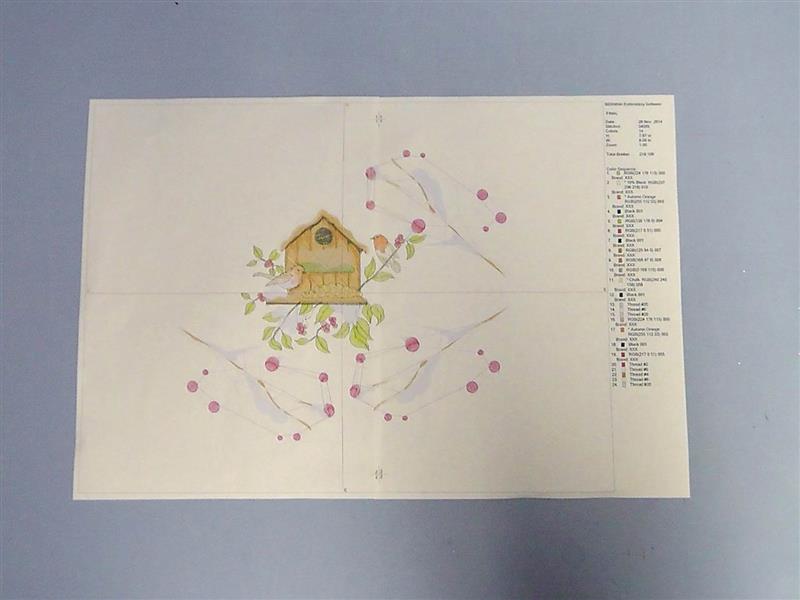
Insert three “Winter Berries” branch designs. Move one to the lower left of the birdhouse so the edge of the branch is to the outer left edge. Rotate the design into position so it looks pleasing on screen. Mirror and rotate the second design across from the design on the left. Move it into position as shown. Mirror and rotate the third branch into position at the upper right; the three branches should frame the birdhouse.
(Click Image to Enlarge)
Step 8:
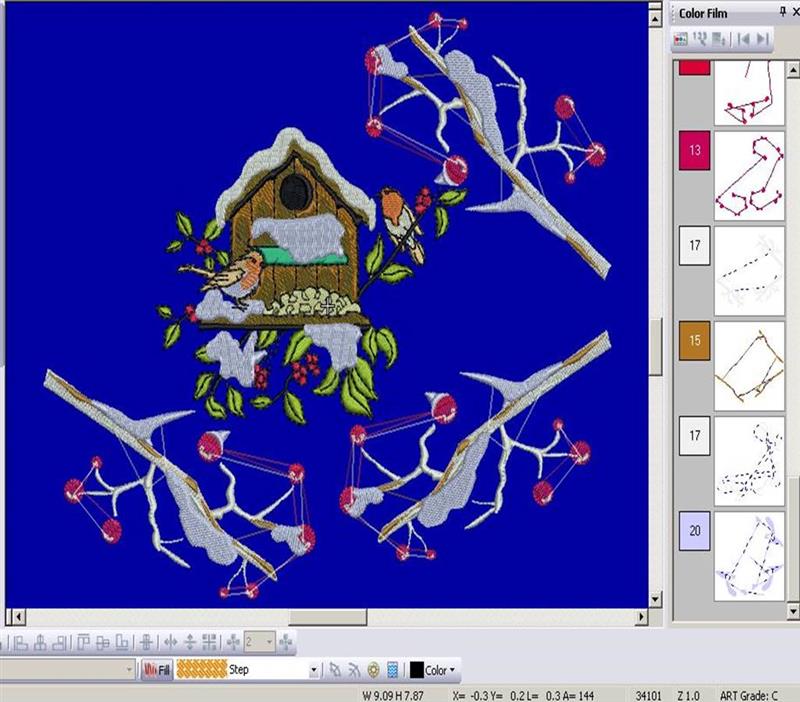
Check the design. Adjust any colors as you’d like. Group the entire design (be sure to save often!) and be sure the alignment point is in the center of the entire design.
(Click Image to Enlarge)
Step 9:
Print a copy of the paper template. Because of the large size, it will print in two sheets. Tape the two sheets together matching any registration marks on the paper. Note the measurement on the embroidery design.
(Click Image to Enlarge)
Step 10:
Lay the wooden embroidery hoop over the printed design to make sure the design will fit inside the hoop when the embroidery is finished. Lay the grapevine wreath on top of the wooden hoop to get an idea of how the finished design will look. Also be sure that the design will fit within the hoop for the machine. Now is the time to make any size adjustments if needed before the stitching begins.
(Click Image to Enlarge)
Step 11:
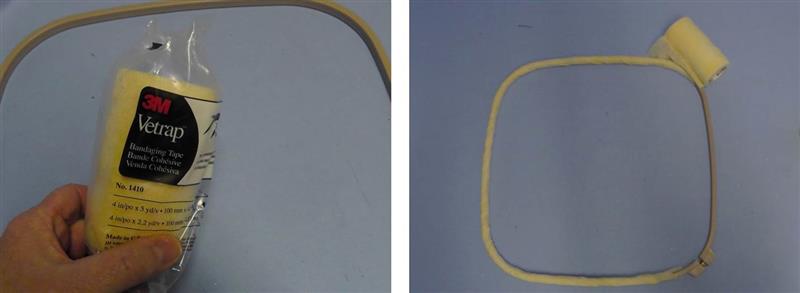
Here’s a tip: If you find the nylon organza fabrics slipping in the hoop, use Vetrap around the inner ring of the embroidery hoop. It will cling to itself and hold the fabrics securely.
(Click Image to Enlarge)
Step 12:
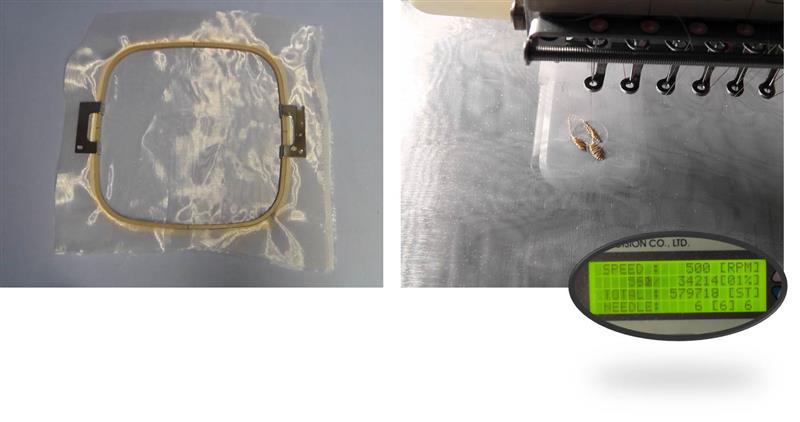
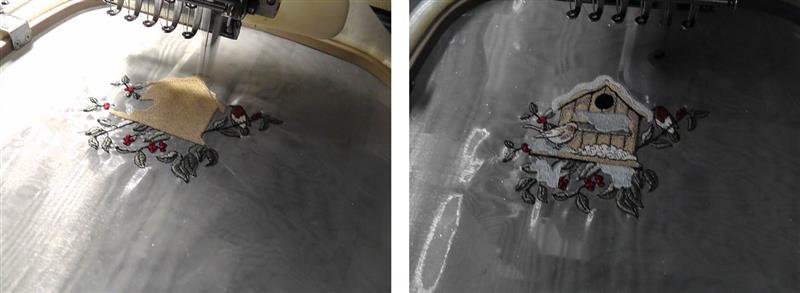
Hoop two layers of nylon organza, leaving an ample amount outside of the hooped area. Be sure the two layers are on grain and both are placed smoothly in the hoop as if they were one fabric. Load the design on the machine, slow down the machine speed, and stitch the design following the color sequence.
(Click Image to Enlarge)
Step 13:
Continue stitching, changing thread colors as needed.
(Click Image to Enlarge)
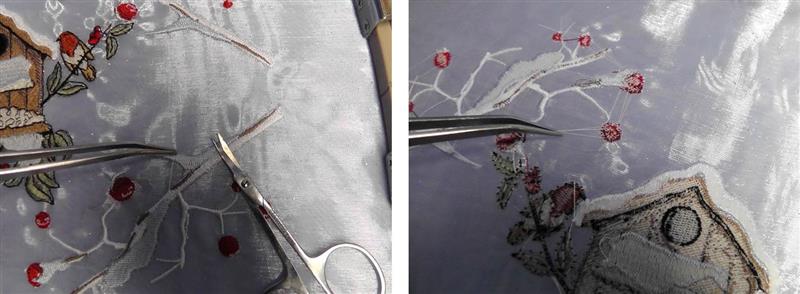
Step 14:
After the embroidery is finished (while the fabric is still in the hoop) trim any remaining jump threads. Normally threads are not trimmed on the back; however because the fabric is sheer, for this project trim the bobbin threads close to the tie in/off knots. No jump threads should be visible from the right side of the fabric. Remove the fabric from the hoop.
(Click Image to Enlarge)
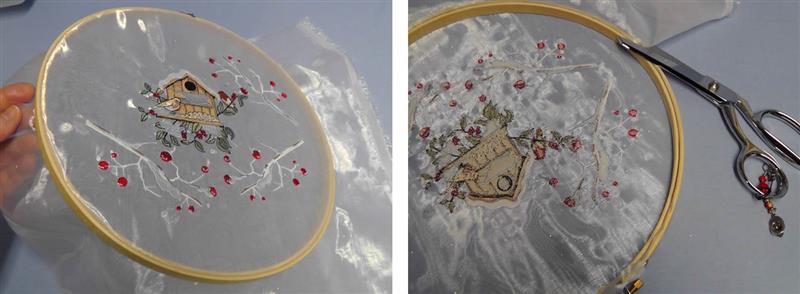
Step 15:
Center and hoop the embroidered fabric in the wooden embroidery hoop. Be sure the fabric is smooth and taut like it was in the embroidery hoop. Be sure the screw is tight to hold the fabric in place. Trim the excess fabric close to the hoop.
(Click Image to Enlarge)
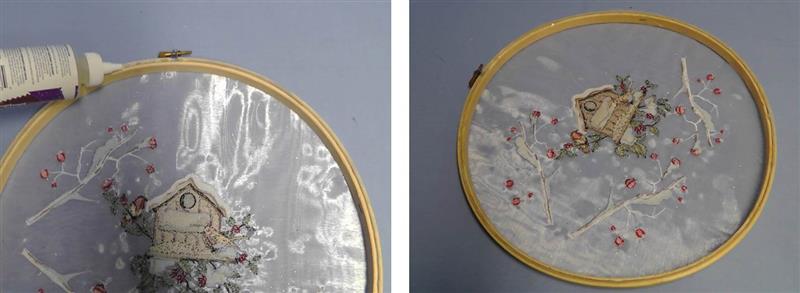
Step 16:
Run a bead of fabric glue around the underside of the hoop. This will seal the fabric edge to the hoop. Set the hoop aside and let it dry according to the manufacturer’s directions (preferably overnight).
(Click Image to Enlarge)
Step 17:
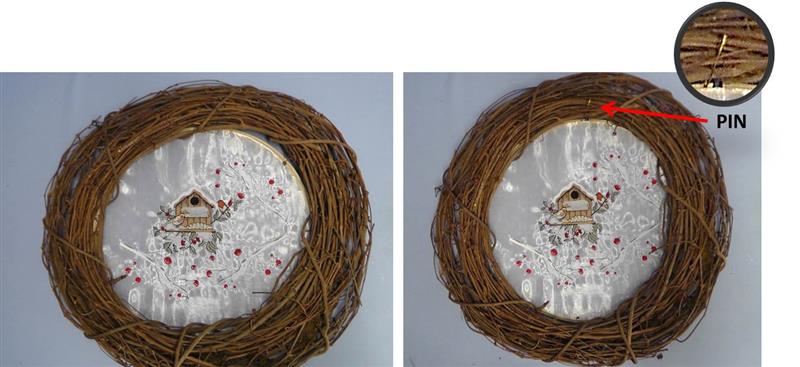
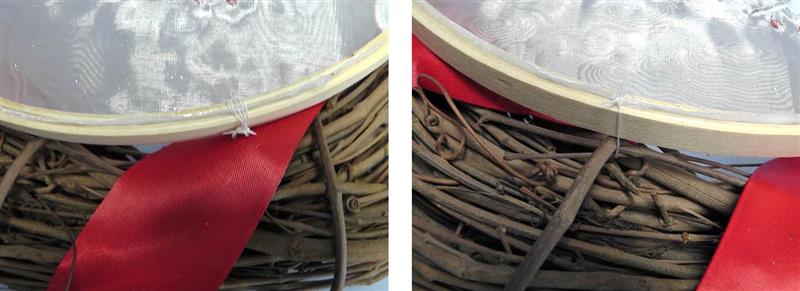
Place the embroidered fabric right side up. Position the wreath over the hoop so that the embroidered hoop doesn’t show when viewing the embroidery within the grapevine wreath. Because grapevine wreaths are not symmetrical, it will take a bit of rotating and re-shaping of the wreath so the wooden hoop will not show. Place a small safety pin or string denoting the top of the grapevine wreath. Remove the embroidery from behind the wreath and set it aside until needed.
(Click Image to Enlarge)
Step 18:
Cut a length of satin ribbon (80”) to wrap around the wreath. Tuck and tie the end of the ribbon to the top, back side, of the grapevine wreath to secure and hide it. Wrap the wreath with the ribbon; do not pull the ribbon tightly. Tuck the other end into the back side of the wreath to secure it.
(Click Image to Enlarge)
Step 19:
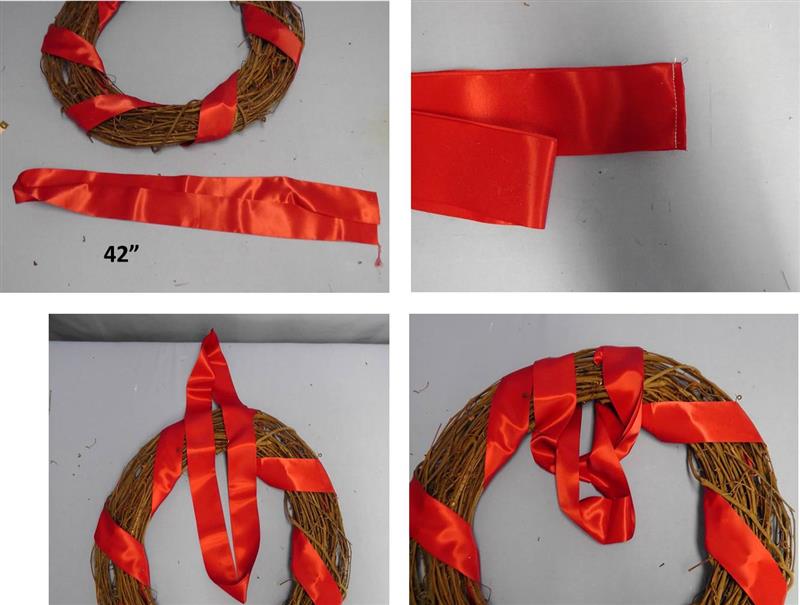
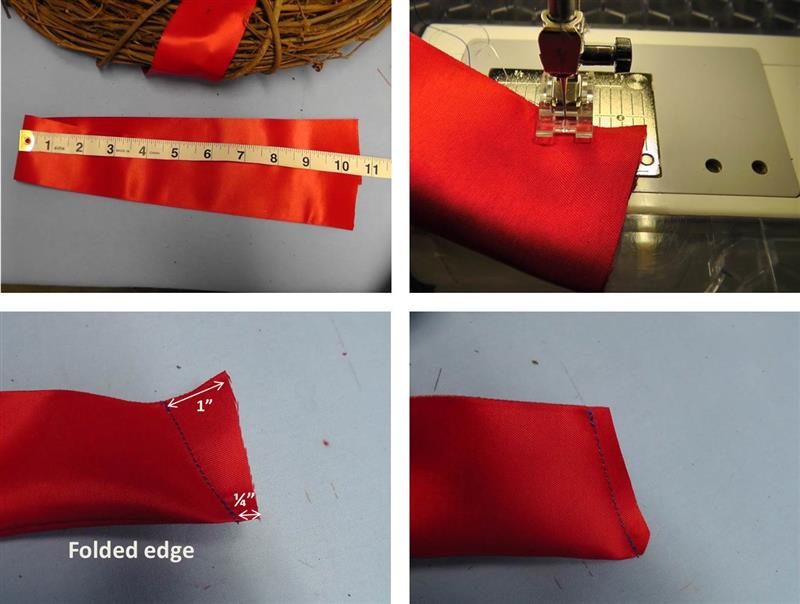
To make the ribbon hanger, cut a length of ribbon 42” (or desired length). Fold the ribbon in half meeting the cut edges and sew a ¼” seam to secure the cut ends together. Lay the ribbon hanger over the wreath with the seam at the top. Bring the seam end underneath the wreath and through the loop.
(Click Image to Enlarge)
Step 20:
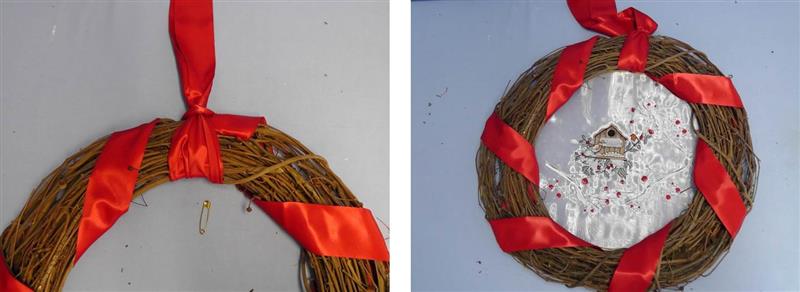
Remove the safety pin and pull up on the seam end of the ribbon hanger, snugging the ribbon hanger to the top of the wreath. Lay the embroidery hoop behind the wreath once again, aligning the top of the hoop to the top of the wreath.
(Click Image to Enlarge)
Step 21:
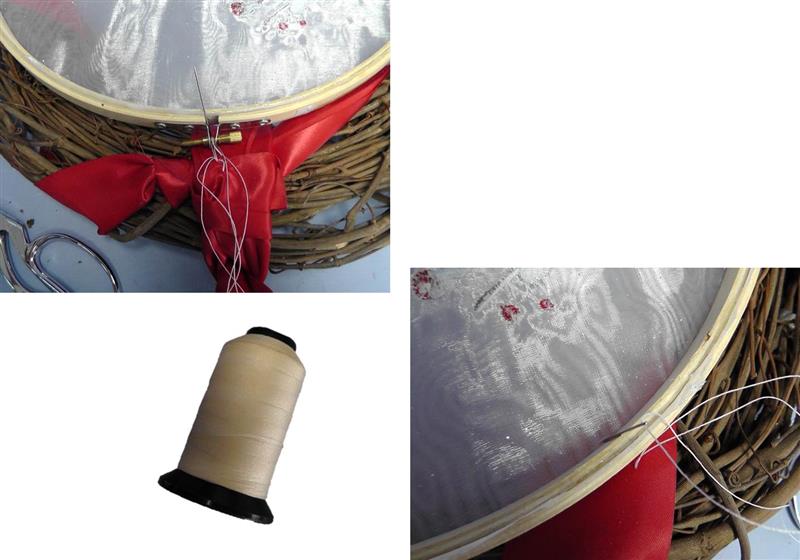
Hold the embroidery hoop and the wreath together snugly and flip the two over together so the back side of the embroidery is facing up. Thread the hand needle with a length of the heavy duty thread; knot the end. Secure the knotted end to the ribbon on the top of the wreath. Take a couple of stitches in the ribbon to securing the screw on the hoop to the ribbon (do not pull too tightly). Now carefully bring the needle point down through the embroidered fabric close to the inside of the hoop edge and back up again.
(Click Image to Enlarge)
Step 22:
Bring the needle and thread around to the wooden hoop 3-4 times to secure the wooden hoop to the wreath. Tie off and cut the thread. Work around the hoop securing the wooden hoop to the wreath/ribbon with thread ties just to secure them together. Continually check the position of the wooden hoop from the front of the wreath to make sure it stays centered inside the grapevine wreath. Set the wreath aside to make the ribbon bow, tails and knot.
(Click Image to Enlarge)
Step 23:
To make the ribbon tails, cut a length of ribbon 21” long. Fold the ribbon, right sides together, lengthwise, and beginning 1” from the cut edge sew a seam ending ¼” in from the point at the fold. Trim the seam to ¼”. Repeat for the other tail end.
(Click Image to Enlarge)
Step 24:
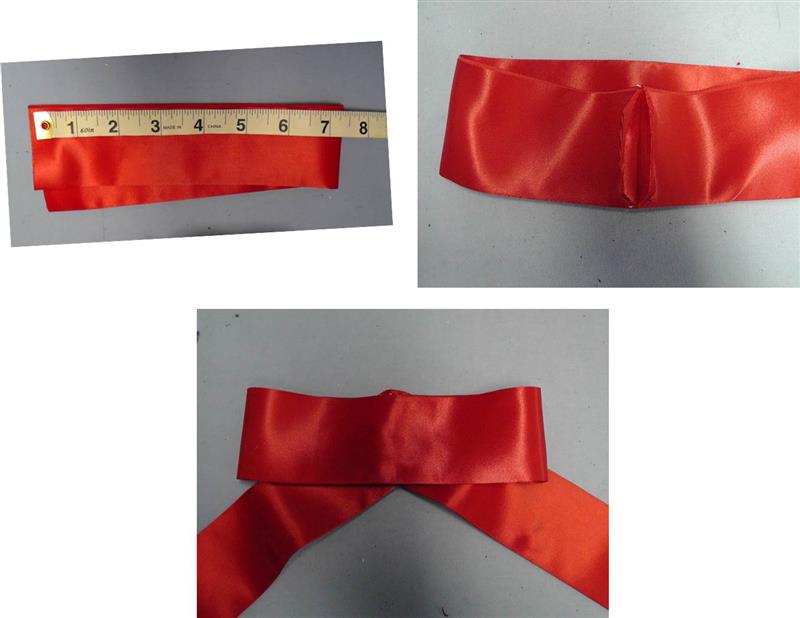
Turn the ribbon right side out forming the corners and press. Fold the ribbon in half lengthwise to find the middle point of the tails. Fold and pin a miter at the middle point and sew together through all layers.
(Click Image to Enlarge)
Step 25:
To make the bow, cut a length of ribbon 15” long. Fold the ribbon in half lengthwise and sew a ¼” seam; press the seam open. Turn the ribbon so the seam is to the inside. Place the right side of the bow over the ribbon tails, centering the bow seam over the seam for the tails.
(Click Image to Enlarge)
Step 26:
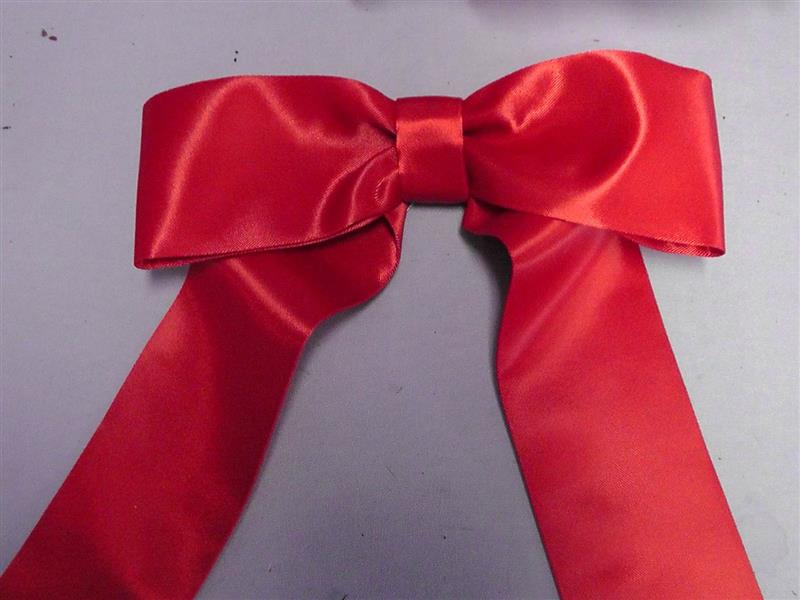
To make a ribbon knot, cut a length of ribbon 4” long. Press the ribbon in thirds lengthwise and place one cut end under the bow and tails. Bring the other end over the bow and to the back. Turn under the cut edge ¼” and pin to the bottom of the knot. Hand-sew the knot ends together.
(Click Image to Enlarge)
Step 27:
Turn the completed ribbon to the right side and shape and form the bow, positioning the knot over the seams of the tail and bow.
(Click Image to Enlarge)
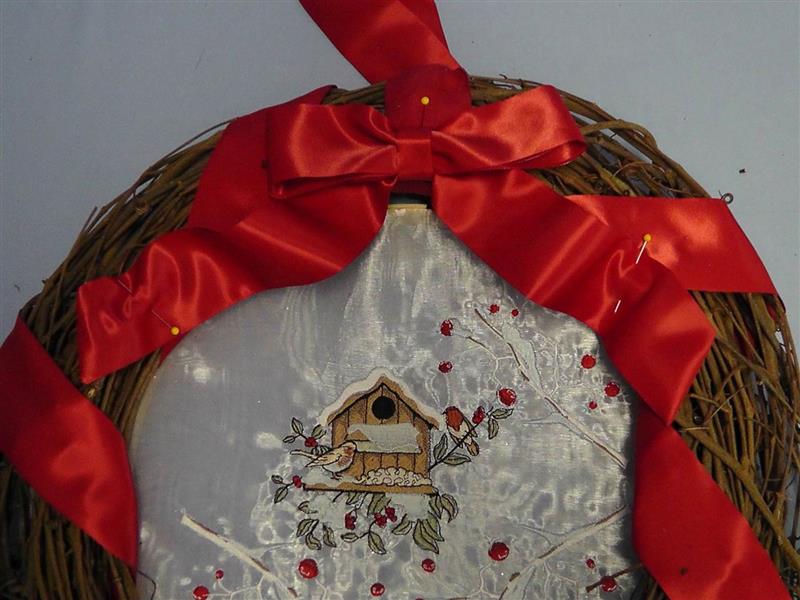
Step 28:
Center the completed bow at the top of the wreath and use pins to position and temporarily hold the ribbon and tails in place, making ripples in the tails to help hide any wooden embroidery hoop that may still peek out from underneath the center of the wreath.
(Click Image to Enlarge)
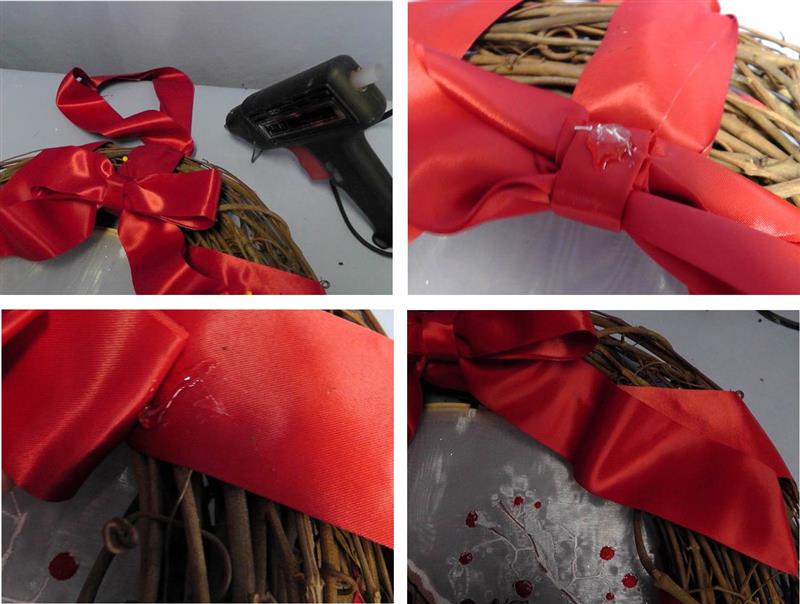
Step 29:
Heat up the glue gun. Work around the bow and placing a small amount of hot glue on the back of the ribbon and gently press it into place on the wreath. Be careful not to press too hard so there is no glue showing to the right side of the ribbon.
(Click Image to Enlarge)
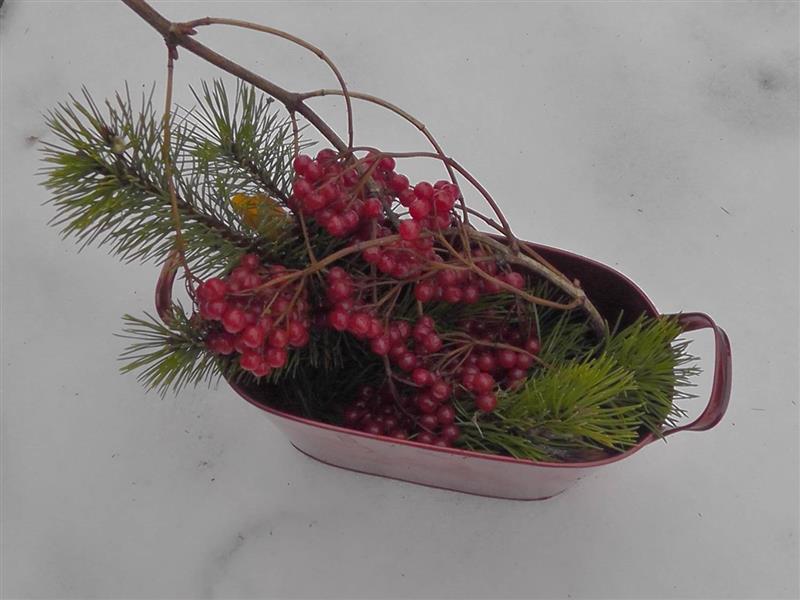
Step 30:
Gather or purchase pine boughs, red berries and pine cones to decorate the wreath. Cut them to length and place them into position as desired within the grapevine wreath, securing with hot glue if needed.
(Click Image to Enlarge)
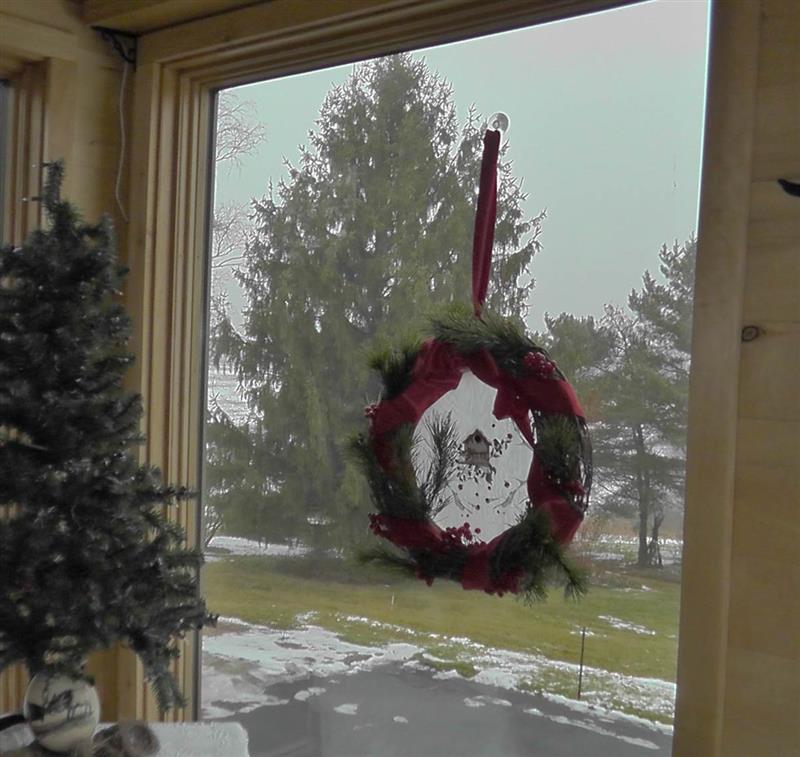
Step 31:
Position the suction cup hanger on the window and hang the wreath from the ribbon hanger.
Ramona Baird has been in the embroidery industry for over 23 years. She and her husband owned a commercial and retail embroidery store in Arizona for many years. She is an experienced digitizer having been mentored by award-winners Pat Williams and Lindee Goodall. Ramona is a contributor to “Creative Machine Embroidery” magazine having 5 covers to her credit. Ramona has worked for Wilcom America and served many years as Education Director for the American Sewing Guild. With a degree in fashion design, she is able to design and execute patterns which Pat Williams says are “out of the box” in creativity and application. Ramona likes to challenge the boundaries of embroidery and bring new and exciting designs, ideas, and projects to EmbroideryDesigns.com. She wants embroiderers of all levels to increase their skills and enjoyment in using their embroidery machine for gift-making and personal pleasure.