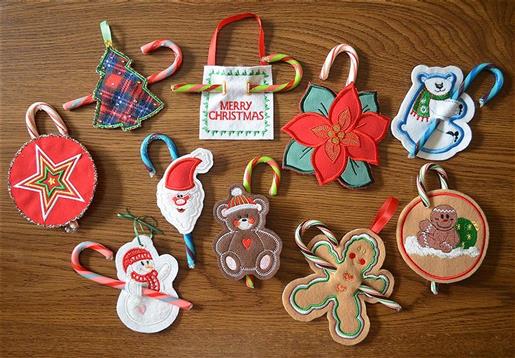
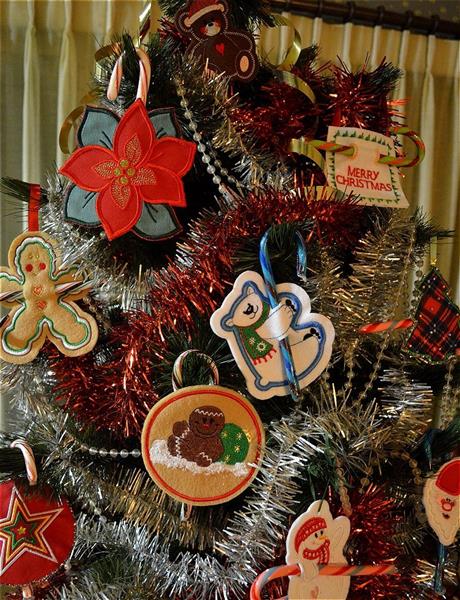
These ornaments can be made quickly, depending on the sewing time of the designs you choose and the amount of embellishment that you desire. In general, each can be assembled within an hour's time and they can be created from scraps of felt and other fabrics that you might already have in your stash. I've used appliqué designs in this project because they usually have a satin stitch column outline that works well for the edge of the ornament, but any design could work if you use a little imagination. The designs featured in this project require either a 4 x 4” or 5 x 7” hoop. The first five steps are the basic instructions, followed by steps for each of the 10 designs.
Step 1:
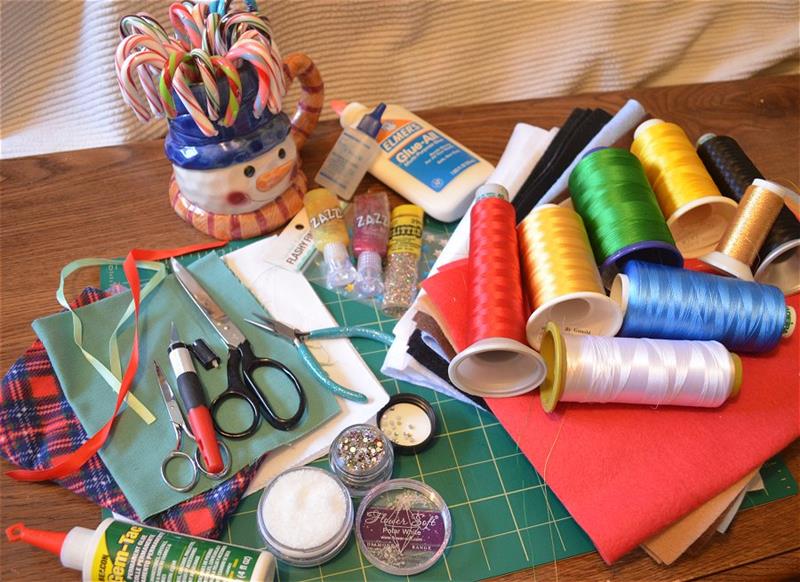
Gather the materials. You will need pieces of felt large enough to hoop and stitch each ornament design. If you have felt pieces large enough for the design but not enough to hoop, you can hoop an adhesive type stabilizer and lay the felt on top for “hoopless embroidery”. Use a heavy weight tear-away or firm cut-away. Find those bits and pieces of ribbons and trims in your stash that need a purpose and other materials for embellishment.
(Click Image to Enlarge)
Step 2:
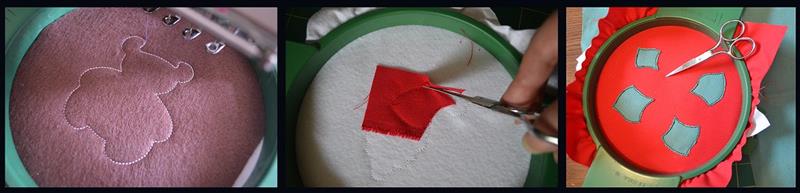
Embroider the designs. I used designs that are digitized for appliqué but it isn’t necessary to use fabric pieces in all areas intended for the appliqué. If you choose to use appliqué, the machine will stop after sewing the placement line and you can either set in your pre-cut piece that has been lightly sprayed with adhesive or backed with an adhesive stabilizer, or you can lay a piece of fabric to cover the area, and then stitch the cutline (the next color digitized in the design). When the machine stops stitching that color, trim away the fabric up to the outside of the stitches and then start the machine again and finish sewing the design.
(Click Image to Enlarge)
Step 3:
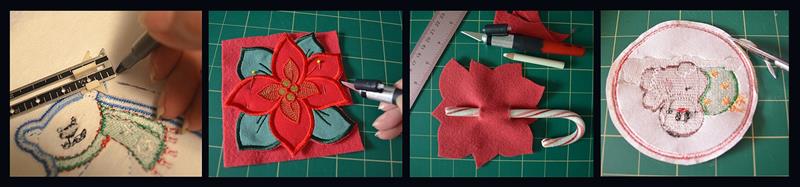
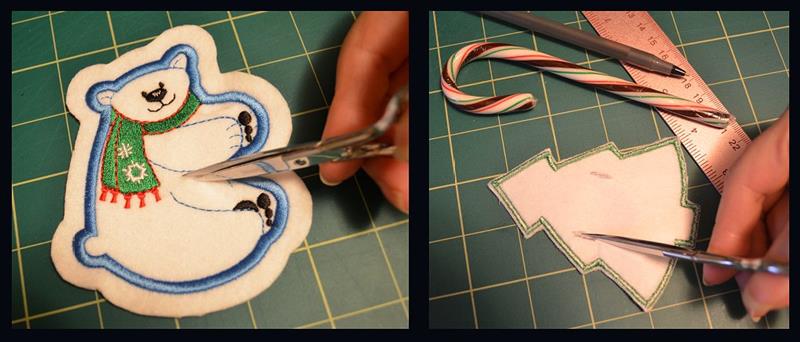
Cut out the designs (fronts) and backs for the ornaments. You can cut as close to the border stitches as you prefer, but take care not to cut the stitches. Keep a bottle of Dritz Fray Check handy to dab on any stitches accidentally snipped. To be safe, leave a margin of about 1/4” to the outside of the stitches all around the design by first measuring and marking. For the Polar Bear I used my hem gauge and a ball point pen, marking dots around the outside, and then connected the dots before using a scissors to cut out the ornament. The Poinsettia was trimmed up close to the stitches very carefully with a small hand scissors, and then I pinned the front to another piece of felt and used a craft knife to create the back and cut out the holes for the candy cane (the holes for holding the candy canes should be cut on back pieces before they are glued in place). You can leave the stabilizer in place and it will add to the firmness of the ornament, but you may want to trim away the very outside up to the stitches to avoid any poking out of the edge. Attach the backs to the fronts with a thin line of fabric or felt glue around the inside edges.
(Click Image to Enlarge)
Step 4:
Cut the holes for holding the candy canes. If you don’t add a back to the ornament, you can cut the holes in places agreeable to the design, such as how I cut the holes between the paws of the Polar Bear. If you stitched an appliqué piece over felt, holes can be cut on the back side using a small scissors: carefully poke the tip of the scissors through the stabilizer and felt, gently pulling the fabric away from the top appliqué, and snip a bit at a time. I made the candy cane holes about 1” apart.
(Click Image to Enlarge)
Step 5:
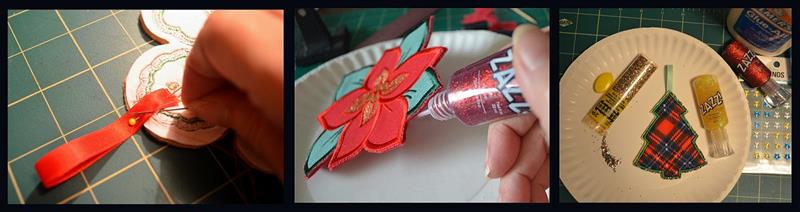
Decorate the ornament. The hook of the candy cane is used to hang the candy cane huggers, but the candy cane holders will need a hanger of some sort. I cut a piece of ribbon about 5” long, folded in half and then I used a couple tack-down stitches to hold in place. You could also use a good dab of glue to attach the ribbon, but you will need to wait until it dries to continue working with the ornament. I used red Zazz glitter glue to seal the outside edges of the Poinsettia. For the Christmas Tree, I applied yellow glitter glue to the front edge and sprinkled multi-colored dry glitter on top of the glitter glue to add more sparkle.
(Click Image to Enlarge)
Step 6:
Gingerbread Man Holder: This cute design actually includes a heart on each side of the gingerbread man, but those elements were unnecessary for this project. I chose to delete them from the design before it was stitched, but if you don’t have an editing software program, you can let the hearts sew and simply cut them out of the final ornament. I decided it was fine without adding a back piece to it. A ribbon was attached for a hanger (as shown in Step 5).
(Click Image to Enlarge)
Step 7:
(Click Image to Enlarge)
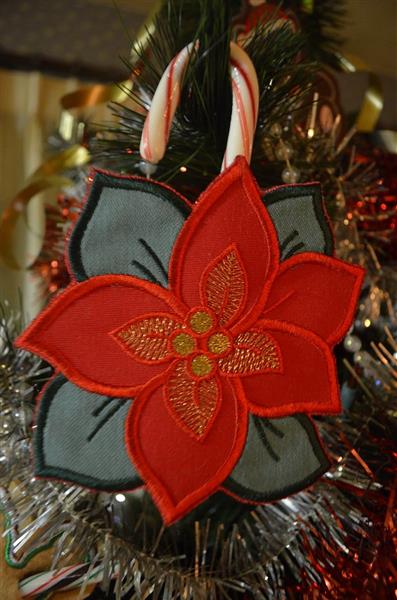
Poinsettia Hugger: This was stitched on the red fabric with green appliqué added for the leaves, and then the entire ornament was backed with red felt. Holes for the candy cane were cut prior to attaching the back to the front (as seen in Step 3). Red glitter glue was applied on the outside edge to embellish and it also hides the white cut-away stabilizer that is sandwiched between the fabric front and felt back. Note, the metallic gold thread that was used for both the berries and inside petals ran beautifully for these elements.
Step 8:
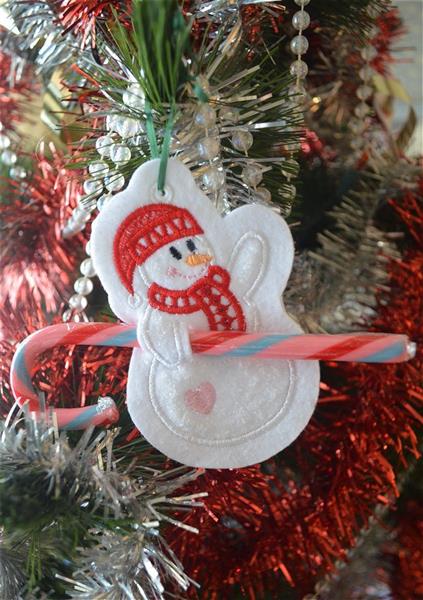
Snowman Holder: This was stitched on one piece of white felt and it has no back. After stitching I carefully snipped a hole inside the satin stitch ring at the top for the 11” long ribbon used for the hanger. I chose to leave a 3/8” wide margin around the outside to better support the area where the hole is cut at the outside of the elbow for the candy cane. A pink, red or blue felt with a white appliqué for the snowman may have been a better idea to help the snowman stand out better, so I added polar white Flower Soft particles to highlight areas of the snowman. Dots of red glitter glue were dabbed in the center of the elements of the snowman’s scarf.
(Click Image to Enlarge)
Step 9:
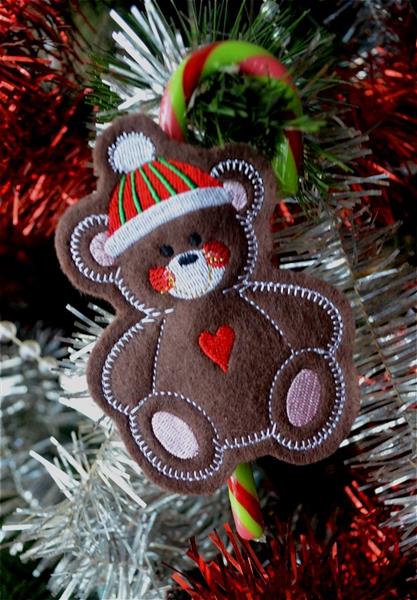
Christmas Bear Hugger: I added a back piece to this ornament because I wanted the candy to be place vertically and the embroidery wouldn’t allow cutting candy cane holes through the stabilizer. Additional embellishment didn’t appear necessary though you could add gems or glitter to the eyes for a bit of sparkle.
(Click Image to Enlarge)
Step 10:
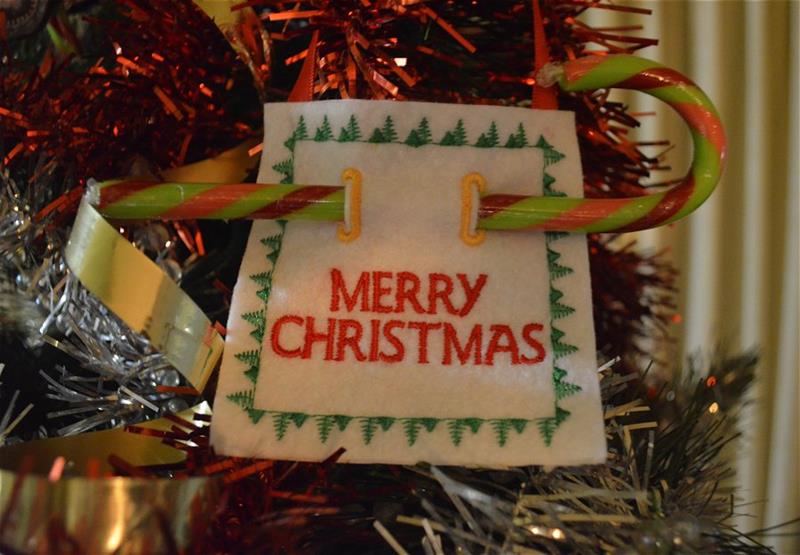
Merry Christmas Holder: This design was likely digitized with the intention of using it for a gift tag; slip a ribbon through the “button holes” to tie on a package or around a bottle of wine. Simply embroider the design, cut around the outside of the border and snip the centers of the button holes, and then attach a ribbon to hang.
(Click Image to Enlarge)
Step 11:
(Click Image to Enlarge)
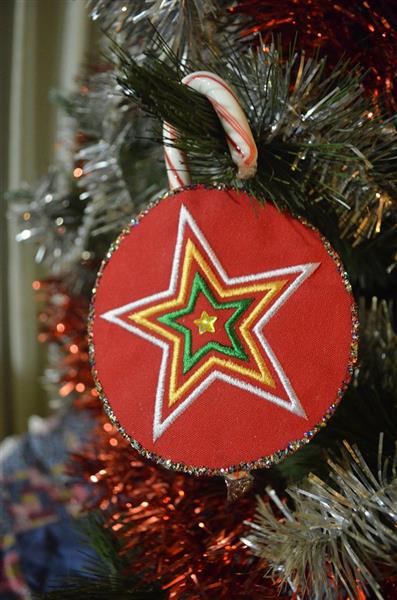
Star Hugger: I stitched the design on red fabric and cut-away and attached a red felt back with a thin line of glue at the edge. The holes for the candy cane were cut into the back prior to attaching it to the front. I used a template made from shipping cardboard to mark a circle around the embroidery. Yellow glitter glue sprinkled with dry multi-colored glitter was added around the outside edge and a stick-on star was added to the center.
Step 12:
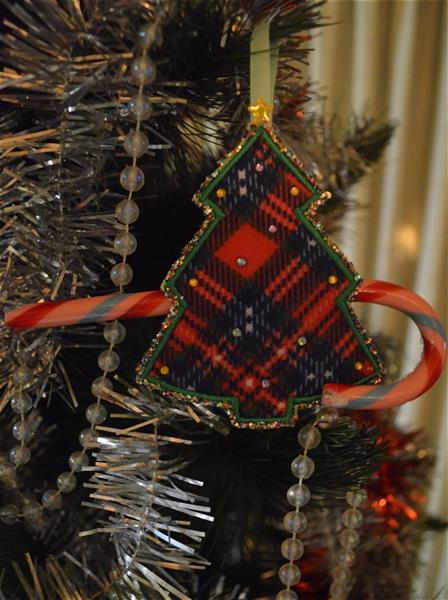
Christmas Tree Holder: White felt and cut-away were both hooped and the design was stitched as an appliqué by adding the plaid fabric after the placement line was sewn. Holes for the candy cane were cut into the stabilizer (as seen in Step 4). Yellow glitter glue with dry multi-colored glitter was added around the 1/8” margin left at the outside of the border stitches. A ribbon was tacked to the back for a holder. A stick-on star was attached to the ribbon at the top of the tree and gems glued on for added sparkle. Note, this design is pictured on the product page with the plaid running horizontally and vertically; I chose to angle the plaid to offer the illusion of garland.
(Click Image to Enlarge)
Step 13:
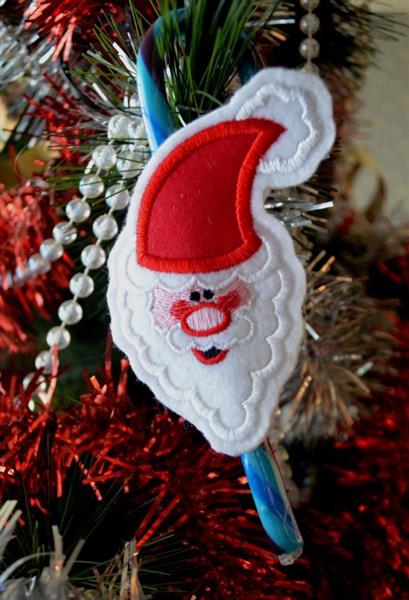
Santa Claus Hugger: This was stitched on white felt and a red appliqué piece was used for the hat. An option for this design is to also use a white piece of fabric like polar fleece for the appliqué that is digitized in this design for the beard and cap tassel. A white felt back was cut and holes cut for the candy cane about an inch apart and the back was attached to the front. No embellishment was added.
(Click Image to Enlarge)
Step 14:
(Click Image to Enlarge)
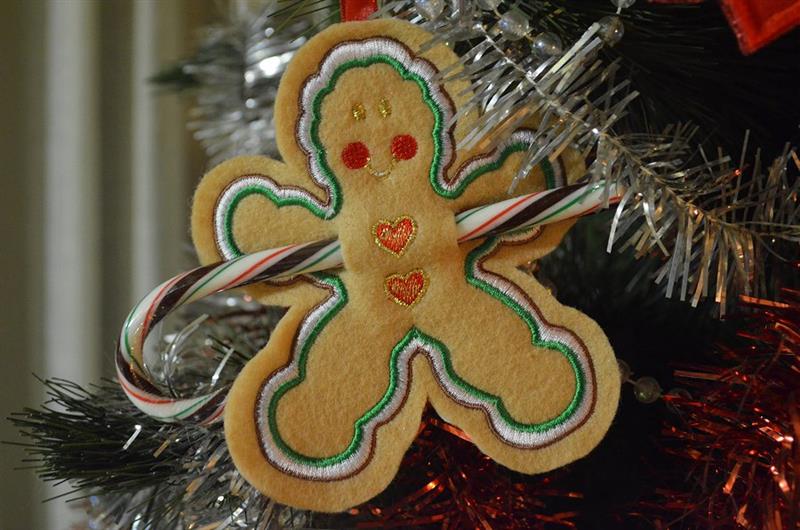
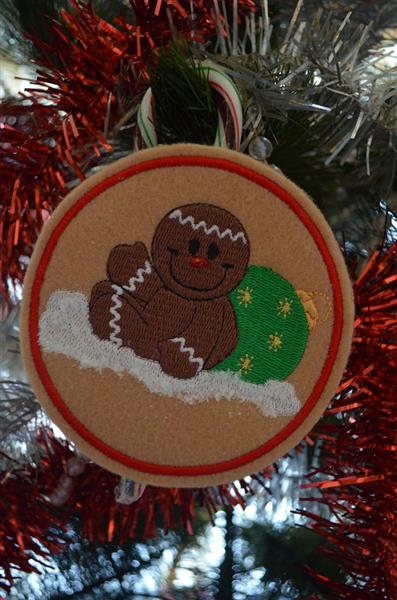
Gingerbread Man Hugger: Stitched on tan felt and a back with pre-cut candy can holes was attached with a thin line of glue at the edge after the stabilizer was trimmed away (as seen in Step 3). I chose to add polar white Flower Soft particles to the embroidered snow and a dab of red glitter glue to the nose and yellow glitter glue to the stars on the ornament.
Step 15:
(Click Image to Enlarge)
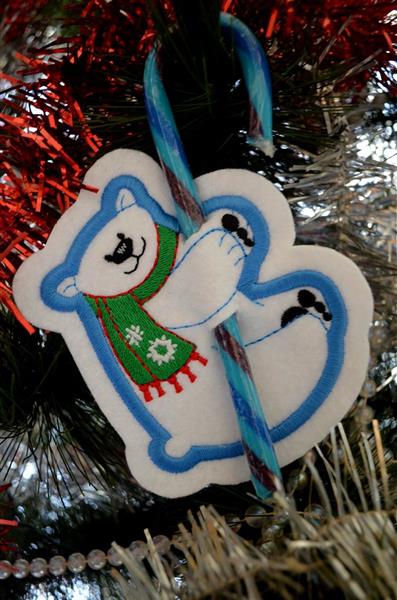
Polar Bear Hugger: This was stitched on white felt and cut-away stabilizer; no back piece was necessary. I cut a 1/4” wide margin around the design (as seen in Step 3). Holes for the candy cane were cut and no additional embellishment seemed necessary. If preferred, you could a bit of black or silver glitter to the nose and paw pads or on the scarf. You could also choose to stitch on colored felt and add an appliqué piece of white polar fleece or similar fluffy fabric for the body of the bear that was digitized for appliqué.
Bonnie Landsberger has been a crafter and hand embroiderer since childhood and a machine embroiderer and digitizer since 1986. She was the in-house head digitizer for a 50-head embroidery shop for 11 years and later offered custom digitizing services and stock design sales through her web site for Moonlight Design since 1993. She currently also holds a position as a customer service representative at EmbroideryDesigns.com.
Bonnie has won several awards for digitizing, including a gold medal in the 2002 Digitizing Olympics and grand prize in all categories & first place for Winter Holidays category in the Stitches Magazine Great Greeting Card Contest 2003.
Her embroidery and digitizing technical articles can be found in various trade magazines and she is currently a contributing writer and Editorial Advisory Board Member for Stitches Magazine. You can also find more of her articles online at EmbroideryDesigns.com and will continue to contribute articles to our Learning Center.