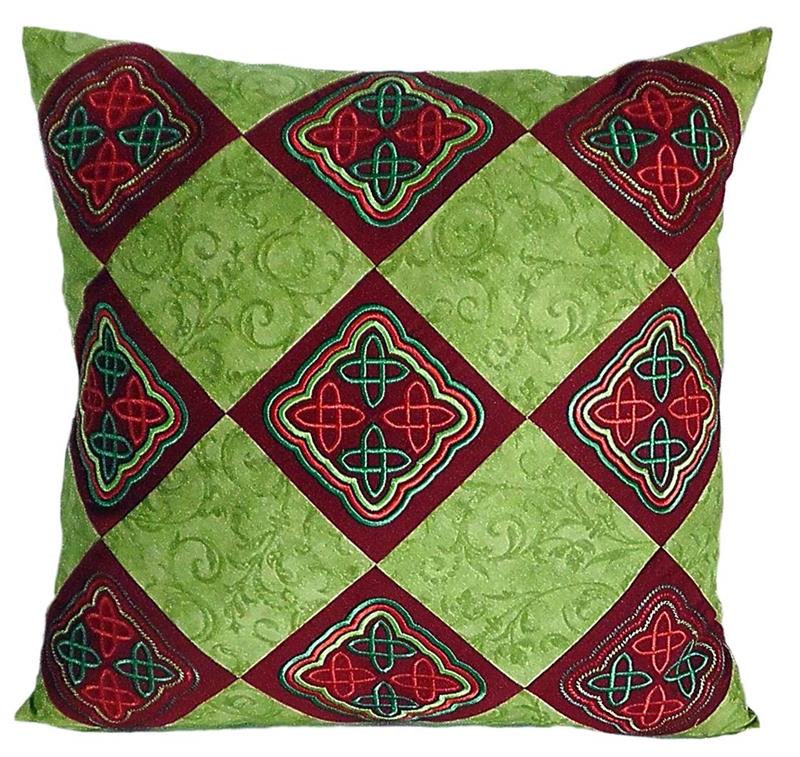
A purchased pillow forms the basis for this project. The pillow is taken apart and the stuffing set aside. The designs are stitched on the pillow fabric then cut apart to form 4 ½” squares. More squares are cut from complimentary green fabric and the embroidered squares are put together with the greens squares in a checkerboard patchwork style. After the squares are sewn into rows, the patchwork is cut to size and the pillow re-sewn and stuffed for a beautiful “Celtic Christmas Pillow”.
Step 1:
Gather the supplies and read through the instructions. Print 5 paper templates of design “Celtic Knots” and 4 paper templates of design “Celtic Christmas”.
(Click Image to Enlarge)
Step 2:
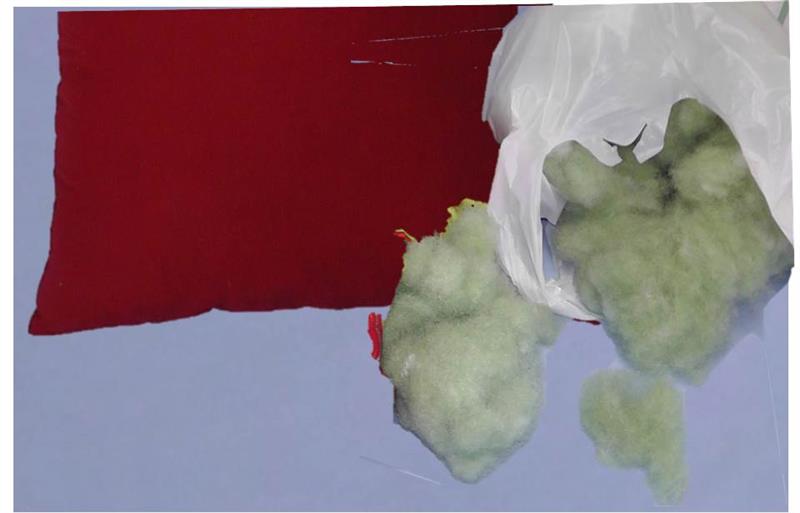
Open up one of the seams in the pillow and remove the fiberfil and place it in a bag.
(Click Image to Enlarge)
Step 3:
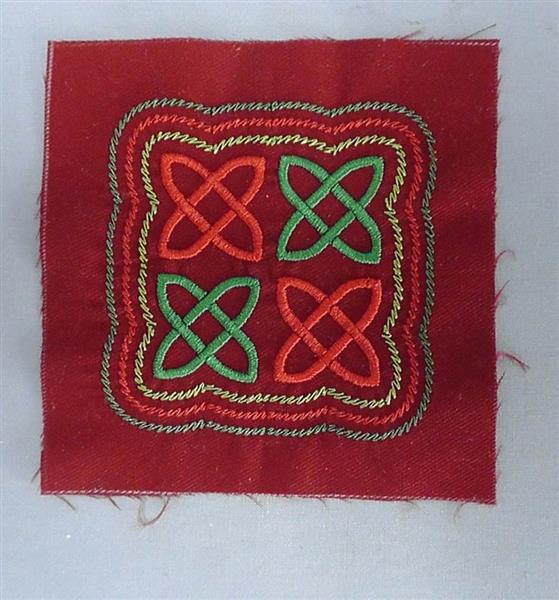
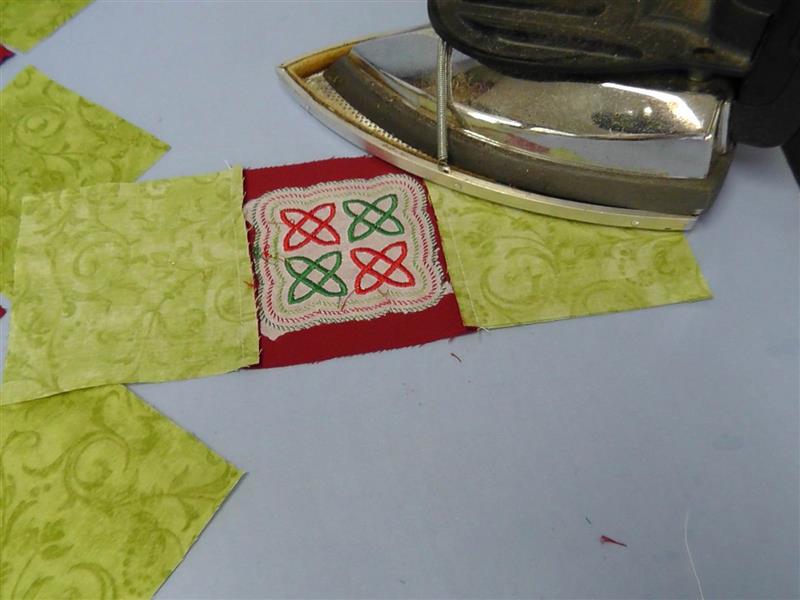
Press both the front and back fabric pieces. Set aside the back fabric until it is needed for re-assembling the pillow. Place paper templates on the pillow front fabric, spacing them evenly. The designs will be stitched and then cut apart with a seam allowance. Stitch the designs with tearaway stabilizer as they are laid out on the fabric. After stitching each design, remove the excess stabilizer.
(Click Image to Enlarge)
Step 4:
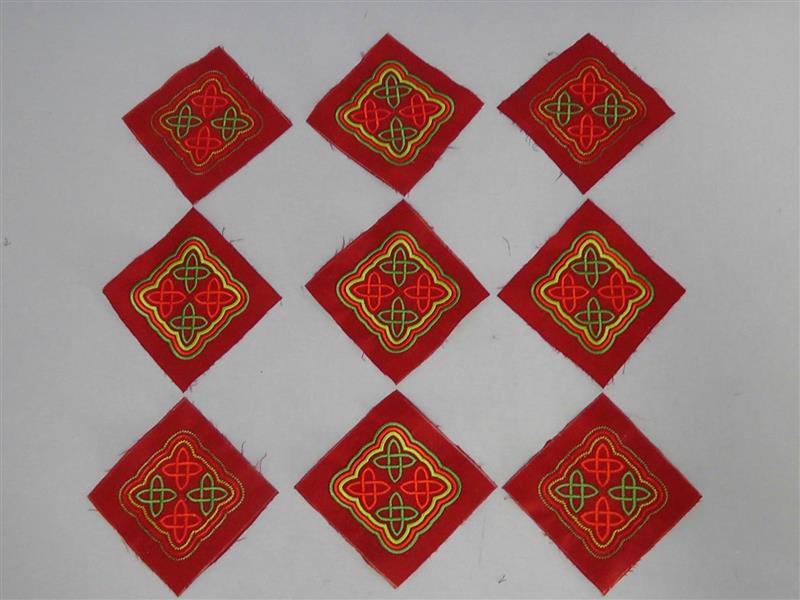
Using the outer most stitching lines as a guide, along all four sides mark ½” away from the stitching line squaring up each design. Each square should measure 4 ½” square.
(Click Image to Enlarge)
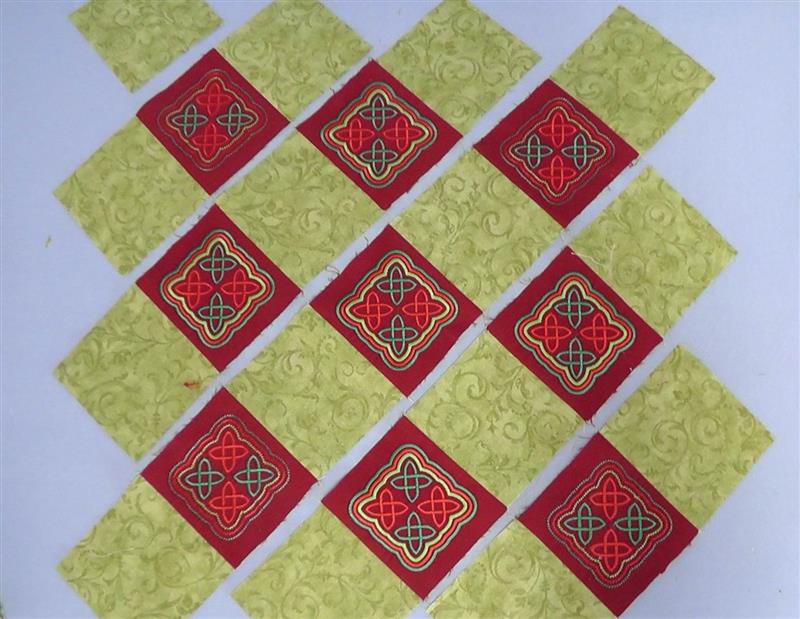
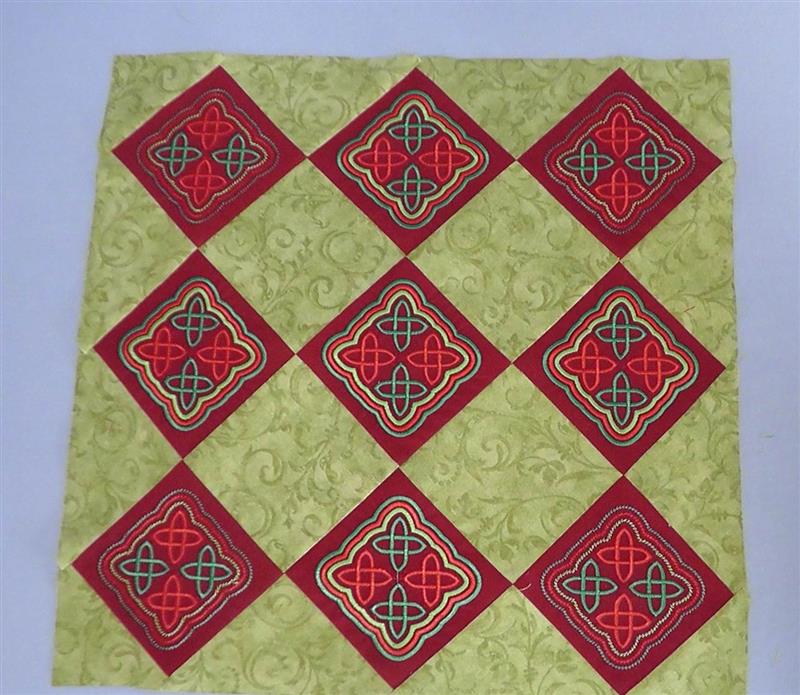
Step 5:
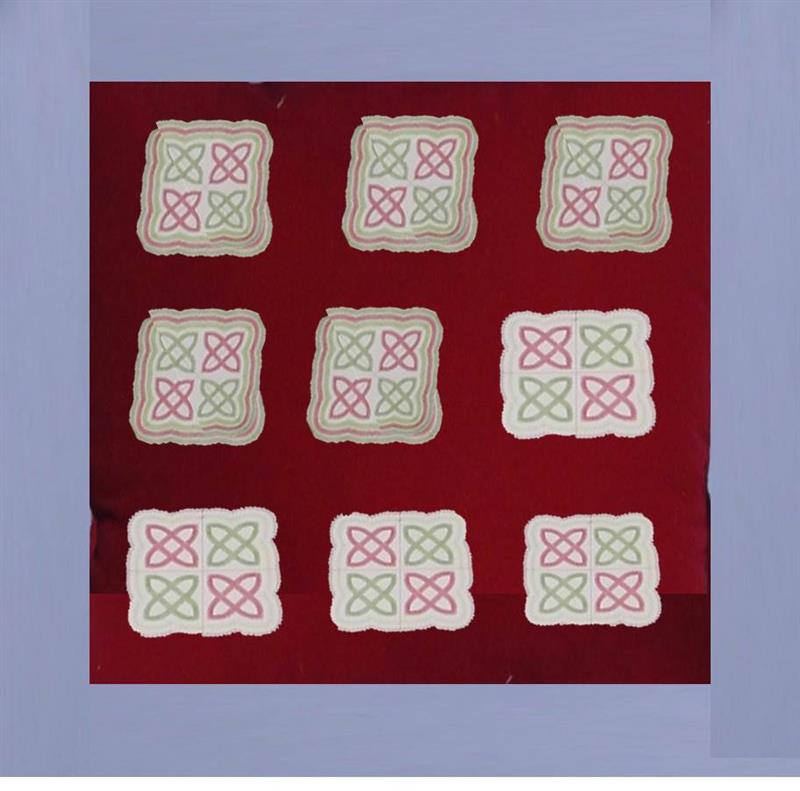
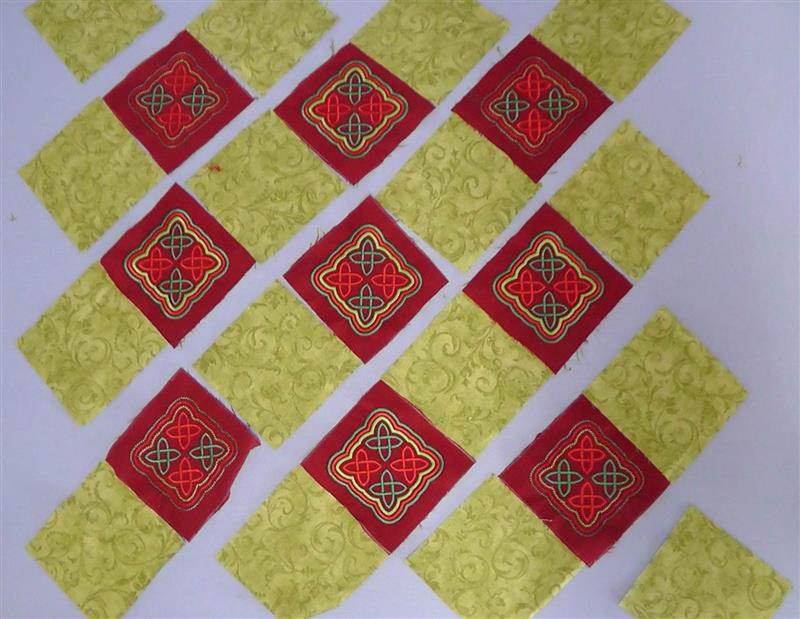
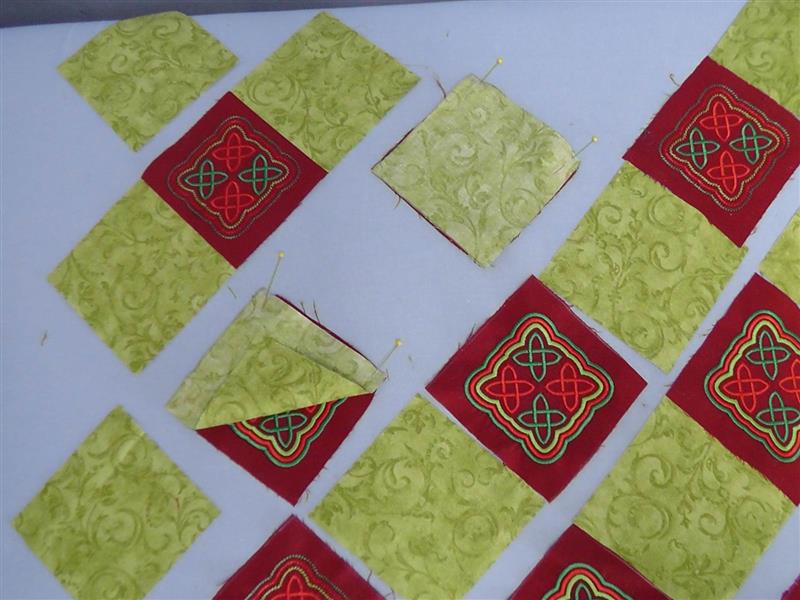
The designs will be laid out like this, by alternating the designs having the “Celtic Knot” in the center of the top and bottom rows and all of the middle row, having the green of the knot at the top. The four “Celtic Christmas” blocks will be in the four outer most corners; place the red knot at the top of each square.
(Click Image to Enlarge)
Step 6:
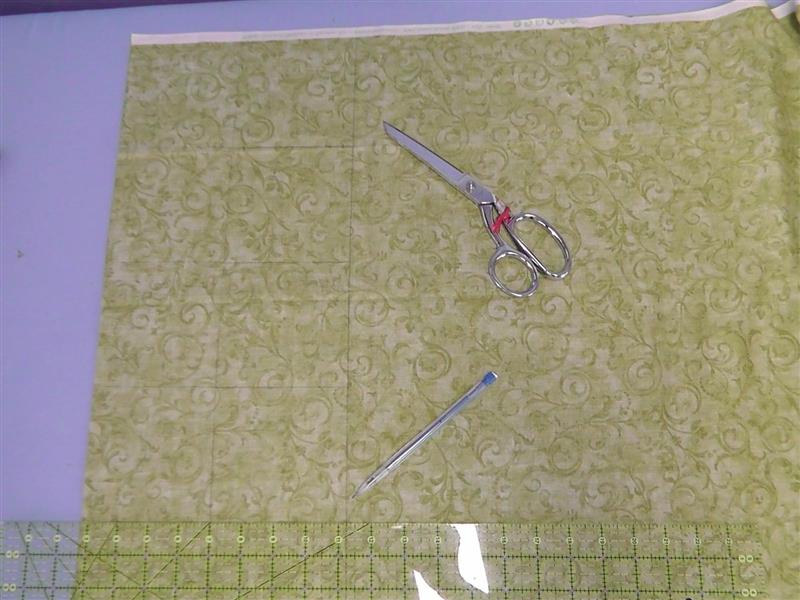
Mark and draw 16- 4 ½” squares on the back side of the green fabric; cut out the squares.
(Click Image to Enlarge)
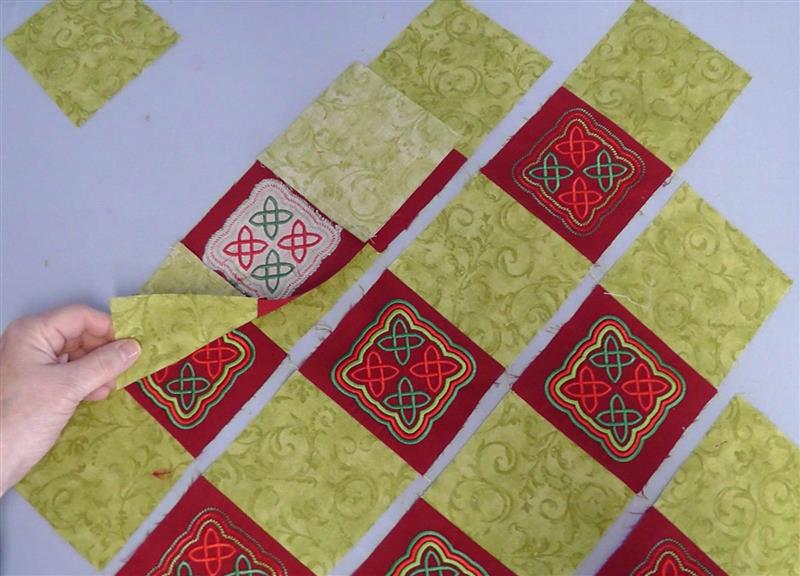
Step 7:
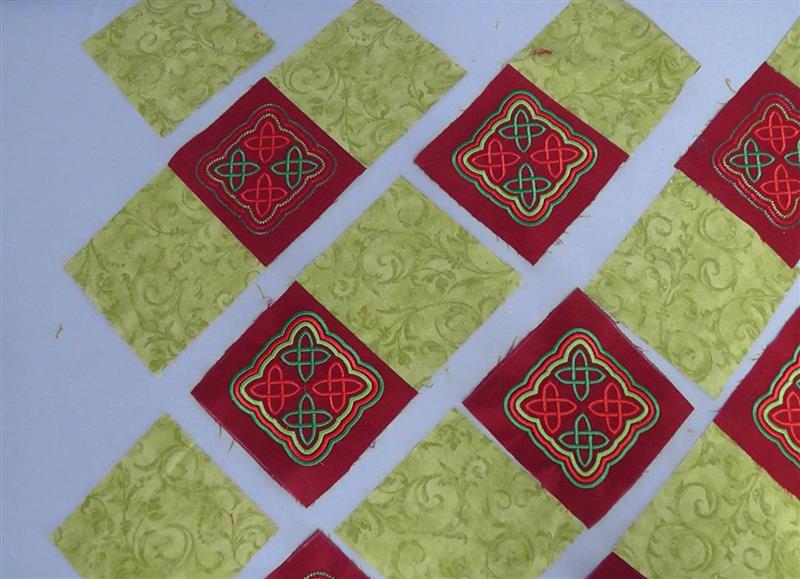
Lay the green squares right side up in the alternating squares next to the embroidered squares as shown.
(Click Image to Enlarge)
Step 8:
Now the squares will be sewn together to create rows and then the rows sewn together to complete the pillow top.
(Click Image to Enlarge)
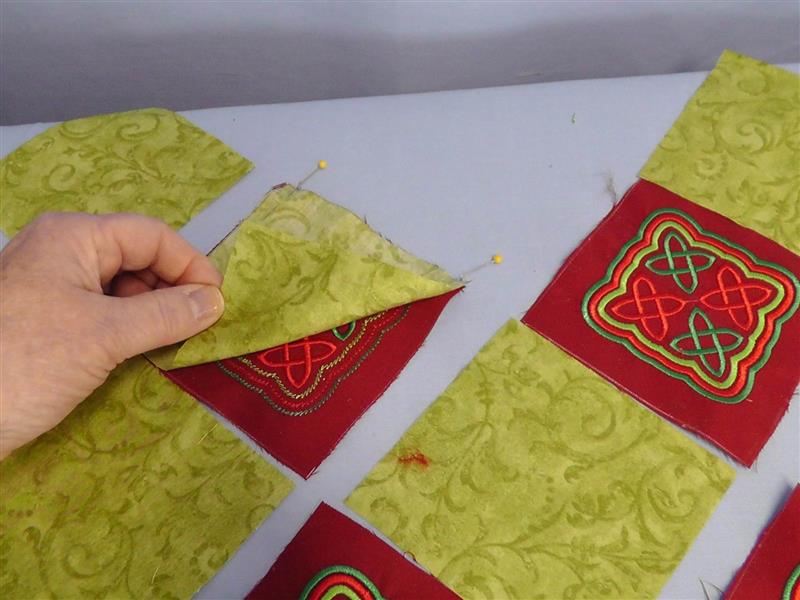
Step 9:
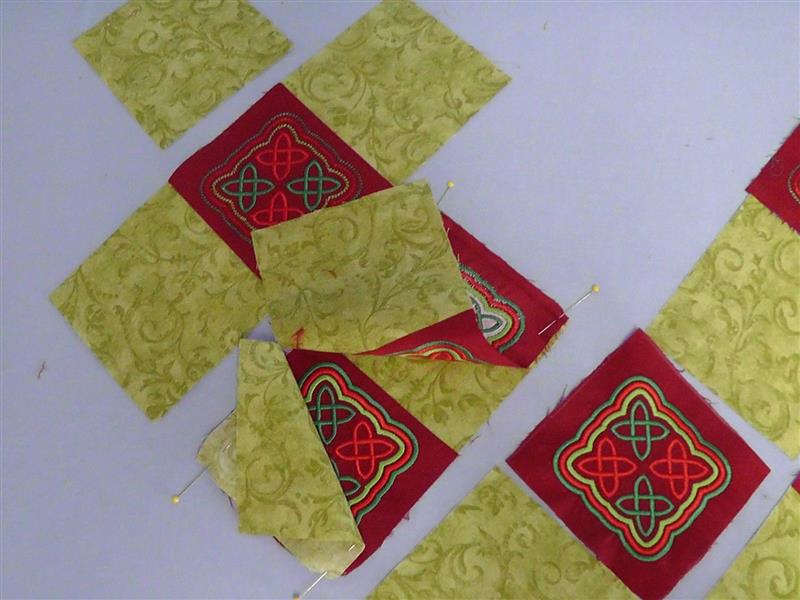
Beginning with the first embroidered square, place the right green square right side together on top of the embroidered square and pin in place.
(Click Image to Enlarge)
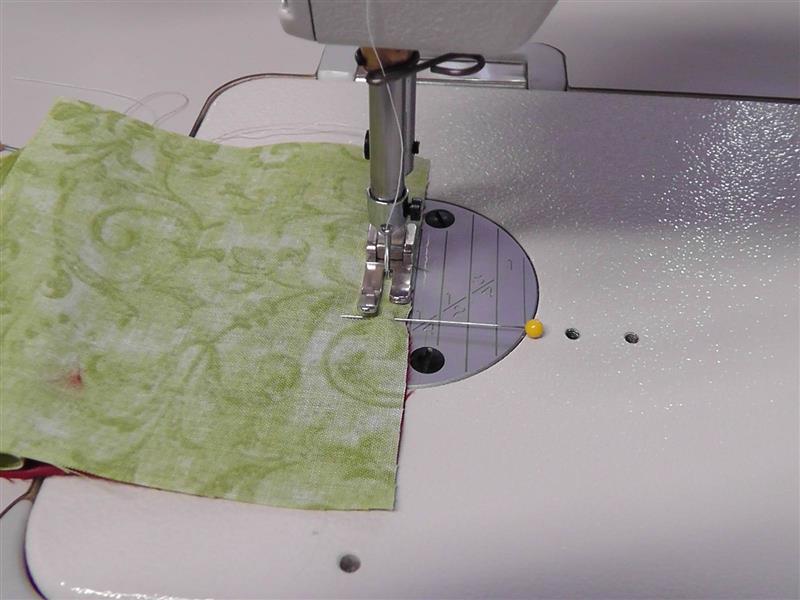
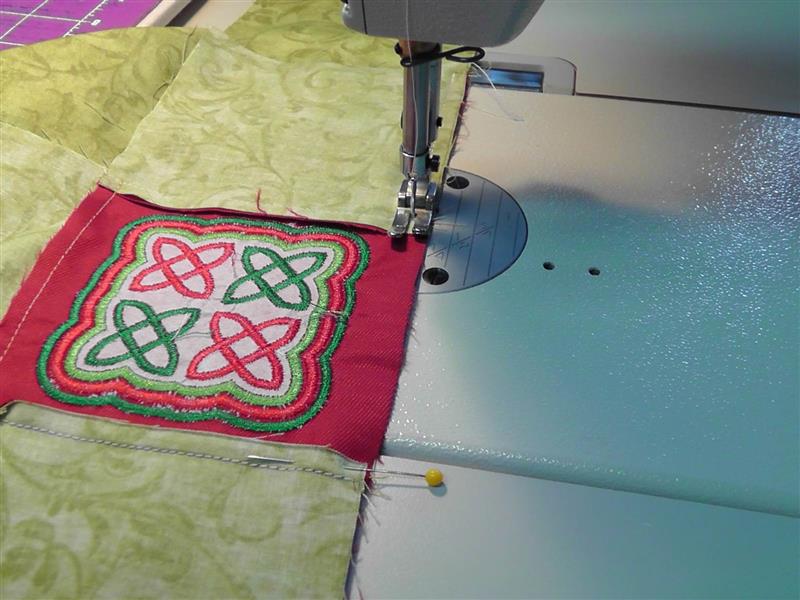
Step 10:
Sew the squares together using a ¼” seam allowance. Repeat for the remaining green square in that row.
(Click Image to Enlarge)
Step 11:
Press the seams toward the embroidered square. Place this row back in place until needed.
(Click Image to Enlarge)
Step 12:
In the second row, place the green squares right sides together on top of its adjoining embroidered square and pin in place.
(Click Image to Enlarge)
Step 13:
Sew the seam and press toward the embroidered squares.
(Click Image to Enlarge)
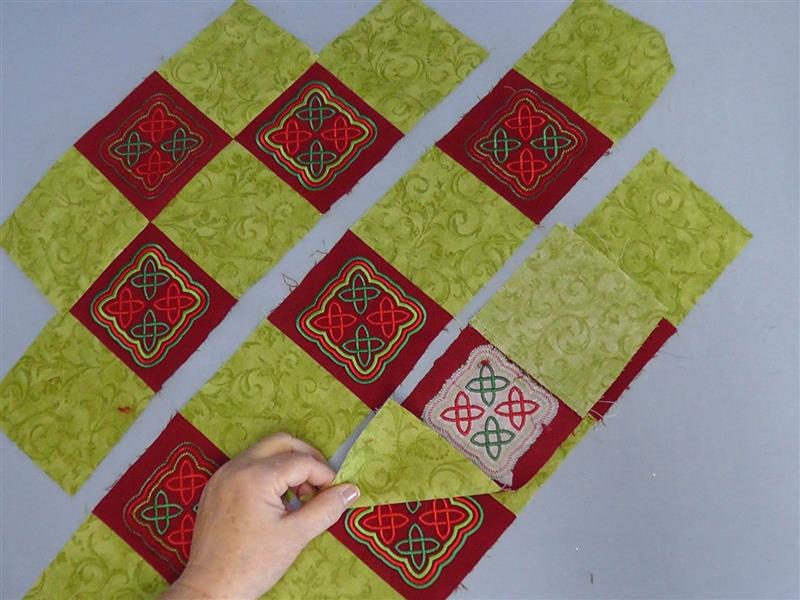
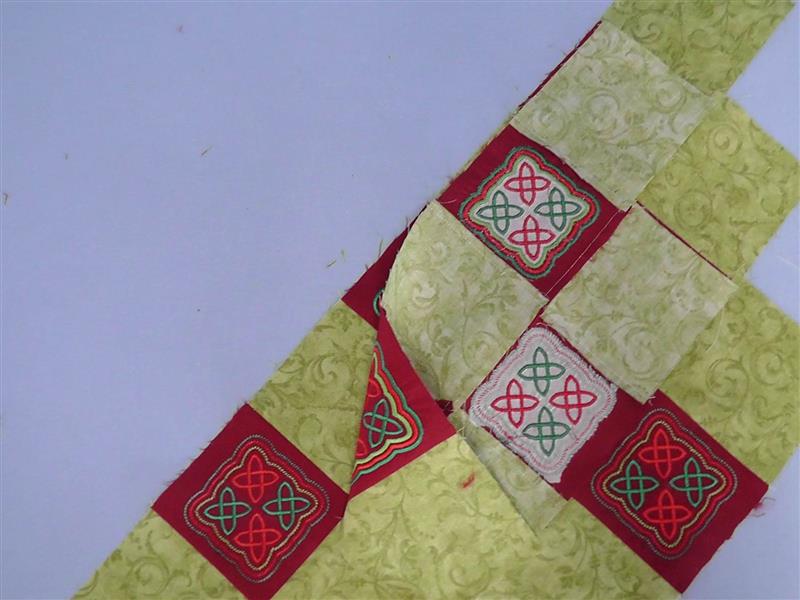
Step 14:
Place the remaining green square to its adjoining embroidered square and also pin the middle embroidered square to the green square it adjoined. Sew the seam and press the seams toward the embroidered squares.
(Click Image to Enlarge)
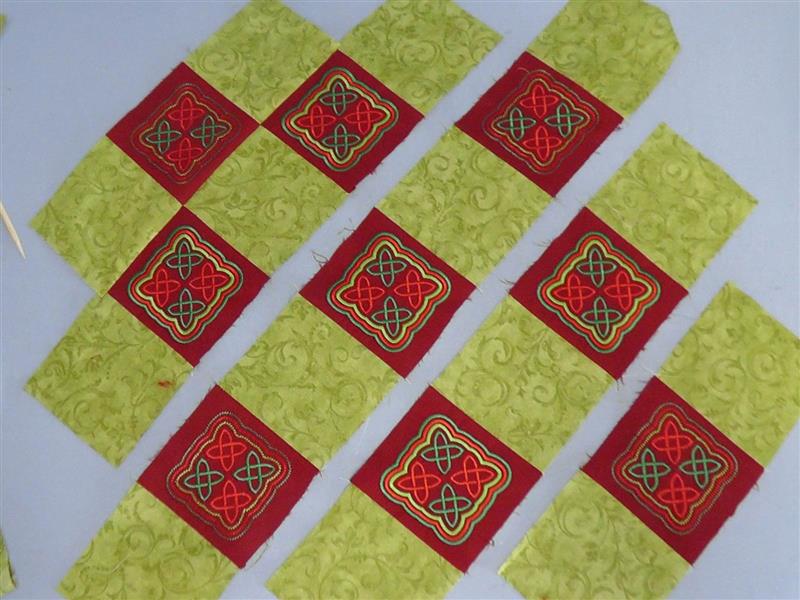
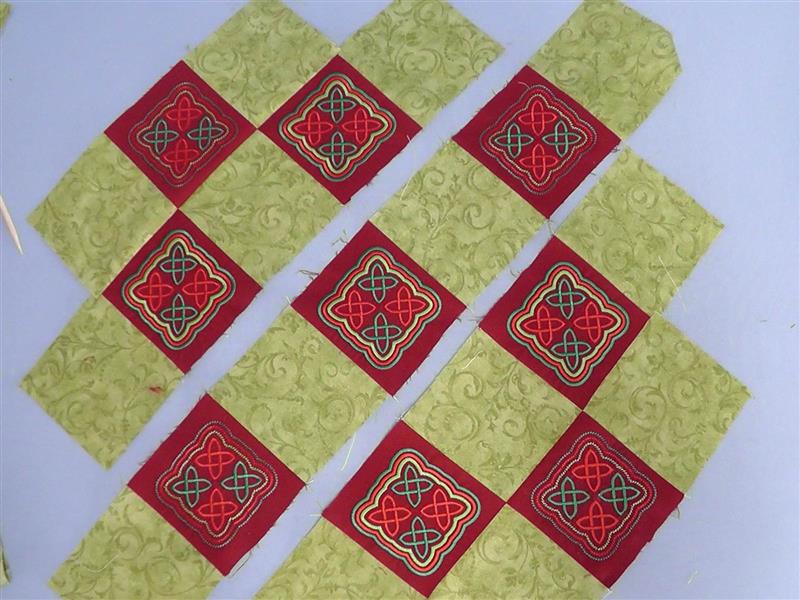
Step 15:
Repeat until all the rows are completed.
(Click Image to Enlarge)
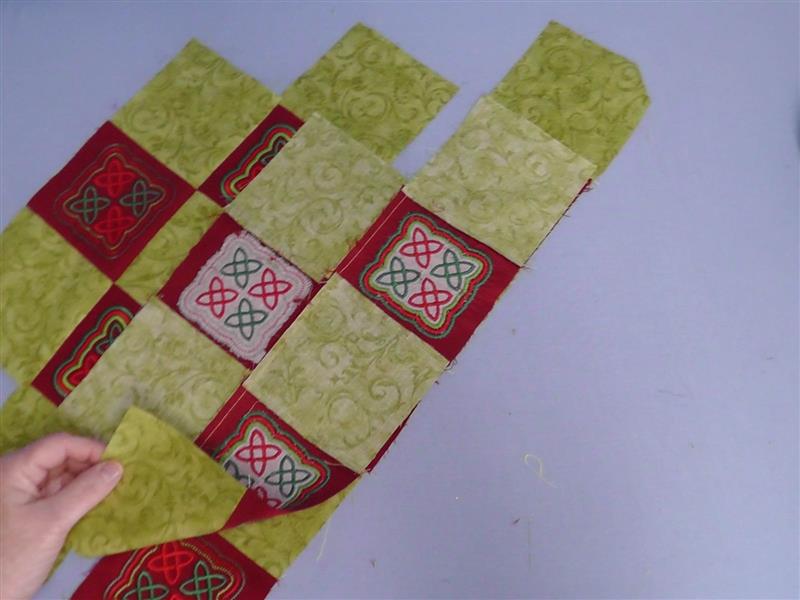
Step 16:
Now sew the adjoining rows together. Lay row one on top of row two.
(Click Image to Enlarge)
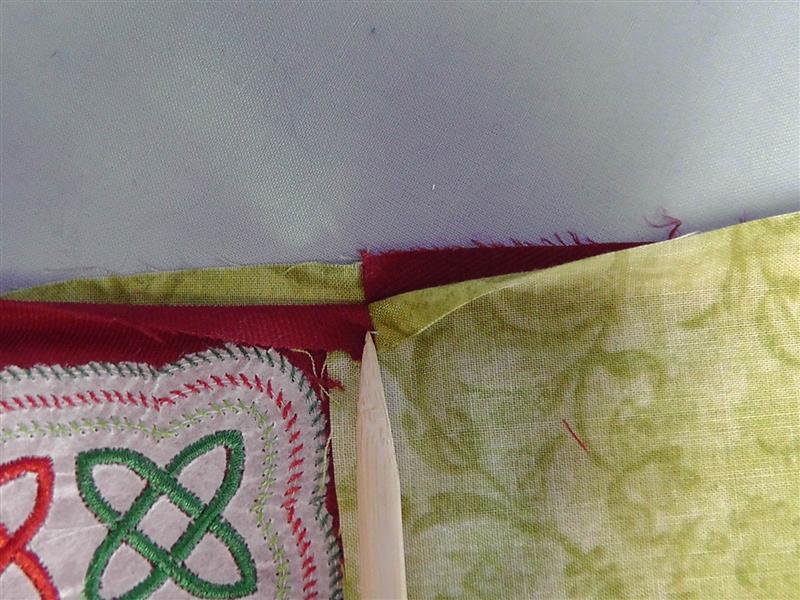
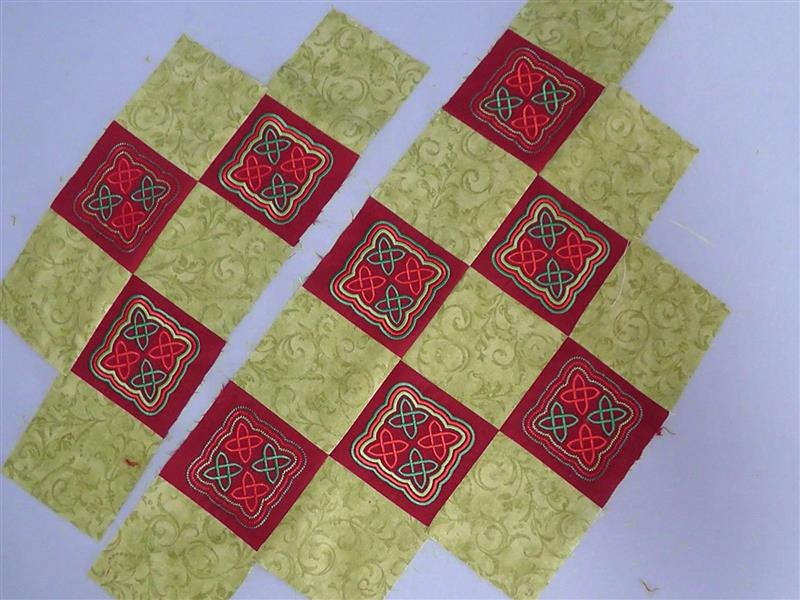
Step 17:
Be sure that the seams interlock. Pin row one to row two.
(Click Image to Enlarge)
Step 18:
Sew the seam and press the seam toward the short row.
(Click Image to Enlarge)
Step 19:
Lay the bottom most row on top of the one above it, matching seams.
(Click Image to Enlarge)
Step 20:
Pin, sew and press the seam toward the shorter row.
(Click Image to Enlarge)
Step 21:
Lay the bottom two rows on top of the middle row as shown.
(Click Image to Enlarge)
Step 22:
Pin, sew and press that seam.
(Click Image to Enlarge)
Step 23:
Lay the top section on top of the middle row.
(Click Image to Enlarge)
Step 24:
Pin and sew the seam. Press the seams.
(Click Image to Enlarge)
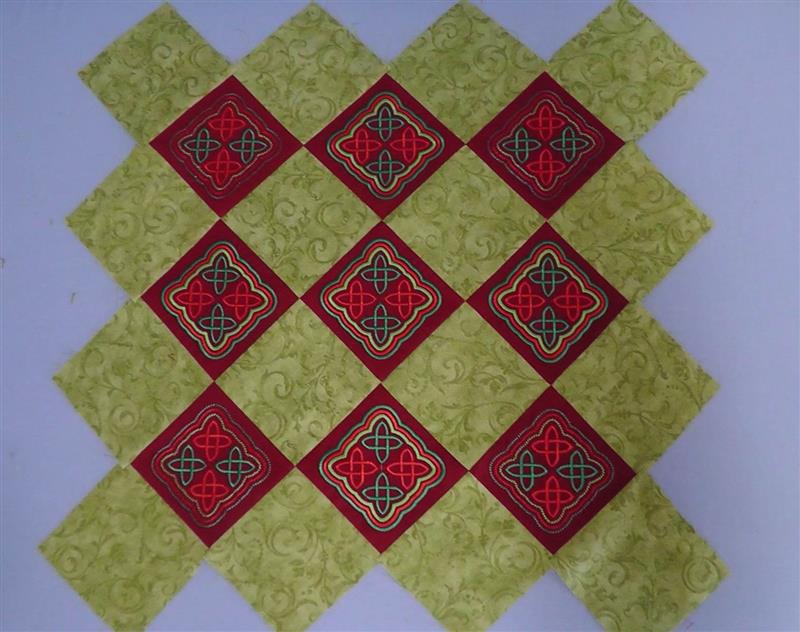
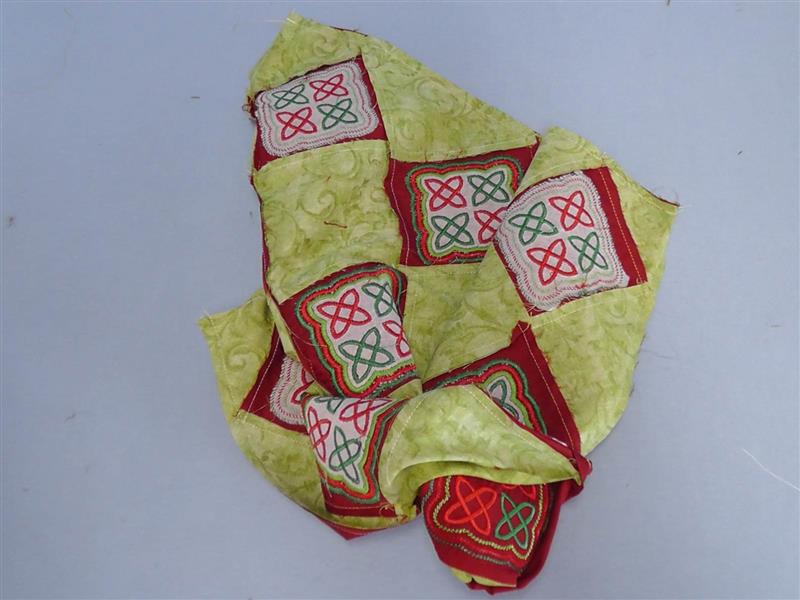
Step 25:
Pin and sew the outer most green squares to the middle of the top and bottom embroidered squares. Press the seams. The pillow top should now look like this.
(Click Image to Enlarge)
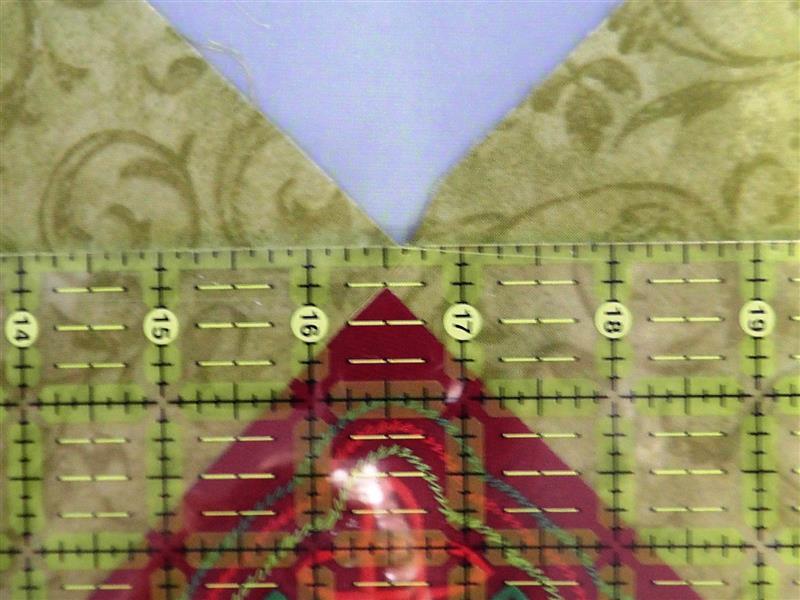
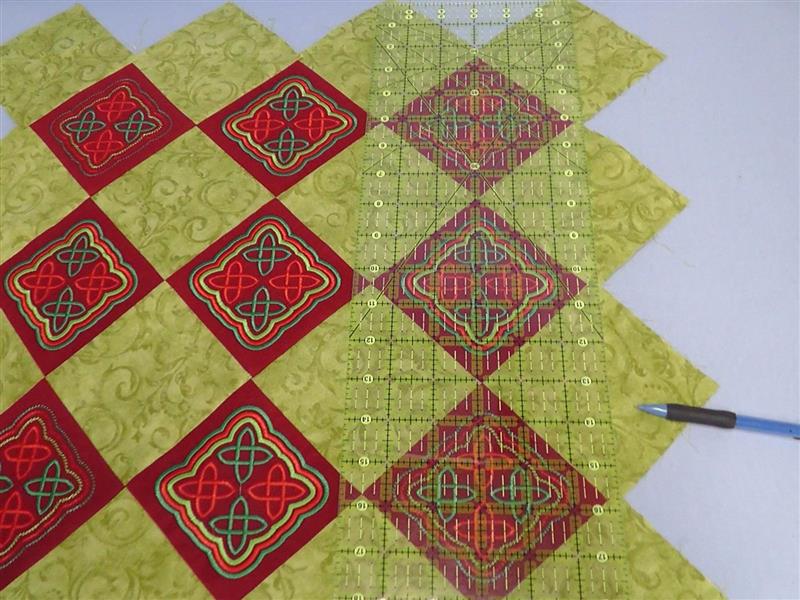
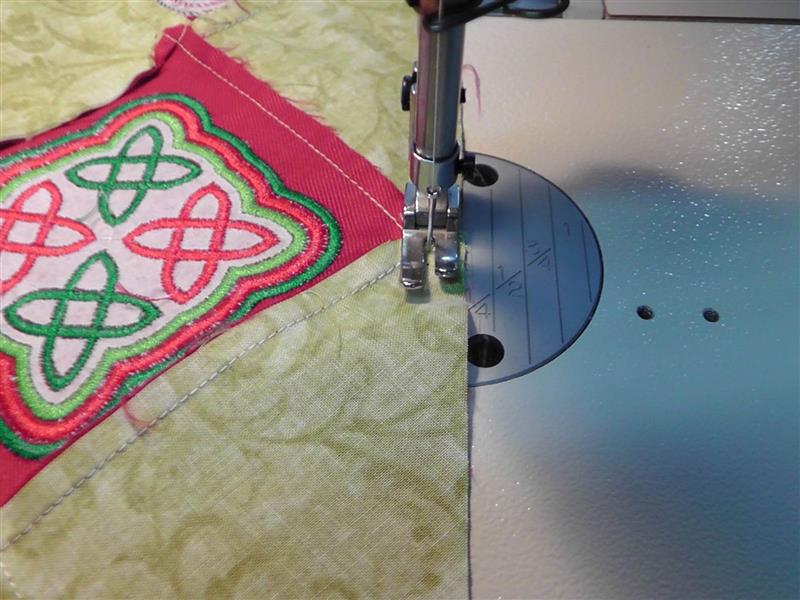
Step 26:
Using a see-through ruler (a quilting ruler), align the point of the tips of the embroidered blocks to the ¼” mark on the ruler.
(Click Image to Enlarge)
Step 27:
Draw a line. This will create a straight pillow edge.
(Click Image to Enlarge)
Step 28:
Cut along the line. There will be a ¼” seam allowance created.
(Click Image to Enlarge)
Step 29:
Repeat the process of carefully marking and cutting the remaining three sides.
(Click Image to Enlarge)
Step 30:
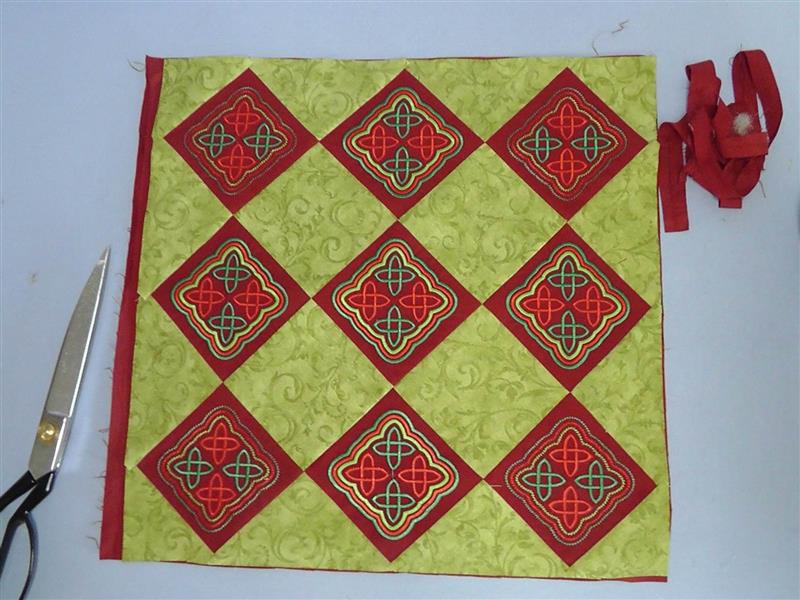
Place the pillow top over the back pillow fabric piece. Pin them together and cut the back pillow fabric piece to match the pillow top piece.
(Click Image to Enlarge)
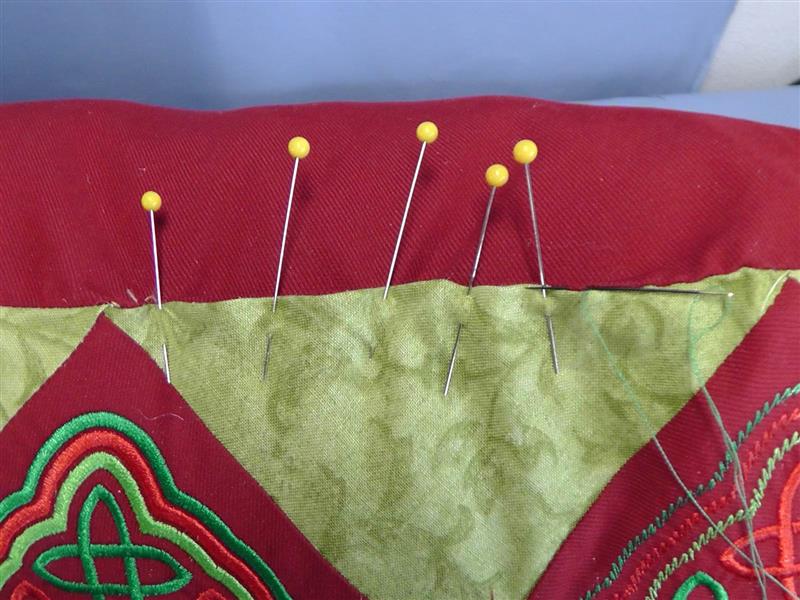
Step 31:
Pin the pillow top to the pillow back placing right sides together. Sewing will be done using a ¼” seam allowance. The stitching line should fall just outside the point of the intersecting seams as indicated by the pin. This will leave just enough fabric to allow for the “turn of the cloth” and when the pillow is turned right side out, there will be perfect points at the seamline.
(Click Image to Enlarge)
Step 32:
Sew the pillow top to the pillow back with a ¼” seam. Leave an opening on one of the green squares for turning.
(Click Image to Enlarge)
Step 33:
Turn the pillow right side out through the opening; form the corners.
(Click Image to Enlarge)
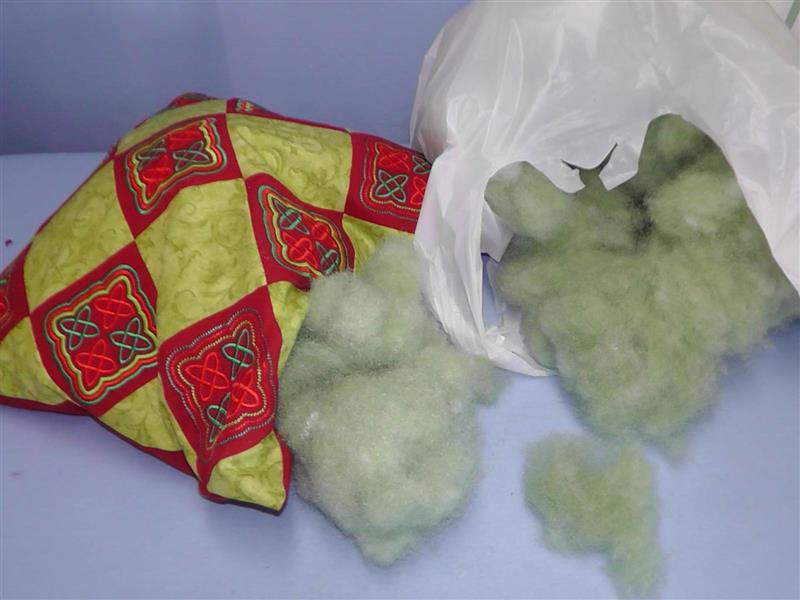
Step 34:
Stuff the pillow with the fiberfil that was removed from the original pillow.
(Click Image to Enlarge)
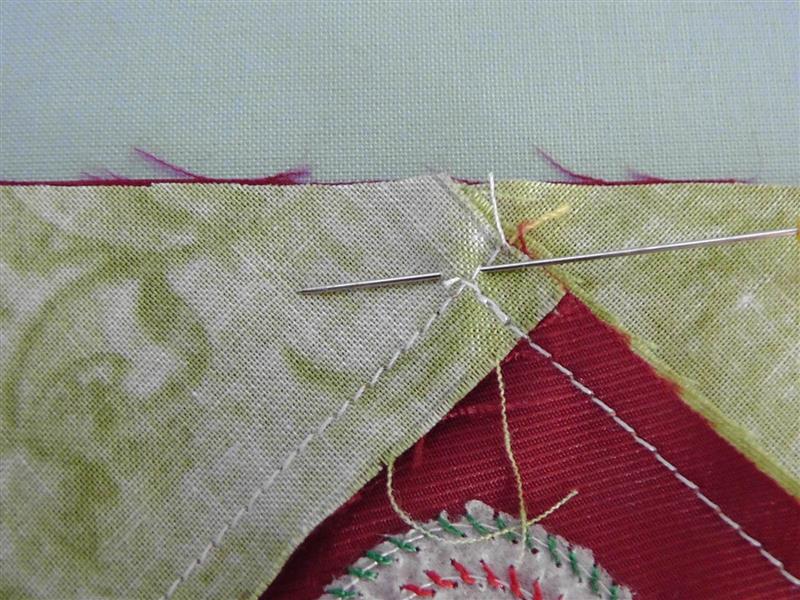
Step 35:
Turn back the ¼” seam allowance at the opening, pin and then hand sew the opening closed.
(Click Image to Enlarge)
Step 36:
Congratulations on completing the “Celtic Christmas Pillow”. Enjoy the compliments!
Ramona Baird has been in the embroidery industry for over 23 years. She and her husband owned a commercial and retail embroidery store in Arizona for many years. She is an experienced digitizer having been mentored by award-winners Pat Williams and Lindee Goodall. Ramona is a contributor to “Creative Machine Embroidery” magazine having 5 covers to her credit. Ramona has worked for Wilcom America and served many years as Education Director for the American Sewing Guild. With a degree in fashion design, she is able to design and execute patterns which Pat Williams says are “out of the box” in creativity and application. Ramona likes to challenge the boundaries of embroidery and bring new and exciting designs, ideas, and projects to EmbroideryDesigns.com. She wants embroiderers of all levels to increase their skills and enjoyment in using their embroidery machine for gift-making and personal pleasure.