Everything that is old is new again. A few years ago pre-cutting appliques was the only method used for creating appliques for embroidery. Then the Stitch N’ Trim method become the most popular way of creating appliques. Now with the popularity of cutting machines, such as the Brother Scan N Cut, pre-cutting appliques is a hot item again. When you purchase a design specifically designed for pre-cut appliques you receive the design files as well as a file, or files, depending on how many applique pieces are needed, that will start with OL or DL to indicate that they are outline or die line files that are used to create templates for cutting the applique pieces.
Step 1:
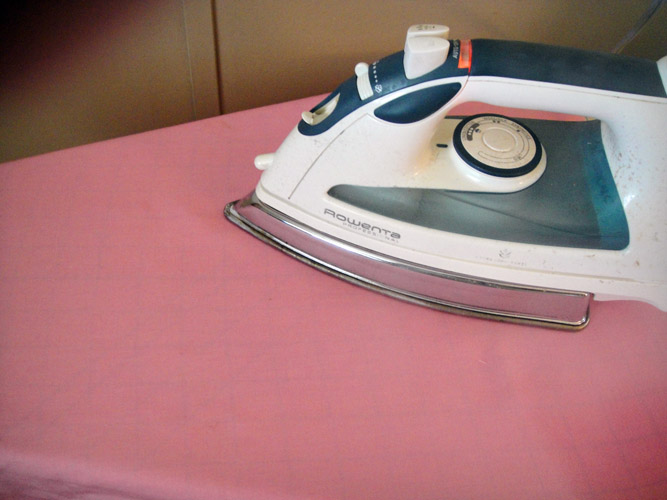
Before you explore the various ways of cutting your pre-cut applique pieces you will prepare your fabric by washing it and then ironing it with spray sizing such as Magic Sizing or Best Press. Spray the fabric and press 3 or 4 times to make the fabric extra crisp. This will minimize fraying during the cutting and application process.
(Click Image to Enlarge)
Step 2:
Following the manufacturer’s instructions apply the fusible applique backing to the applique fabric.
(Click Image to Enlarge)
Step 3:
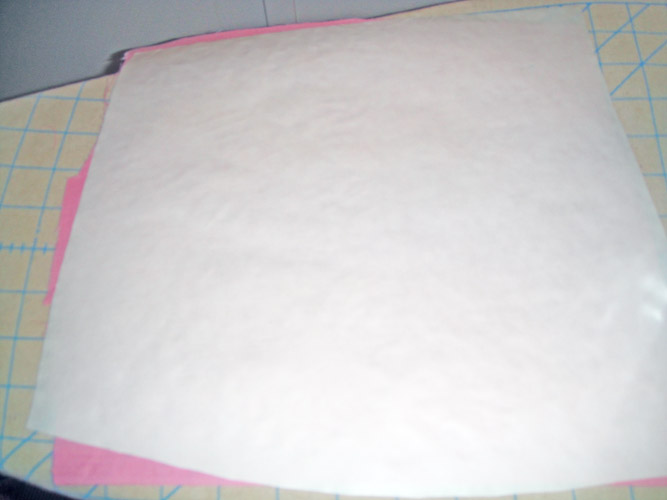
Following the manufacturer’s instructions apply fusible tear away to the back of your back ground fabric. Excuse the white tear away on the white background material here.
(Click Image to Enlarge)
Step 4:
(Click Image to Enlarge)
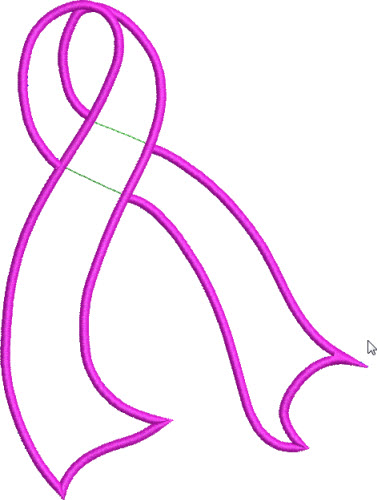
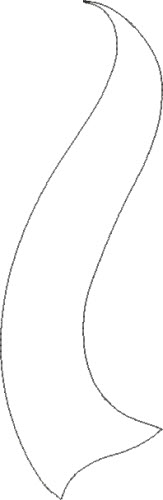
When you purchase the Yellow Ribbon Applique file you receive three files. The first BH001 is the design file.
Step 5:
(Click Image to Enlarge)
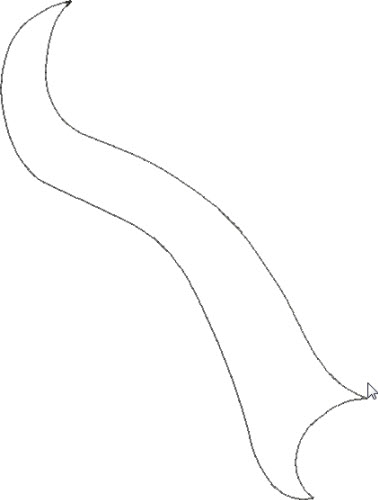
OLBH001A is the Outline file for the 1st applique piece.
Step 6:
(Click Image to Enlarge)
OLBH001B is the Outline file for the 2nd applique piece. The outline files are used in various ways to pre-cut the applique pieces.
Step 7:
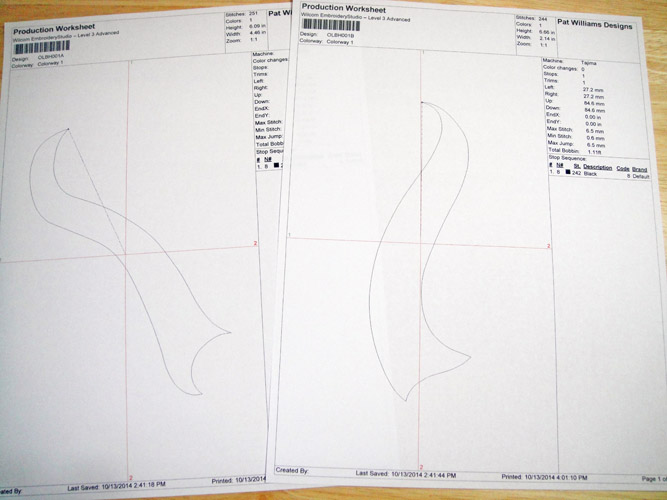
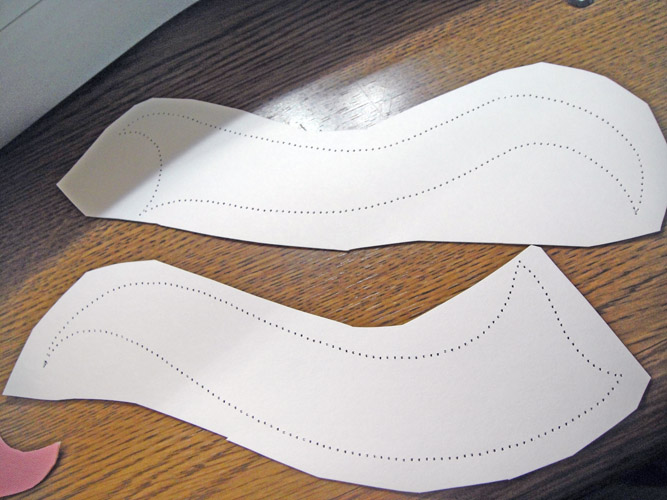
Method 1 is used if you have embroidery software. Load the outline files into your embroidery software and print out design sheets.
(Click Image to Enlarge)
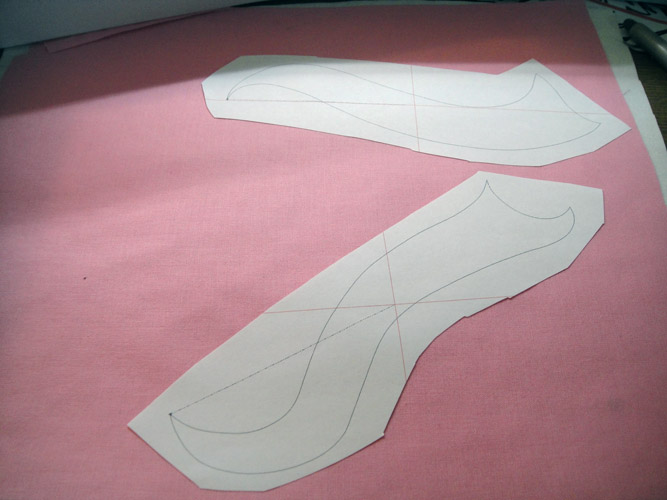
Step 8:
Roughly cut the printed pieces from the design sheet. Spray with adhesive spray and place the paper pieces on top of your prepared applique fabric.
(Click Image to Enlarge)
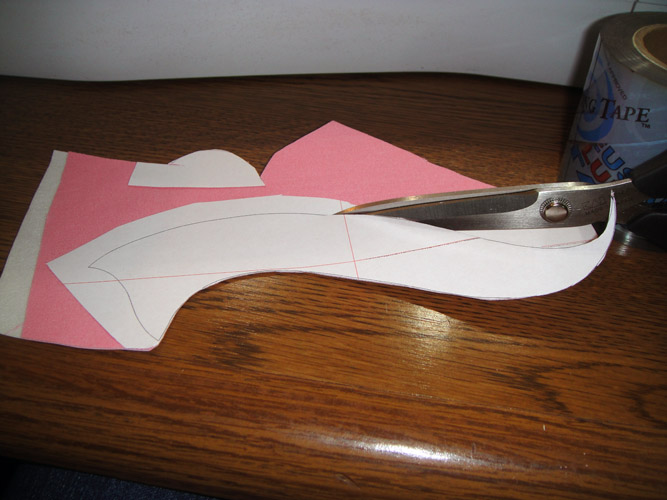
Step 9:
Cut the applique from the fabric using the lines on the printed paper.
(Click Image to Enlarge)
Step 10:
Method 2 is used if you do not have embroidery software to print the template. Load the outline file OLBH001A into your machine. Hoop two pieces of copy paper in your embroidery hoop. Turn off the thread sensors in your embroidery machine and without thread in the top of the machine and stitch the design. Repeat for OLBH001B. You now have perforated the outline into the paper. Roughly cut out these templates. Spray them with adhesive spray and place them on top of your prepared applique fabric. Cut out the appliques along the perforated lines.
(Click Image to Enlarge)
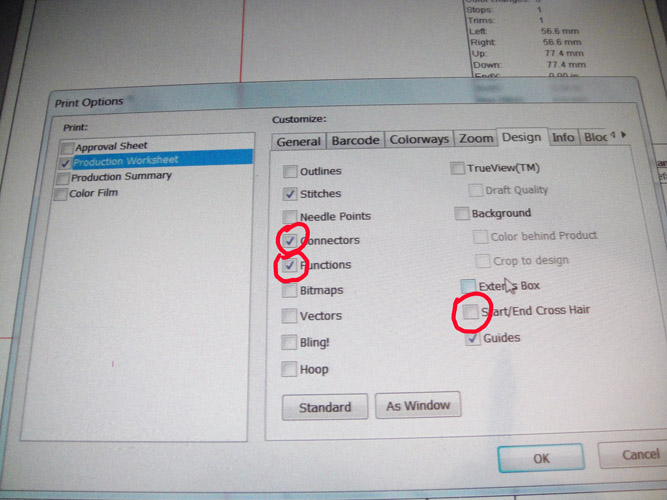
Step 11:
Method 3 is for Scan N Cut owners. Before printing the Outline files, go into your Print options in your embroidery software. Turn off the options that print the cross hairs on your design sheet as well as those that print functions and connectors so that only the stitch outline will print. Note: If you like to place your fabric with the fusible web side up on your mat; mirror image the outline files before printing. If you like to place your fabric with the fusible web side down on your mat leave the outline files in their original position for printing.
(Click Image to Enlarge)
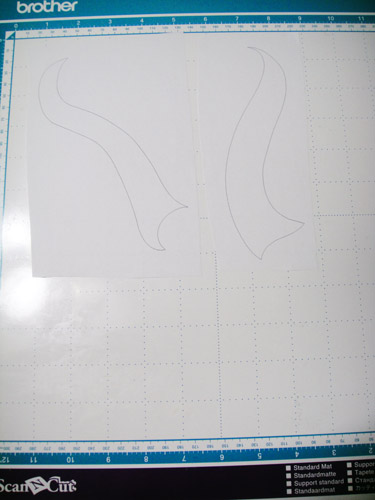
Step 12:
(Click Image to Enlarge)
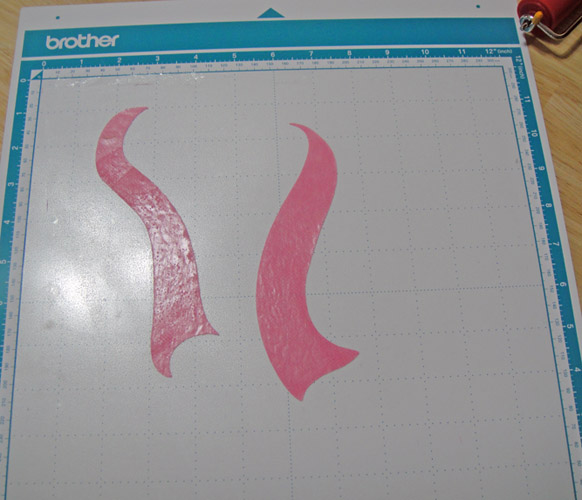
Cut rectangles around the printed applique pieces and place on your standard mat.
Step 13:
Load the fabric support sheet and the prepared fabric on to your mat.
(Click Image to Enlarge)
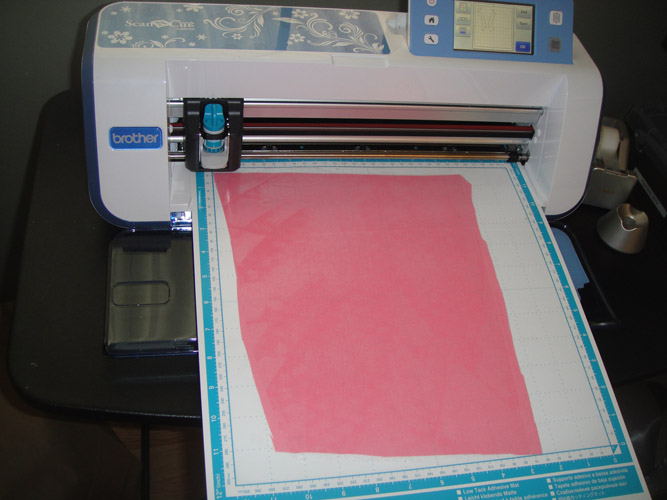
Step 14:
Follow the Scan N Cut instructions to set your settings and cut the applique pieces.
(Click Image to Enlarge)
Step 15:
Now that your applique pieces are pre-cut the instructions for using them are all the same.
Step 16:
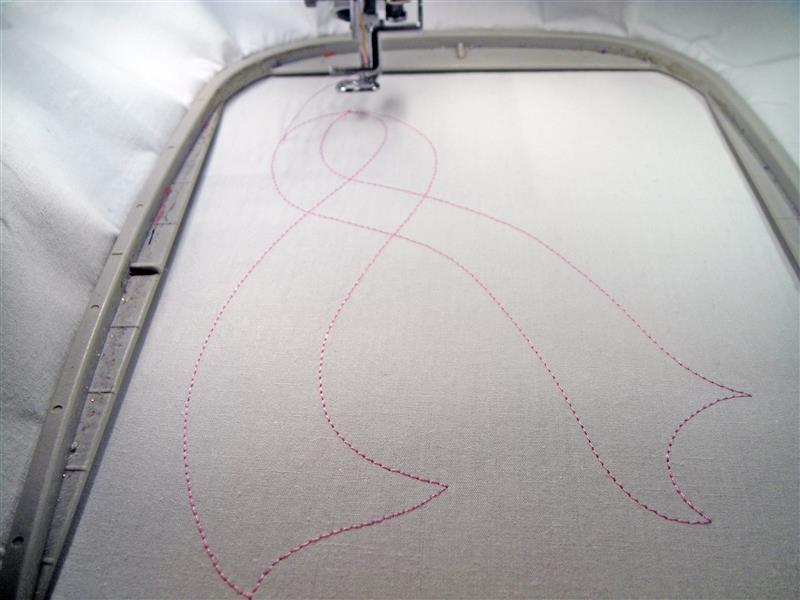
Load the file BH001 into your embroidery machine. Hoop your prepared background fabric and run the first color sequence which is the outline stitch.
(Click Image to Enlarge)
Step 17:
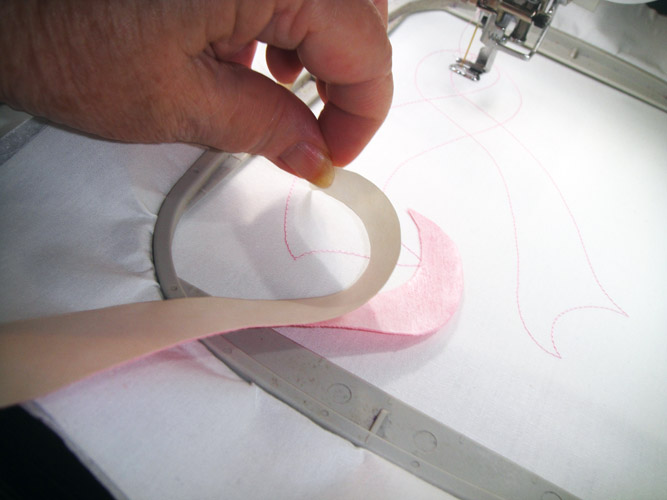
Remove the paper from the fusible web from the 1st applique piece and position it directly over the outlines. The first applique covers the left side of the loop of the ribbon with its tail swinging to the right side of the design. Finger press into place.
(Click Image to Enlarge)
Step 18:
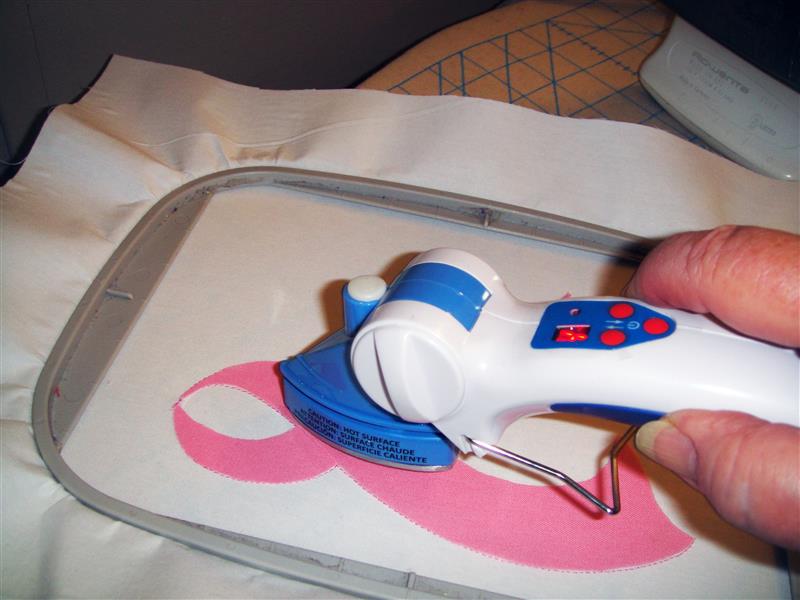
Remove the paper from the second applique piece and place over the remaining outlines crossing over the first applique. Using an applique iron securely fuse the appliques to the background fabric.
(Click Image to Enlarge)
Step 19:
Stitch the second color sequence to stitch the zigzag tack down stitches.
(Click Image to Enlarge)
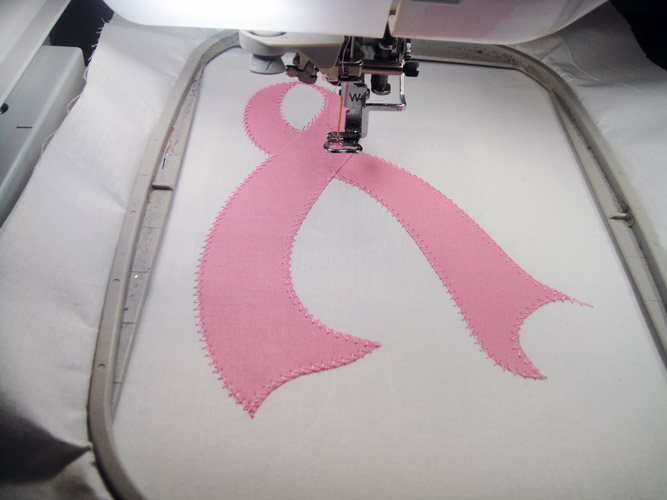
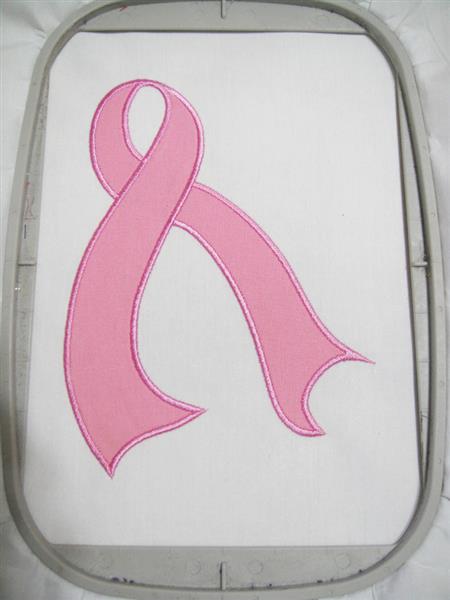
Step 20:
Stitch the 3rd color sequence to apply the satin stitch border.
(Click Image to Enlarge)
Step 21:
You can stitch these in all colors to support your favorite cause. Type Support Ribbon Colors into your browser search window to find the color for those that you wish to support.
Award winning Digitizer, Embroidery Educator, Author and a Consultant to the Industry, Pat Williams has 30 years of experience in the embroidery industry. Pat has won multiple awards for her digitizing expertise including the 2007 Impressions Awards Grand Championship, Best of Show as well as the 1st and 2nd Place Awards. Pat’s love of digitizing has afforded her the opportunity to write numerous articles for Impressions magazine in the United States and Images Magazine in Europe. In 2001 Pat was named “Embroidery Educator of the Year.” For many years Pat taught digitizing seminars at the ISS Shows in Long Beach, CA and for Compucon software. She now resides in Tucson, AZ.