Nylon organza is available through LA Crafts website and I even found some in my local Hobby Lobby Store. Green nylon organza was the hardest to find. I found it at Fashion Fabrics club on line store. The nylon does appear to be glittered nylon in the photographs below due to flash photography. Though a glittered organza could be used the organza in these photos is not glittered.
Step 1:
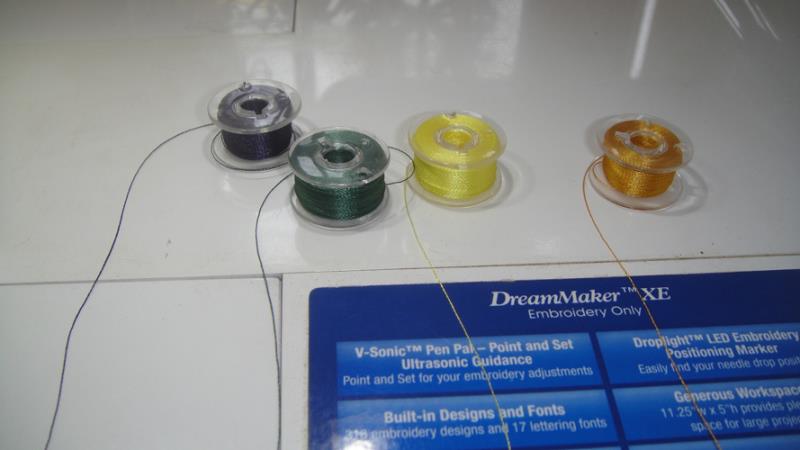
Before you start to fill bobbins with all the colors of polyester thread that you are going to be using in the design.
(Click Image to Enlarge)
Step 2:
(Click Image to Enlarge)
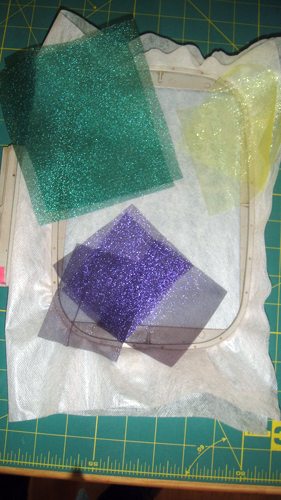
Tautly hoop 2 layers of fibrous water soluble stabilizer in the hoop. Cut your organza pieces per the materials list above.
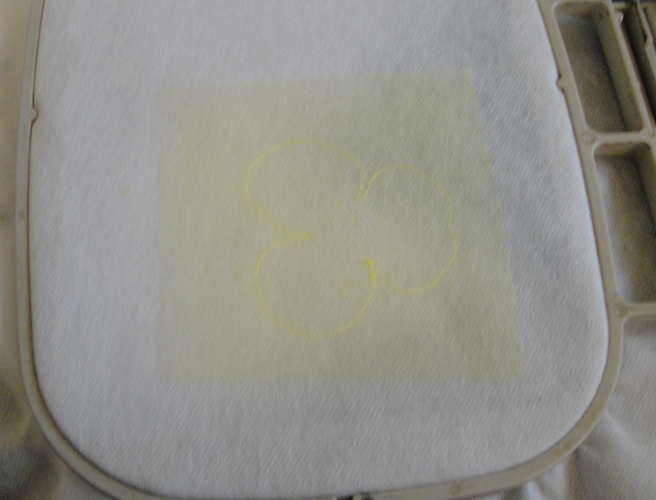
Step 3:
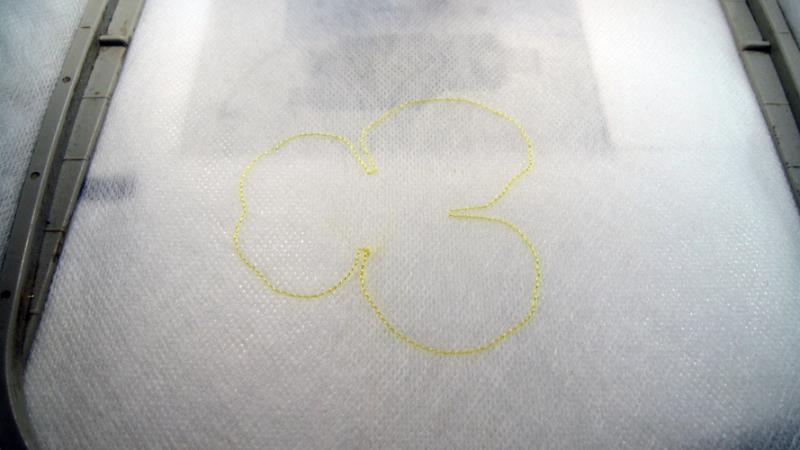
To avoid having messy tie-in stitches on the back of the hoop bring the bobbin thread to the top of the work by feeding the top thread through the presser foot and holding onto that thread while tapping the needle up button twice on your machine. That will bring the bobbin thread to the top of the work. Hold onto both the top and bobbin thread and stitch a few stitches. Stop the machine and trim the threads. Continue sewing the CS. You will still have tie-off threads to trim on the back of the work, but it will keep the back neater. Do this for each time you are running a new color stop. Run color stop (CS) 1 in yellow as a placement line for the petal.
(Click Image to Enlarge)
Step 4:
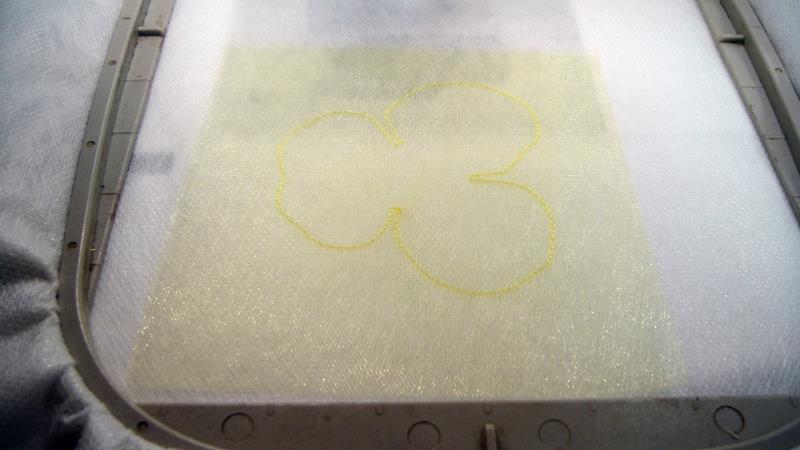
Spray adhesive on 1 yellow organza square and position over the placement line.
(Click Image to Enlarge)
Step 5:
Remove the hoop from the machine, do not unhoop, place it face down on a flat surface. Spray adhesive on the second square of yellow organza and position over the placement line. Return the hoop to the machine.
(Click Image to Enlarge)
Step 6:
Run CS 2 to tack down the fabrics.
(Click Image to Enlarge)
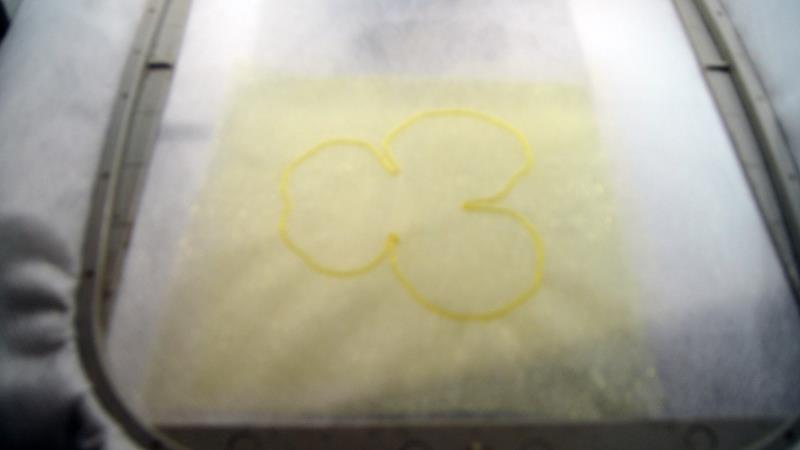
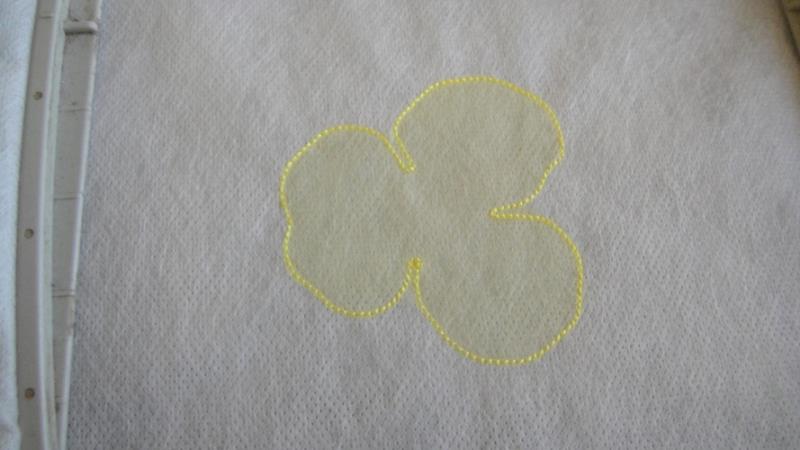
Step 7:
Trim the excess fabric around the tack down lines on the front and the back of the hoop. Also, trim off any tails from the tie off on the back of the hoop.
(Click Image to Enlarge)
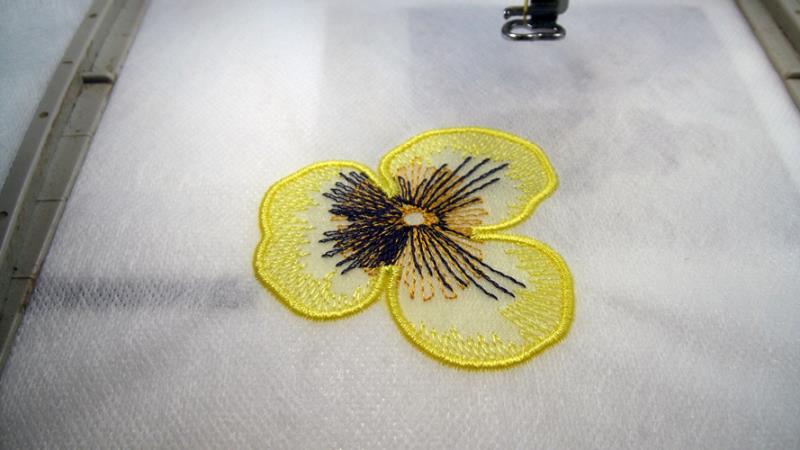
Step 8:
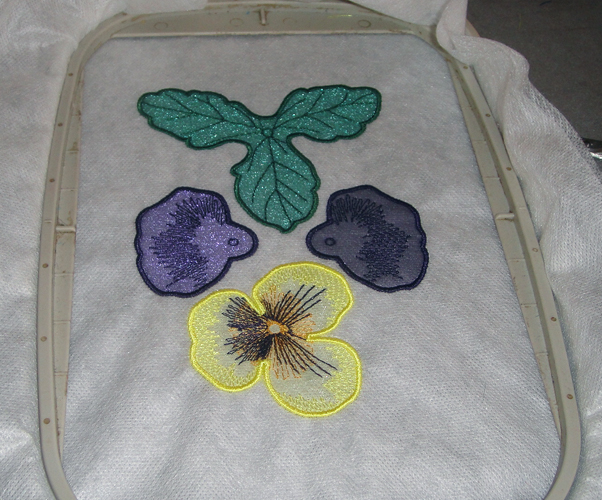
Follow the color chart through CS 5 to complete the first petal.
(Click Image to Enlarge)
Step 9:
Follow the color chart and the above techniques, i.e., running the placement line, applying the organza, bringing the bobbin thread to the top and complete each section of the pansy. You will not be able to bring the bobbin thread to the top of the work when the little center circles are sewn on the purple petals. Do not be concerned with those as they are in the center of the flower and will not be seen.
(Click Image to Enlarge)
Step 10:
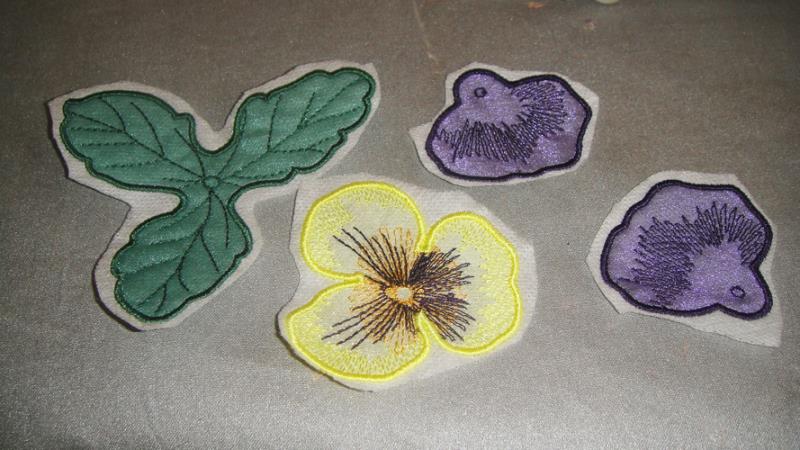
Remove the project from the hoop and cut each section out from the stabilizer. Make sure that all thread tails are removed from the back of each piece.
(Click Image to Enlarge)
Step 11:
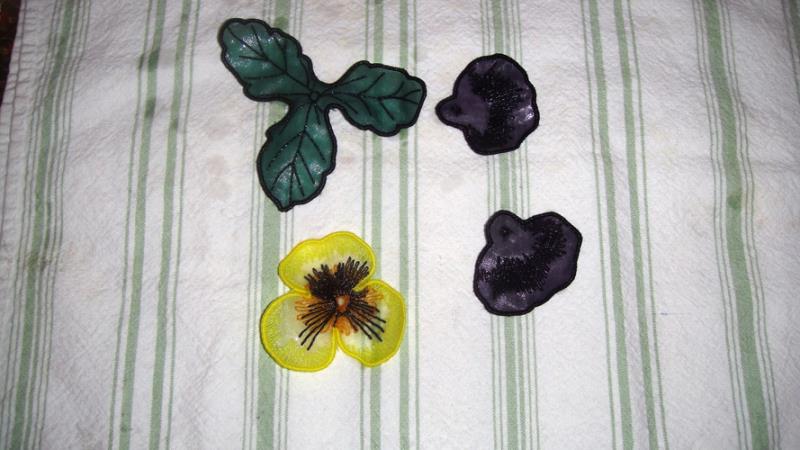
Hold each piece under hot running water to remove the stabilizer. Place on a smooth cotton dishtowel to dry. Do not smooth the pieces onto the towel. Instead, encourage the petals and leaves to have smooth curves and let them curl a little. Let dry thoroughly.
(Click Image to Enlarge)
Step 12:
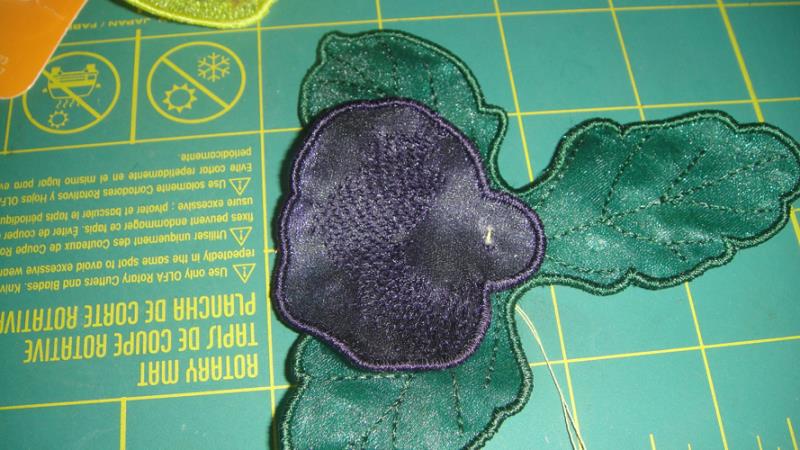
When the components are dry thread your sewing thread through the needle and knot the ends together. Place the small stitched circle at the end of a purple petal over the stitched circle in the leaves. Stitch the two sections together. The petal may face any direction on the leaves.
(Click Image to Enlarge)
Step 13:
Attach the second purple petal to the first petal and leaves in the same way. The second petal should be close to and slightly overlapping the first petal.
(Click Image to Enlarge)
Step 14:
Attach the yellow petals to the others by sewing through all the elements aligning the center circles.
(Click Image to Enlarge)
Step 15:
Sewing through all layers attaches a bead to the center of the flower. Sew through the bead twice then tie off your thread at the back of the pansy.
Step 16:
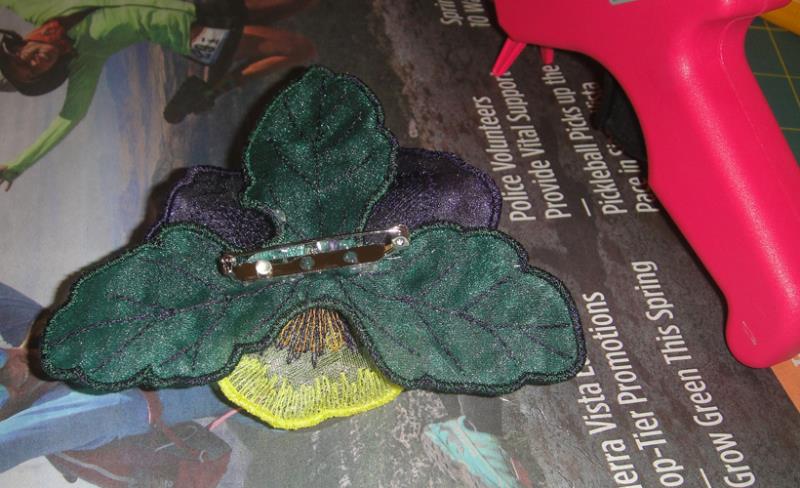
Place an old newspaper or something under the project and hot glue gun to protect your work surface from trails of the hot glue.
To make a brooch or hair clip simply apply hot glue to the back of the pansy and press onto the brooch or hair clip piece. If making a brooch make sure that the open end of the brooch pin faces to the left.
(Click Image to Enlarge)
Step 17:
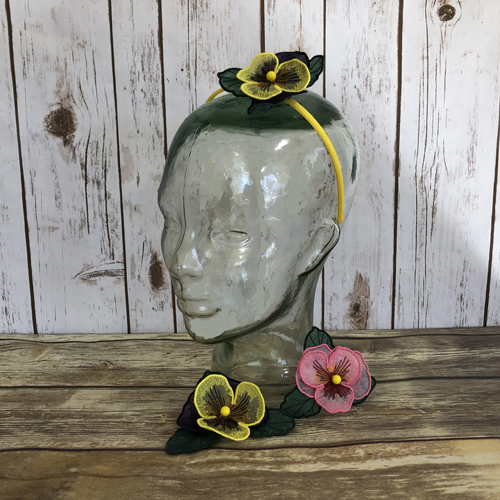
One or more flowers can also be applied to a headband, in the same manner, to make a darling headband to compliment a little girls outfit.
Step 18:
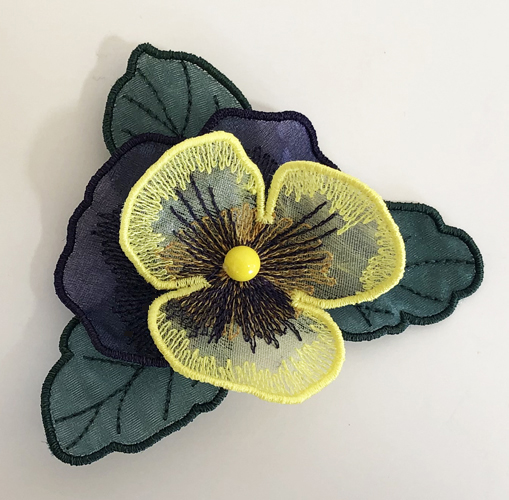
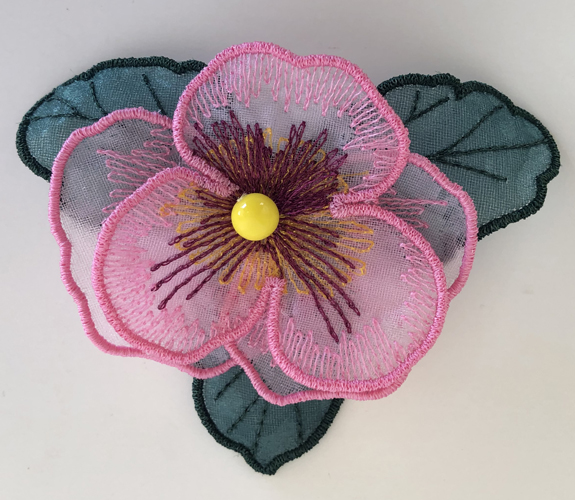
Remember that pansies come in a variety of colors – make them up in your favorite colors too!
(Click Image to Enlarge)
Step 19:
Congratulations your 3D pansies are complete! Head over to my Flowerpot Mini Quilt project to apply your new skill!
Award winning Digitizer, Embroidery Educator, Author and a Consultant to the Industry, Pat Williams has 30 years of experience in the embroidery industry. Pat has won multiple awards for her digitizing expertise including the 2007 Impressions Awards Grand Championship, Best of Show as well as the 1st and 2nd Place Awards. Pat’s love of digitizing has afforded her the opportunity to write numerous articles for Impressions magazine in the United States and Images Magazine in Europe. In 2001 Pat was named “Embroidery Educator of the Year.” For many years Pat taught digitizing seminars at the ISS Shows in Long Beach, CA and for Compucon software. She now resides in Tucson, AZ.